• We have upgaded to the latest version of XenForum and the process finished without any errors!!!! Enjoy the new forum!

Converting Black Knight into Monty Phyton's Holy Grail Black Knight

Seven

Active Member
Oct 6, 2015
255
150
43
56
Prince Edward Island
www.pinballorama.com
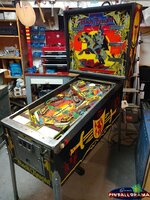
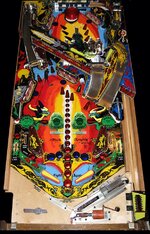
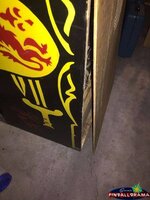
I've been wanting a Black Knight for a while. After a year or two of searching and only finding vastly overpriced machines, I happened on this old beat up Black Knight for a crazy low price. The woman I bought it from didn't even know if it worked. The machine was pretty thrashed and missing lots of paint.

I've been wanting a retheme project for a while, and since they made 13,000 Black Knights and it is far from a rare title, I figured it was probably a good candidate.

Once I got it home I fixed the cabinet and went to the task of seeing if it worked.

I started troubleshooting at the power supply and worked my way out. I started testing power outputs and fixing connectors and wires.

I got the GI (general illumination) going first. Then I got power to the displays (they all work). I got the MPU to boot into audit mode, then into attract mode. I could add credits but not start a game. I found a problem down by the ball trough switches, fixed that, and it sprang to life.

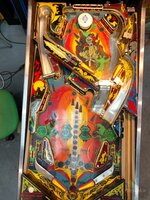
I spent about 2 hours going though the playfield. I fixed drop targets, switches, and feature lights. Even got the bell working. By the end of the day it was playing to my satisfaction. It’s a mess, it played like crap, but everything worked.

I then starting stripping it down and giving it a good scrub.
black-knight-02.jpg black-knight-04.jpg black-knight-dayone08.jpg black-knight-dayone12.jpg black-knight-dayone14.jpg
 

Seven

Active Member
Oct 6, 2015
255
150
43
56
Prince Edward Island
www.pinballorama.com
I grabbed an image of the playfield off the web and made a quick and dirty mock up. I need to refine it, and alter the style of the images to match the original artwork, match fonts, etc – but here a test layout.

The concept is to make it look very similar to Black Knight and not notice the changes at first. Then, the more you look, the more you find.

The Knights of Ni and King Arthur in the top playfield. Tim the Enchanter on the plastic to the right of them. Lower playfield has the Black Knight with an arm off below the left ramp. The Trojan Rabbit added to the plastic under the castle on the left. In the middle above the multiball light is the Rabbit of Caerbannog. Next to the two magna-saves I’ve added the Legendary Black Beast of Aaaaarrrrrrggghhh. And in the middle, you have double and triple shrubbery (the Knight of Ni wanted shrubbery).

There is a red plastic in the middle between the two playfields. That would be cool to have the King and Knights with their coconut squires behind them.

black-knight-mockup-01.jpg
 

Seven

Active Member
Oct 6, 2015
255
150
43
56
Prince Edward Island
www.pinballorama.com
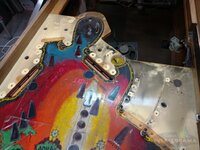
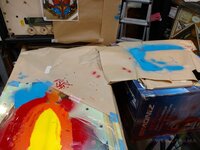
I pulled the mylar and cleaned both playfields. I then lightly sanded all sections I plan to paint with 800 grit sandpaper. I want to keep some elements of the original theme, but I'll have to repaint the background colours.

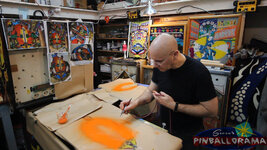
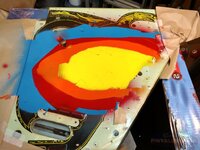
I masked off areas with frisket and started airbrushing .

I started with the red. Once the red was dry I lightly sanded it in areas where some of the original paint has worn away. I’m using the new paint to fill in these areas. It seems to be working.

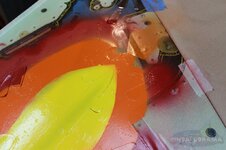
Next, I started airbrushing the yellow.

spray-yellow-01.jpg spray-yellow-03.jpg

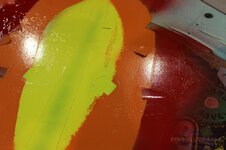
..then airbrushed the orange.

orange-01.jpg orange-03.jpg
 

Seven

Active Member
Oct 6, 2015
255
150
43
56
Prince Edward Island
www.pinballorama.com
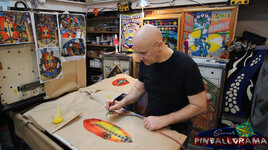
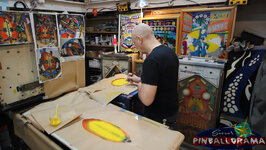
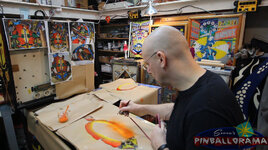
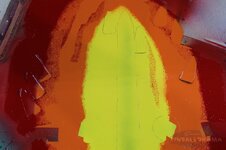
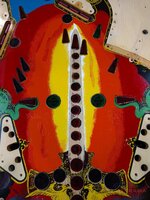
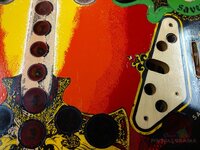
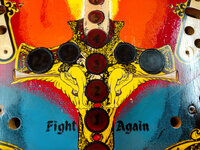
Next step is to start blending the colours. In the original design the colours blended together with a speckled pointillism type thing. I tried to emulate this by testing different ways to airbrush and even tried a splatter from a brush. Neither would give me the control I needed.

Time to pull out the tiny brush.

This is about 4 hours worth of making tiny little dots on a playfield. It sounds like a lot, but if you’ve never done pointillism work before, there is something very zen and calming about it. You don’t realize how long you’ve been at it until your hand and arm start to cramp.

black-knight-playfield05.jpg black-knight-playfield07.jpg black-knight-playfield10.jpg
 

Seven

Active Member
Oct 6, 2015
255
150
43
56
Prince Edward Island
www.pinballorama.com
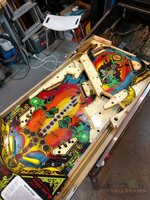
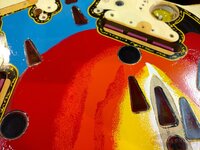
I sprayed the blue on the upper playfield and the little bit of blue in the top left of the lower playfield. Most of the blue at the bottom of the lower playfield is in good shape. It just needs a little touch up, so I’ve left it alone.

Once the blue was mostly dry, I pealed the frisk and masking from the lower playfield. I had a little bleed from the frisk here and there, but it will clean up easily.

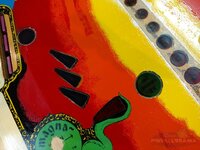
I wasn’t quite happy with the position of the yellow near the tip of the sword, so I brushed a little yellow here and there to reshape it. I think it will look better once it gets white and yellow dots.

I started the white dots around the rest of the sword and began to touch up around the handle the lower playfield.

black-knight-playfield-4-01.jpg black-knight-playfield-4-03.jpg black-knight-playfield-4-04.jpg black-knight-playfield-4-06.jpg black-knight-playfield-4-07.jpg black-knight-playfield-4-08.jpg
 

Seven

Active Member
Oct 6, 2015
255
150
43
56
Prince Edward Island
www.pinballorama.com
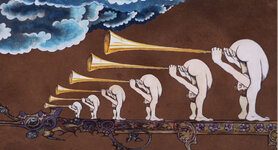
So here is an idea. I really wanted to sneak the butt trumpet guys from the movie into the lower part of the playfield somewhere. On the handle of the sword are two birds. I think with a little modification, changing the scrolling bits around, and clever painting, I can put the butt trumpet guys there.

Here are the trumpet guys from the movie and a quick photoshop of them in the handle of the sword. If I were careful, you wouldn’t notice them.

butt trumpet guys.jpg butt trumpet sword handle.jpg
 

Seven

Active Member
Oct 6, 2015
255
150
43
56
Prince Edward Island
www.pinballorama.com
Thanks.

I have an idea for a backglass, but I'm not quite sure how I'll make it. A printing company I know of can make translites but I saw a sample and the colours didn't look very rich. Since they aren't that much to print, I might just create the artwork and have one made. See how it looks.

I'd love to have one silk screened on glass. I just need to fine someone who can do it.
 

Coitusmysterioso

Active Member
Jan 13, 2017
202
27
28
45
Shelburne, Ontario
3qafhk.jpg
 

spiroagnew

Well-Known Member
Staff member
Dec 1, 2012
1,333
311
83
Scotch Block, ON
www.creditdotpinball.com
Shay could do it for you as well. They don't seem to take as long as BGRESTO.

Shay offers repro glasses for vintage games but I'm not sure he is able/willing to do one-offs. I could be wrong.

Shay and BGResto use different processes anyhow: silkscreen for the former and direct to glass printing for the latter. BGResto lends itself more to a custom one-off. Less setup.
 

Seven

Active Member
Oct 6, 2015
255
150
43
56
Prince Edward Island
www.pinballorama.com
Very neat project! Are you planning on doing some custom audio samples as well?

I am. I want to leave the original sounds and voice but want a second sound source to trigger a few things from the movie. I don't want to over do it and I want them to be subtle and funny.

The upper playfield will have the Knights who say Ni on the playfield. I want to tap into a couple switches and these will trigger various "NI" samples.

I want to tap into the ball shooter switch so when you shoot the ball it says "run away".

The round ramp on the upper left side I'm going to try and turn into the Bridge of Death. I can add a trigger there for something related.

The thing I don't want the custom sounds doing is stepping all over the original sounds - and vice-versa. When I get the game back together I'll give this some more thought. Play it a few times, get more familiar with what triggers what original sounds, then I can plan from there.
 

Seven

Active Member
Oct 6, 2015
255
150
43
56
Prince Edward Island
www.pinballorama.com
Shay could do it for you as well. They don't seem to take as long as BGRESTO.

http://shayarcadegroup.com/

If you ask on the EM Pinball Facebook group there are a few others that could do it as well but theoir names escape me at the moment.

bgresto.com will do a professional, printed backglass. Not cheap and not quick but great results.

Cool. I'll send out some feelers to these guys when I get a bit closer to getting the backglass art put together.

A friend of mine used to work for a company that might have the ability to print to glass. I'm going to look into that as well.
 

Seven

Active Member
Oct 6, 2015
255
150
43
56
Prince Edward Island
www.pinballorama.com
I'm using 1 Shot lettering enamel (http://www.1shot.com). It's super tough with good colours. Very opaque.

I've touched up my Big Guns machine with it (just used the paint, no clear coat over it). The machine has been in a public environment for at least 9 months and the paint is holding strong. I think it is very similar to the paint originally used on playfields.

big-guns-01-1.jpg big-guns-02.jpg
The second picture was taken right after I painted. Once the paint dried I smoothed it with 1200 grit, then buffed it to a shine with Novus 2. You'd never know unless you were really looking for it.

Frisket (or frisk) is the term for a masking medium. What I'm using is a thin film but you can also buy stuff that is kind of like rubber cement. Paint it on and then peel it off. The film comes in different tack depending on that you are working on. You can precut a stencil with it or, in my case, adhere it to the surface and use a blade to trim around what you want to save. In the video, I have it over all my inserts, the sword, and all the bits around the outside. (I peel it all off in episode 4, which was super satisfying)

I use the term "frisking" as well, although I don't know if that's proper.

I had a little bleed here and there under my frisket because I airbrushed a little on the wet side. If I did lighter coats, especially around the frisket, it would have been better. The places where I used a brush along the frisket didn't bleed at all.

I'm still learning this airbrush business. Part of the point of this retheme is to hone some of my airbrush skills in a practical application. I need to get better at putting paint down, smoothly, over a large defined section.