• We have upgaded to the latest version of XenForum and the process finished without any errors!!!! Enjoy the new forum!

Dr@No's fun filled (and often long-winded) restorations

DRANO

Super Member
Nov 15, 2012
2,821
517
113
Mississauga
Hi Everyone,
So I've been meaning to do this for a while, so here it goes.
This will be a little spot in PREV where I can catalogue and share some of my restoration work and other pinball related projects (successes and failures alike) and hopefully help some people, as well as learn from others.
I thought about creating a blog at one point to track all the stuff I'm doing... and have done... but with the pinball community already here, why go elsewhere? After all, the only difference between a thread and a blog is that I can't turn off the comments here :x

In any case, the doctor is in!
Hopefully you'll find it entertaining... or at least better than doing real work.

I'll start by posting a few links to some of my earlier projects.
Not sure if this is possible, but if the mods here on PREV had the power and inclination to move that content over to this thread, that would be awesome. If not, that's okay... I'll wait a day or two and see... then start fresh here.

TAF playfield restoration: (It's so old the pics don't even auto load anymore ;) )
http://www.pinballrevolution.com/th...build-step-by-step-playfield-restoration.121/

Zaccaria Farfalla playfield restoration:
viewtopic.php?f=4&t=764

Centigrade 37 cabinet stencil and re-paint:
viewtopic.php?f=10&t=1699

New gameroom design and constuction:
viewtopic.php?f=38&t=670


These are just a few that I've posted to PREV, but I'll try and get caught up as time goes on.
Other projects completed or in-progress that are in the queue include:

-My eventual Farfalla rebuild and cabinet clean-up
-Stern Cheetah playfield exorcism, execution and eventual ressurection
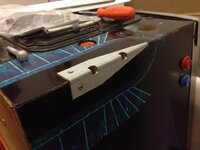
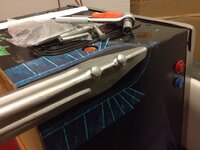
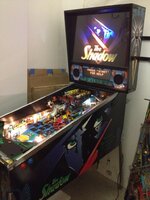
-Freshening up cabinets on BSD and The Shadow
-My WH2O full scale restoration (I already documented this on Pinside, but will cover some of the highlights here)
-Jacks Open playfield touch-up and cabinet refresh
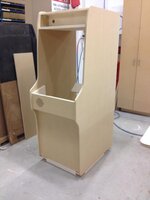
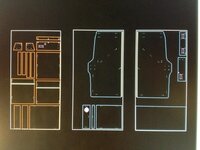
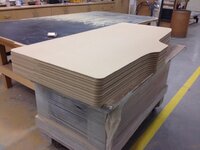
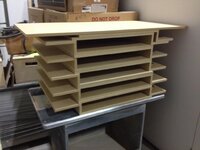
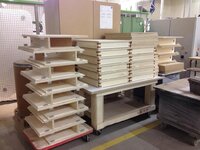
-How/why I built a dozen Nintendo DK cabinets from scratch
-yada yada yada...
 
Last edited:
  • Like
Reactions: WARLOCK

DRANO

Super Member
Nov 15, 2012
2,821
517
113
Mississauga
SquidVicious said:
Your WH2O is the nicest one I have ever seen ... could you post a link to the pinside write up

Sure thing Dan. But, I warn you, it's a big thread. I wrote it as I was doing the project and it took a good 8 months. I learned a lot and had a ton of great encouragement from some top restoration guys.

This was my 3rd restore... but my first attempt at a full strip-down and rebuild... with a few diversions along the way ;)

Enjoy!

http://tinyurl.com/n4tpdq4

Coincidentally, this is game that was photographed and used in Pinball Magazine #2 when they did a spotlight on Dennis Nordman.
 

mwong168

Administrator
Staff member
Nov 14, 2012
6,654
1,405
113
45
Toronto
Don't forget the TOTAN touch ups you did for me. Here are some pics of Drano's mad talent.

12192665455_16d25a5fbc_c.jpg


12193284846_7104790e64_c.jpg


12193285706_fcdf0a5b81_c.jpg


12192923853_ff97b91971_c.jpg


12193089914_0ac7e38d9e_c.jpg


12192923123_7a6ddd4729_c.jpg


12192922873_436181f7ab_c.jpg


12193088864_ed9b9af58b_c.jpg


12192922433_1eb274fb91_c.jpg


12192662585_f8378dbd56_c.jpg


12192922063_ebeaafdc73_c.jpg


12192921663_3ee8e8d818_c.jpg


12192660645_c4f0520a26_c.jpg


12193282226_3680c70a63_c.jpg


12193087234_22383cfc89_c.jpg


12193281056_f77d1067fa_c.jpg


12193280866_ed1dd05593_c.jpg
 

DRANO

Super Member
Nov 15, 2012
2,821
517
113
Mississauga
Forgot about that one. First time I let anyone talk me into working on a populated playfield.
I guess I should just be happy you let me remove it from the game :lol:
 

mwong168

Administrator
Staff member
Nov 14, 2012
6,654
1,405
113
45
Toronto
DRANO said:
Forgot about that one. First time I let anyone talk me into working on a populated playfield.
I guess I should just be happy you let me remove it from the game :lol:

My extra I500 playfield you did some minor corrections and clear coated wasn't populated ;)

8420201366_6e9a70f2fb_c.jpg


8714138353_76c1322c3a_c.jpg
 

DRANO

Super Member
Nov 15, 2012
2,821
517
113
Mississauga
mwong168 said:
DRANO said:
Forgot about that one. First time I let anyone talk me into working on a populated playfield.
I guess I should just be happy you let me remove it from the game :lol:

My extra I500 playfield you did some minor corrections and clear coated wasn't populated ;)

Ha!
Show me a pic of that PF installed in your game and then I'll be impressed.
Or, just sell it to me when I find me a busted up I500 :D

Those damned corrections didn't end up being so minor either! Got to bust out my new airbrush on that one... and then there was the mysterious bleeding insert. That was a weird project!!!
 

DRANO

Super Member
Nov 15, 2012
2,821
517
113
Mississauga
IRONING OUT THE WRINKLES: a quick guide to repairing cabinet corners on The Shadow


Okay, there's been a lot of playfield stuff posted and linked here so far.
I am working on several playfields right now and will touch on any interesting aspects of those later... but here's an experiment I just did on my Shadow that involves some cabinet clean-up. I would not call this a 'restoration', but more of an acceptable fix.

Like a lot of games from this era forward (WPC-S and WPC-95) the cabinet graphics almost appear to be decals. I don't know what the exact process was, but it seems like a layer of white vinyl was pressed onto the wood (instead of primer) and then the art was screened on that.
Well, the result is that some of these games did not fare very well out in the field... especially around the legs. My shadow had such bad wrinkling and peeling that no Pincab Protector was going to hide the damage.

Lucky for me (and you other shadow owners), the artwork on this game has a large section of black right where this damage occurs.
I decided to cut away the worst of it all the way to the black edge and try and replace it with something else.
Here are the first few steps I took.
 

Attachments

  • IMG_6218.JPG
    IMG_6218.JPG
    318 KB · Views: 767

DRANO

Super Member
Nov 15, 2012
2,821
517
113
Mississauga
The artwork on these cabs just peels away with almost no effort. DO NOT ATTEMPT THIS ON OLDER GAMES!
Once it was clean, I debated whether to try and paint the area. In the end, I decided that using a black vinyl would be closest to the original.

After testing a few swatches I grabbed from work, I went out and found a yard of 3mil gloss black stock for about $3.
 

Attachments

  • IMG_6221.JPG
    IMG_6221.JPG
    253.8 KB · Views: 767

DRANO

Super Member
Nov 15, 2012
2,821
517
113
Mississauga
Sorry for all the posts, but PREV or my ISP is not liking multiple images today.

After sanding the wood lightly and cleaning it off (you can also seal it if you're really picky) I just applied the vinyl and pressed it right into my cut line. Then, using a fresh razor blade, trimmed it tight. If you make a mistake and some of the wood edge remains visible, this is one of the few areas where I would recommend a little sharpie pen to fill it in. Rub your finger over the pen mark to even it out and make it less obvious.


If you ran your finger over the edge, you would feel the slight difference... but this was an acceptable fix for me on a game that I did not want to do any 'major' work on.
My head decals are also toast... so I'll have to repair those as well, and that's enough cabinet work for me on TS.

One thing I highly recommend is buying these protectors from Pinball Life: http://www.pinballlife.com/index.php?p=product&id=2711

Stern started using them on games like XM/TRON to protect decals from legs.
This new vinyl I've applied will probably wrinkle even worse than the original if you don't take this precation.
Place the metal plate over the vinyl and line it up with the holes, then cut around it with a blade and peel away the vinyl behind it before screwing into place. This should prevent any future damage.
 

Attachments

  • IMG_6225.JPG
    IMG_6225.JPG
    405.5 KB · Views: 767
  • IMG_6229.JPG
    IMG_6229.JPG
    302 KB · Views: 764

DRANO

Super Member
Nov 15, 2012
2,821
517
113
Mississauga
And finally!
Here's the finished shot with the legs on.

I'll probably still use a Pincab Protector later on to help hide the area a little more (I didn't have a spare set on hand).


The rest of my lower cab was in pretty nice shape, so this was a simple (1-2hrs) process that yielded the best results for me.
Also a nice distraction form all the playfield work I've been doing. I'll tackle the head cabinet and pull the playfield for a full shop job sometime next month I hope.
I sent the wireforms, ramps and divertors to Mike Chestnut way back in October of last year and already have all those parts brass plated... along with the shooter in chrome.
Can't wait!


Well, that is all!
Thanks for following along.
 

Attachments

  • IMG_6230.JPG
    IMG_6230.JPG
    327 KB · Views: 739
  • IMG_6270.JPG
    IMG_6270.JPG
    360.5 KB · Views: 740

DRANO

Super Member
Nov 15, 2012
2,821
517
113
Mississauga
Shock_me said:
Nice job. Where can I pick up 3mil gloss vinyl? Sign shops?

Yeah, any graphics supply place will have it. I actually wanted 4mil.. but it seems like nobody carries it anymore. But 3 is acceptable.
If you can't locate any easily and need some for a similar fix, let me know.
 

DRANO

Super Member
Nov 15, 2012
2,821
517
113
Mississauga
THE NEW KING OF KONG: if you can't find a vintage Nintendo cab.... just make your own
Part 1


And now for something completely different.

I'm not really a vid guy, but I do love classic Nintendo cabs and decided I would try and build a Donkey Kong from scratch... but most likley with a 60-in-1 or similar board.
I quickly found out that most files online were crap! They were close, but full of mistakes and anyone who knows me understands how much that would have bugged me.
Luckily, a friend donated a beat up popeye cabinet that I tore apart and measured accurately.


After the files were ready, we cut one set on the CNC to verify and compare against the original.


After a few adjustments and improvements, the files were all set.
At this point I decided that this was way too much work to just build one machine, so I decided to make a run of dozen or so and offered them to a few close friends.
The eventual plan is to have all of these pre-assembled and professionally painted in my shop and ready to install a JAMMA or MAME setup.

(Please do not contact me for a kit. I'm not making more or selling these... just sharing the experience.)
 

Attachments

  • IMG_6054.jpg
    IMG_6054.jpg
    128.8 KB · Views: 663
  • IMG_5954.jpg
    IMG_5954.jpg
    218.3 KB · Views: 662

DRANO

Super Member
Nov 15, 2012
2,821
517
113
Mississauga
The steps in the previous post occured in January and February.

This week I have started mass assembly of all the parts. no finished cabs yet, but almost all of the other sub-assemblies are together.


Tomorrow I plan to knock together the retainers for the back access panels (which also help make the entire cabinet more ridgid. With any luck, I should start seeing full assembled cabinets by next week!
 

Attachments

  • IMG_6322.jpg
    IMG_6322.jpg
    175.2 KB · Views: 658
  • IMG_6449.jpg
    IMG_6449.jpg
    182 KB · Views: 658
  • IMG_6448b.jpg
    IMG_6448b.jpg
    226.1 KB · Views: 647

DRANO

Super Member
Nov 15, 2012
2,821
517
113
Mississauga
Man... progress is slow on this stuff when you only have an hour a day to work on it.
Back panel retainers have been assembled and "T-nutted" for easy access down the road. Not exactly true to the original builds, but then again, neither are metal L-brackets for all of the assembly. I think a few 'improvements' are okay ;)

Hopefully I'll have these babies all on their feet by mid next week. Then the fun part begins... PAINTING!!!
 

DRANO

Super Member
Nov 15, 2012
2,821
517
113
Mississauga
Yeah. Your vacation left a big hole in the forums for a few days :D
I figured I'd add a little filler LOL!

Thanks.