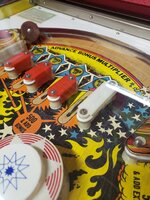
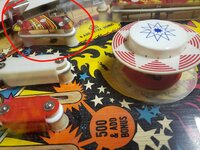
I did some more investigating myself and it looks to me like the taller ones might be for the rollunder bar just to the right of what you have circled.
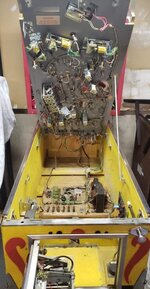
I took a lot of photos before I took it apart but didn't realize how hard it is to tell the details like the post sizes from the pictures.
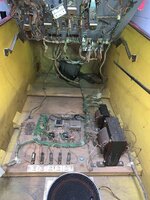
I only have 2 posts that are taller than the rest and these are 1 3/16" high. How many of the larger posts are on yours and can you confirm where they are? The first photo that I'm attaching here makes me think that the posts go on this rollunder. I'd be interested in hearing how your repair/restore went. Do you need to make any changes to the boards when you switch to led bulbs or can you just swap them in? Also, if you notice the paint on my back door it has some black specs all over it. Not sure if it's meant to be that way or not. Is yours like this?
(You're local to me as well! I have relatives that live in London and I only live an hour away).
So I took a closer look and you are correct, they appear to be for the rollunder bar, those 2 posts are clearly different in size and shape at the top.
As for mine, the machine is in great working order and a lot of the major system 1 stuff had already been done, new battery, connectors all re pined, ground mods are done, and the sound board was rebuilt. So I wouldn't call what I am doing a restore, more of a refresh, I am not going to strip everything down like you did, I'm just going to replace rubbers, change out the bulbs for LED, and clean it up a bit. I don't believe anything extra is needed to swap the bulbs out, the previous owner already has some LED's in there, looks like any time an incandescent went out they replaced it with a LED.
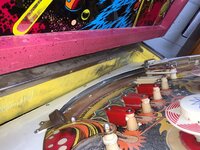
For the paint on the back box, mine is the same pinkish purple color with a black speckle.
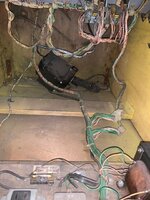
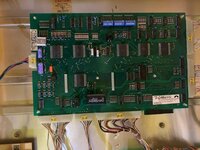
1 question, what is the large black transformer looking thing at the back of the cabinet in your second pic, mine does not have that.
That's cool you're from the area, London and surrounding area seems to have a lot of Pinball folks.
")