This is not my design or idea and I sent to original poster a quick message for permission to share on here and he had no problem as long as he was given credit. Thanks goes out pinballmike217 for giving me permission to sharing all this with you guys.
I actually came across this "homebrew" playfield rotisserie a few years ago when he made his first black pipe version and seems he has updated it with some new improvements over the previous version which has been around for apparently 6 years on RGP. The new design uses a single 3/4" upright instead of boxed 1/2" uprights and is just as strong but uses way less parts. It an hour and ten minutes to build without rushing and total cost was $97.00 at Home Depot.
Disclaimer: There is a 1/2" of side/side movement with a playfield mounted. If you can't live with that don't build this. You can make a sawhorse or tabletop version of the hub and axle assembly for about $50 which will be 100% rigid. I like this floorstanding design because it knocks down in less than a minute and takes up virtually no space.
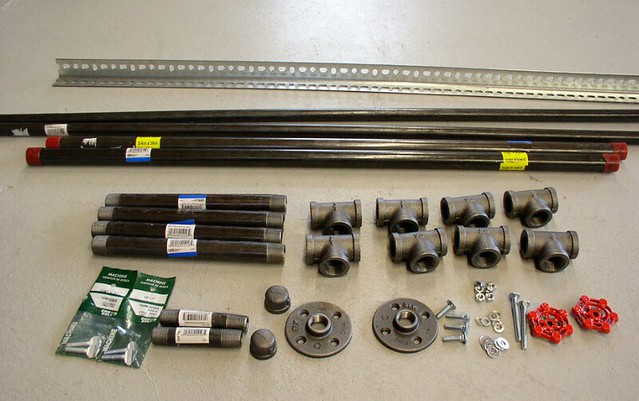
Parts List:
8 X 3/4" "T"s
4 X 3/4" X10" black pipe
2 X 3/4" X 36" black pipe
2 X 1/2" X 4" black pipe
2 X 1/2" X60" black pipe
2 x 1/2" caps
2 x 1/2" flanges
48" perforated angle iron
2 faucet handles with square centers
4 X 1/4" X 1" thumb screws
4 X 1/4" X 1" carriage bolts
2 x 1/4" X 2 1/2" carriage bolts
6 X 1/4" nuts, flat, and lockwashers
Extras:
4 X 1" 'C' clamps
Special Tools Required:
1/4NC20 tap
#7 or 13/64 drill bit.
Instructions:
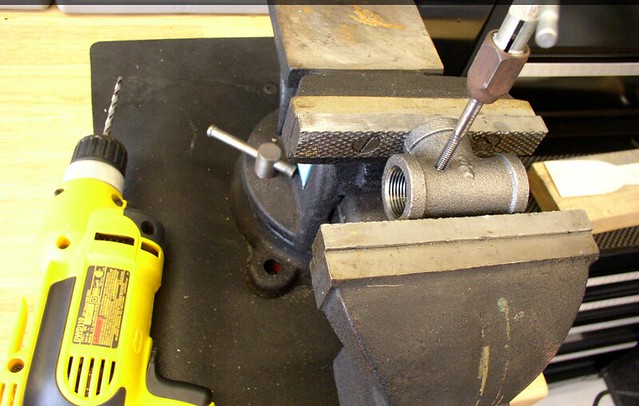
1. Four T's need to be drilled and tapped as shown for the feet. T's must be drilled laying flat. Two T's must be drilled and tapped for the axle assembly. These must be drilled from the top.
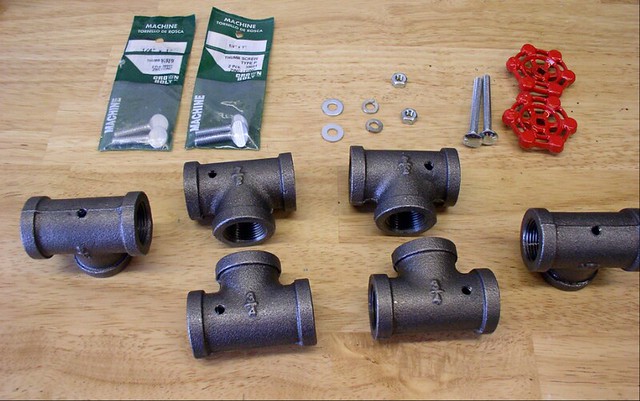
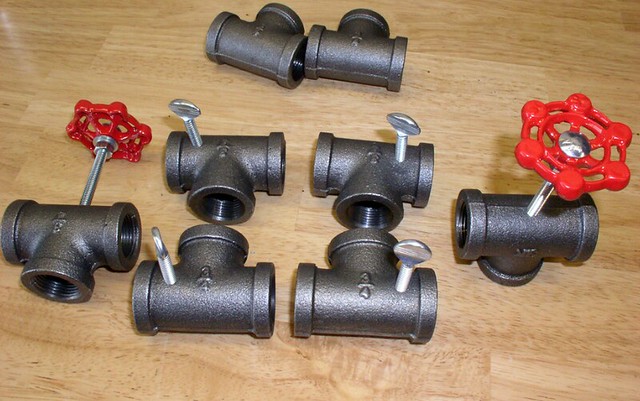
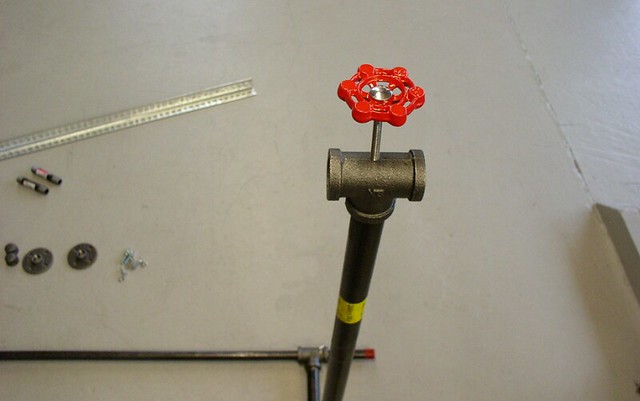
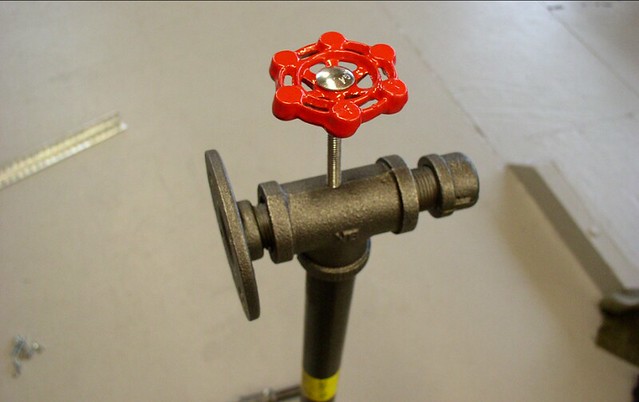
2. Assemble the faucet handles with the two long carriage bolts, washers, and nuts as shown and thread into T's. Thread the four thumbscrews and the four T's that will be used as feet.
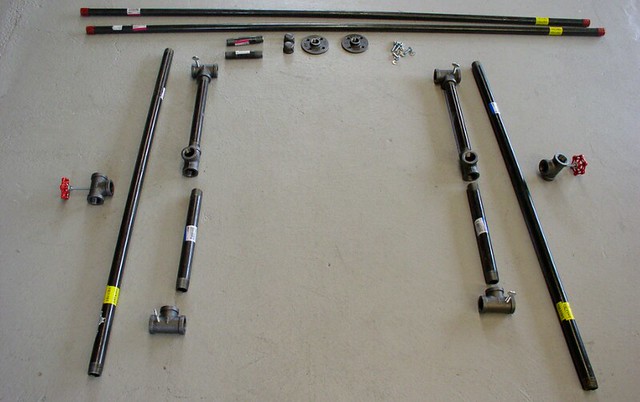
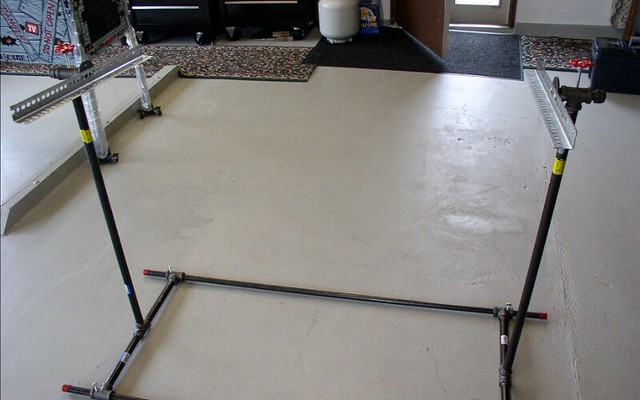
3. Lay out stock as shown. Thread the four 10" pipes into the four feet. Connect each pair into another "T" in the center. Make sure the feet are flat on the floor and the center "T" is pointing straight up.
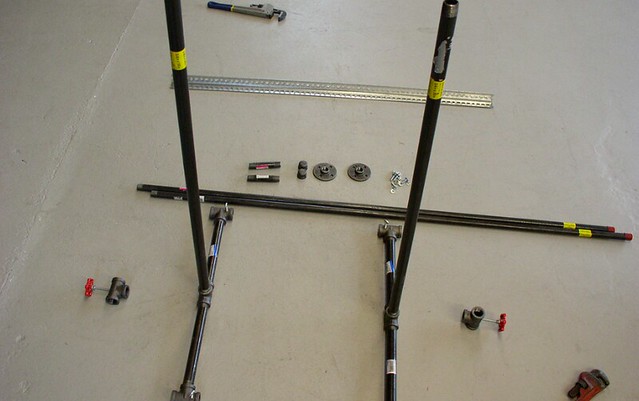
4. Thread the two 36" uprights into the center "T".
5. Run the two 60" crossbeam pipes through the feet "T"s.
6. Thread the axle "T" onto the upright, parallel to the crossbeams.
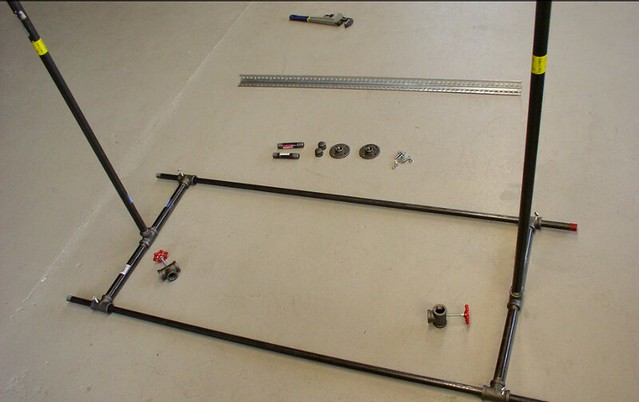
7. Insert the 4" pipe through the axle "T" and install a cap on the otside and a flange on the inside.
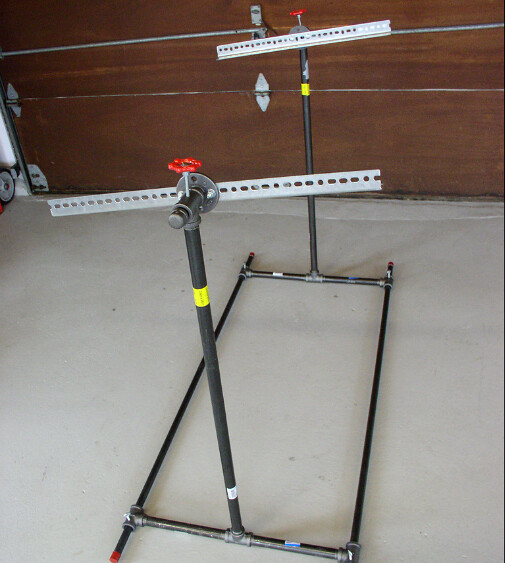
8. Cut the 48" perforated angle iron in half and secure each half to a flange with two 1" carriage bolts, washers, and nuts.

9. If you have any spray paint lying around, use it. This step is optional and won't turn you into a High End Restorer by any means :lol:
Make sure you tighten all the black pipe super tight when assembling. Also, give the thumbscrews in the feet a good crank with a wrench once the crossbeams are positioned so they won't come loose. If you want to do a tabletop or sawhorse version, the axle assemblies stay the same. Just substitute everything below the axle "T" with a 3/4" X 12" black pipe and a 3/4" flange. Screw the flange onto the top of your table or sawhorse and get to work.
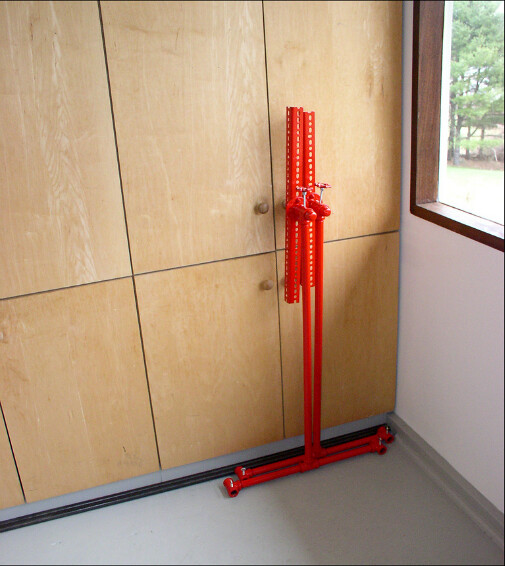
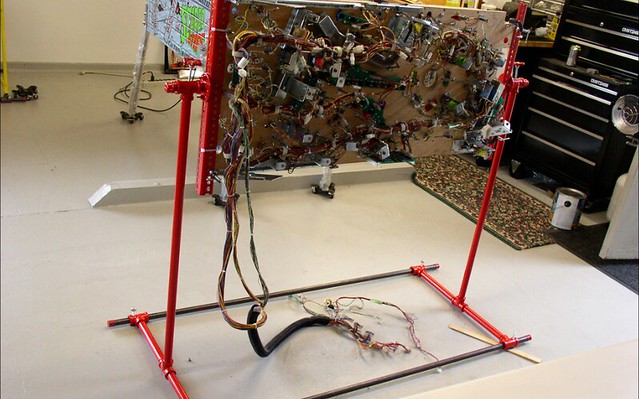
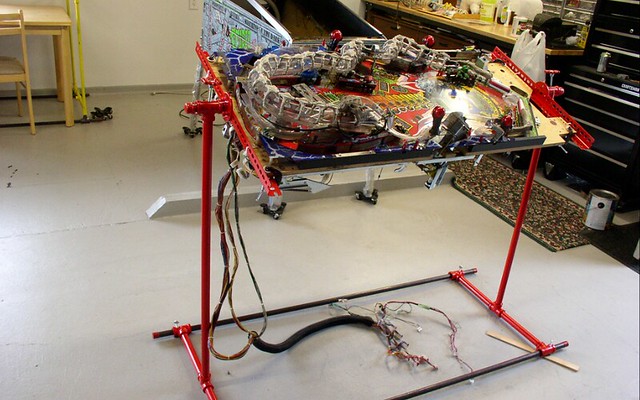
These pics also shows you how little space it takes when broken down and not in use only to be reassembled again in minutes.
I will be building one of these in a few weeks or towards the end of winter for my WH20 shop/restore and I500 pf swap.
I actually came across this "homebrew" playfield rotisserie a few years ago when he made his first black pipe version and seems he has updated it with some new improvements over the previous version which has been around for apparently 6 years on RGP. The new design uses a single 3/4" upright instead of boxed 1/2" uprights and is just as strong but uses way less parts. It an hour and ten minutes to build without rushing and total cost was $97.00 at Home Depot.
Disclaimer: There is a 1/2" of side/side movement with a playfield mounted. If you can't live with that don't build this. You can make a sawhorse or tabletop version of the hub and axle assembly for about $50 which will be 100% rigid. I like this floorstanding design because it knocks down in less than a minute and takes up virtually no space.
Parts List:
8 X 3/4" "T"s
4 X 3/4" X10" black pipe
2 X 3/4" X 36" black pipe
2 X 1/2" X 4" black pipe
2 X 1/2" X60" black pipe
2 x 1/2" caps
2 x 1/2" flanges
48" perforated angle iron
2 faucet handles with square centers
4 X 1/4" X 1" thumb screws
4 X 1/4" X 1" carriage bolts
2 x 1/4" X 2 1/2" carriage bolts
6 X 1/4" nuts, flat, and lockwashers
Extras:
4 X 1" 'C' clamps
Special Tools Required:
1/4NC20 tap
#7 or 13/64 drill bit.
Instructions:
1. Four T's need to be drilled and tapped as shown for the feet. T's must be drilled laying flat. Two T's must be drilled and tapped for the axle assembly. These must be drilled from the top.
2. Assemble the faucet handles with the two long carriage bolts, washers, and nuts as shown and thread into T's. Thread the four thumbscrews and the four T's that will be used as feet.
3. Lay out stock as shown. Thread the four 10" pipes into the four feet. Connect each pair into another "T" in the center. Make sure the feet are flat on the floor and the center "T" is pointing straight up.
4. Thread the two 36" uprights into the center "T".
5. Run the two 60" crossbeam pipes through the feet "T"s.
6. Thread the axle "T" onto the upright, parallel to the crossbeams.
7. Insert the 4" pipe through the axle "T" and install a cap on the otside and a flange on the inside.
8. Cut the 48" perforated angle iron in half and secure each half to a flange with two 1" carriage bolts, washers, and nuts.
9. If you have any spray paint lying around, use it. This step is optional and won't turn you into a High End Restorer by any means :lol:
Make sure you tighten all the black pipe super tight when assembling. Also, give the thumbscrews in the feet a good crank with a wrench once the crossbeams are positioned so they won't come loose. If you want to do a tabletop or sawhorse version, the axle assemblies stay the same. Just substitute everything below the axle "T" with a 3/4" X 12" black pipe and a 3/4" flange. Screw the flange onto the top of your table or sawhorse and get to work.
These pics also shows you how little space it takes when broken down and not in use only to be reassembled again in minutes.
I will be building one of these in a few weeks or towards the end of winter for my WH20 shop/restore and I500 pf swap.
")
