• We have upgaded to the latest version of XenForum and the process finished without any errors!!!! Enjoy the new forum!

Questions about stripping a playfield

Chris Bardon

Well-Known Member
Nov 15, 2012
1,307
168
63
Mississauga, ON
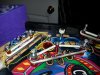
So while I was working on CV this weekend, I ran across a couple of things that I wasn't able to figure out how to remove when I went to clean/wax the PF. I ended up working around them (since I wasn't doing a swap, it wasn't really necessary), but just so I know for the future, is there a "right" way to remove the metal bars like the one I circled here:


These look like they're just embedded in the PF, so no screws at the bottom, and they didn't pull off with a little pressure, so I didn't really want to yank on it and gouge the wood.

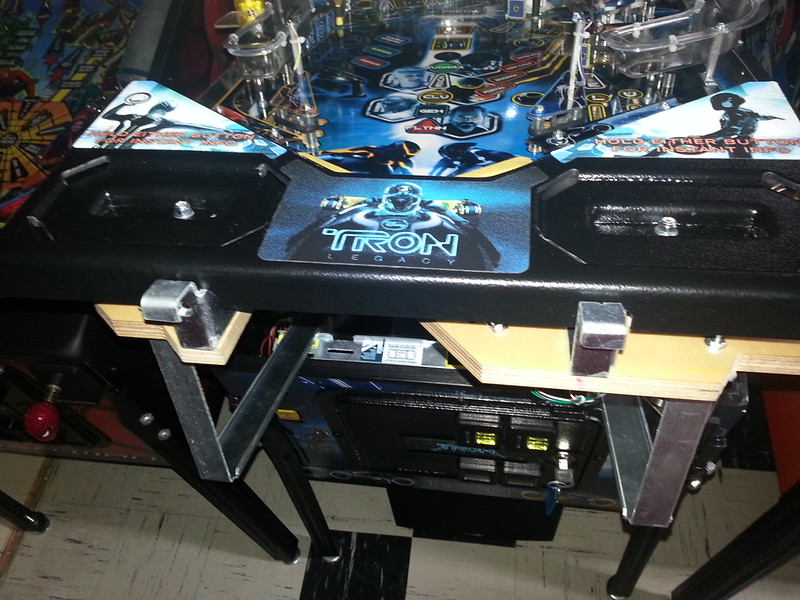
Last one should be reasonably obvious, but I wasn't able to get the apron off. It looks like it's just held in by a couple of screws, but these looked like they were under the brackets that held the flippers in place. Is this usually the case, or is there another trick to getting at them that I missed?

I did end up taking all of the posts off (since those are pretty easy to remove), but I left the pop bumpers and metal bars on there (maybe 6 or 7 at different points on the PF). Meant that I could get into just about everything to get the crud out and not have too much work to get it all back together.
 

Attachments

  • bars.jpg
    bars.jpg
    230.5 KB · Views: 273

REVOLUTION

Administrator
Staff member
Nov 13, 2012
2,314
76
48
46
GTA
www.pinballrevolution.com
Hey Chris, the apron is held on by two screws where I've circled in the pic.

the other part you mention was hammered into the PF with a mallet. Not sure how to pry them off myself, but I'm sure others will chime in.
 

Attachments

  • Bally_Apron_03.jpg
    Bally_Apron_03.jpg
    115.2 KB · Views: 269

tkaye

Active Member
Mar 17, 2013
597
59
28
54
Ancaster, On
REVOLUTION said:
Hey Chris, the apron is held on by two screws where I've circled in the pic.

the other part you mention was hammered into the PF with a mallet. Not sure how to pry them off myself, but I'm sure others will chime in.


Yup. Just pull 'em straight up and off. They just push back in afterward. Don't worry, won't gouge anything.
 

Vengeance

Well-Known Member
Nov 14, 2012
1,990
138
63
Keswick, ON
I don't know that those lane guides would just pull out.

Those ones look much thicker then the usual ones you see on a machine
 

DRANO

Super Member
Nov 15, 2012
2,821
517
113
Mississauga
Most are just push/pull. It could just be a trick of the camera, but if Adam is right and they are thicker than regular wire lane guides, look underneath and make sure there isn't a bolt or some weird fastener.

Be carefull removing them. They have little stamped "wings" on the ends that help them bite into the wood. When you lift them out, there is a risk of the playfield wood flaking around the hole. Most guys put something down to protect the playfield like a small block of wood, then slide a screw driver under the guide and pry up. Do this gently on either side. If you go all the way on one end and then the other, you will likley warp the shape.

Chris Hutchins had this neat trick for preventing the wood from splitting. He took a small paint stir stick and split it down the middle (you can do this with a few passes of an exacto knife. Then flip the peices around so the two straight outside (factory) edges are facing each other. Get a small round file and file a half circle into the edge of each piece so that they line up to make a hole about the same size as the wire diameter. Then, take both pieces and bring them together around the wire. Press down with your hand and use the prying method described above. This focused pressure on the wood will prevent/minimize splitting. Of course, you don't need the entire stir stick, so cut it down to a usable size... but leave it long enough to use as a protective surface to press your screw driver against as well... so it serves a double purpose. It's a neat tool to have in the arsenal and you can make it for free in a few minutes. Just remember to switch from one side to the other regularly as you go.

Another way to get these out is pound them out from behind. You'll have to find something of a similar size (like a small flathead screwdriver) and insert it into the hole from under the pf, then tap it out gently. You can still get splitting this way, so the above technique still applies, but you may need a buddy to help you work both sides of the playfield.
 

Chris Bardon

Well-Known Member
Nov 15, 2012
1,307
168
63
Mississauga, ON
Good idea-I figured they'd pull out, but didn't want to risk damaging things any further. Those guides are pretty thick at the bottom-the ones higher up on the PF are a smaller gauge.
 

Menace

Well-Known Member
Staff member
Nov 14, 2012
2,440
255
83
Santiago de Aurora
Drano nailed it.

As for the apron, two screws at the back by the PF hangers and the other side has two tabs that slide under retainers screwed to the PF. Basically have to slide the apron froward towards the flippers. The only one I know of off the top of my head that is screwed all the way around is IJ.

D
 

Chris Bardon

Well-Known Member
Nov 15, 2012
1,307
168
63
Mississauga, ON
Thanks-I'll give that a try next time. As for the apron, it looked to me like it was screwed down in the middle as well, almost directly on top of the flipper mechs, but now I'll have to take another look.
 

mwong168

Administrator
Staff member
Nov 14, 2012
6,657
1,417
113
45
Toronto
Just in case you need to remove the apron on your newer Sterns they have two screws under your instruction cards.

10322497846_a9f677e16b_c.jpg