• We have upgaded to the latest version of XenForum and the process finished without any errors!!!! Enjoy the new forum!

spiroagnew's Six Million Dollar Project

spiroagnew

Well-Known Member
Staff member
Dec 1, 2012
1,334
311
83
Scotch Block, ON
www.creditdotpinball.com
I’ll start this thread to document the facelift I’ll be giving my newly acquired Bally Six Million Dollar Man. It should be a slow process, so no need to buckle up. We can rebuild him…

The game is a bit of a dream theme of mine. While not being old enough to remember the Bionic Man from his first run on network television, I gained an appreciation of his adventures from re-runs, and a marathon watching of the show when it first appeared on DVD a few years back. The marketing around the show was fantastic: model kits, action figures, records, books, View-Master reels and of course, a pinball machine. Not just any pinball machine: one from the undisputed kings of the licence tie-in, Bally. This Bally game is lost among the other licences of the era--Playboy, Evil Knievel, KISS, Bobby Orr (in Canada anyway)—probably due (in equal amounts) to the theme not being as timeless as the others above and the gameplay being a little…lacking compared to the others. The theme and amazing art was enough to sell me. I’m not a huge fan of Bally games from this era, but this was one I had to make an exception for.

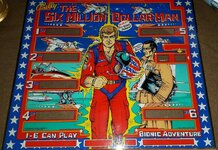
A big thanks to Brock/Revolution for picking the game up for me. As soon as the Kijiji ad for the game appeared, I responded, pledging the full asking price. Being tied up with work over the weekend when it popped up, I needed a set of hands to secure the game as the seller said offers were coming in, attempting to sweeten the deal in exchange for voiding our verbal agreement. Turns out Brock was mere blocks from the seller, and within 24-hours (and a small deposit sent to the seller), Brock had the game in his van. My son and I picked the game up earlier this week. The game, more or less, worked. A few tech hiccups, but a game could be started and played. The cabinet will be repainted--I know a guy ;) --even though it may be suitable for some collections. The backglass is immaculate, not a mark on it. Plastics are complete and unbroken. The playfield has seen better days. I’m going to attempt to touch it up and save it, although in some places the paint has aged into that flaky, chalky dust that playfields from this era have been known deteriorate into. It will be quite the challenge.

If anyone has, or knows of, a donor Bally Six Million Dollar Man playfield that may be available for purchase, please contact me. (Turns out I was able to save the playfield...)

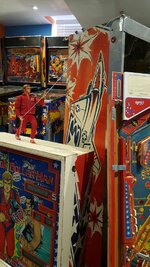
Had a little help getting the game into the gameroom. Bionic power comes in handy.
000-pins99.jpg

Great looking backglass!
000-pins97.jpg

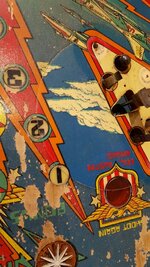
Some of the wear... :(
000-pins98.jpg
 
Last edited:
  • Like
Reactions: WARLOCK and DRANO

spiroagnew

Well-Known Member
Staff member
Dec 1, 2012
1,334
311
83
Scotch Block, ON
www.creditdotpinball.com
I found Greg Kmiec's signature during disassembly:

0c7692dc2a3236b02d9156af05fef890.jpg


On every game he designed, Greg Kmiec would place a single non-translucent, non-ribbed post somewhere on the playfield. Bally pinballs used the translucent posts for the most part, the non-translucent ones were reserved for Bally's bingo machine production. The single solid red post on 6MDM was found on the left side of the playfield just below the top arch.
 
  • Like
Reactions: WARLOCK

spiroagnew

Well-Known Member
Staff member
Dec 1, 2012
1,334
311
83
Scotch Block, ON
www.creditdotpinball.com
Removed the sling moon and pop bumper ring mylar. I wouldn't wish this process on my worst enemy. I used the freeze method to get the plastic off, followed by equal parts Goo-Gone, flower, gentle hair dryer heat and plenty of patience for the goo. A credit card didn't work to scrape the goo off; my fingers worked the best...which made for some decent calluses and soreness the following day. It came off though...after much cursing and elbow grease.

Started touching up the playfield today.

Some shots of the original wear:

b57adfd67c4c9b2016864524c18125aa.jpg


f5a8be0176b3768c92ac4c98688b4f9f.jpg


f7dd88e864454e21b1216f5be8037b0f.jpg


And a shot of the first coat of blue acrylic:

d3e2e55e1f891b0b26d71d35257ef000.jpg


I was lucky the dithering from blue to aqua happened outside of the area I needed to paint. Going to put a second coat of blue on the damaged areas tomorrow. Will also try and squeeze in a couple other colours and replace the star rollover inserts (which are always gross, they are havens for dirt and old wax). I went from thinking I'd need a donor PF to feeling kind of OK that this one is salvageable.
 
Last edited:

spiroagnew

Well-Known Member
Staff member
Dec 1, 2012
1,334
311
83
Scotch Block, ON
www.creditdotpinball.com
I had four playfield posts on the playfield, in high traffic areas, that were loose. When I removed them, I found that constant and direct ball strikes had worn away the wood beneath something terrible. These posts were not secured via t-nuts on the underside, but rather just a washer and lock nut...from the factory, no less. I filled these through-holes with JBWeld Kwik Wood, which boasts the same density of wood, and something I've worked with on cabinet repairs in the past. The repairs turned out ok, and I'm left to wonder how I will make sure this mend stands up. Should I use a t-nut underneath if there is room to do so? Should I use a thin washer that will clandestinely sit at the base of the post on the topside of the playfield? Will the repair stand up without any further modification since it is now in home use?

Anyhow, here's a before and after of the repair.

6d7703116f02d54c72d66864ba261cf9.jpg


d214b33225873434dba0d51c4f7a50d4.jpg
 

Seven

Active Member
Oct 6, 2015
255
150
43
56
Prince Edward Island
www.pinballorama.com
Looking good so far.

Around the the half circle mylar by the slings there is some paint wear in the half tone printing. I have some of that on one machine I'm working on. Hand painting half tone is a pain in the butt - and is only almost passable. What are you planning on doing in this area?
 

spiroagnew

Well-Known Member
Staff member
Dec 1, 2012
1,334
311
83
Scotch Block, ON
www.creditdotpinball.com
Around the the half circle mylar by the slings there is some paint wear in the half tone printing. I have some of that on one machine I'm working on. Hand painting half tone is a pain in the butt - and is only almost passable

I've completed all touch ups. The aqua was a pain in the ass to match, and the original paint loss was the result of flipper rash, I think. After the aqua was applied, I used various sizes of pick tools (akin to awls) and a small brush to recreate the darker blue half-tone "dotted" effect. Its passable, but perhaps the only part of the playfield I'm dissatisfied with at this point. I attempted it about three times before obtaining this result (which I can post a picture of later on this evening). The clear I use does a good job of blending touched up areas...if this isn't the case with the half-tone, I can always re-apply the acrylics to the area before more layers of clear are added.
 
  • Like
Reactions: WARLOCK

spiroagnew

Well-Known Member
Staff member
Dec 1, 2012
1,334
311
83
Scotch Block, ON
www.creditdotpinball.com
I clearcoated the playfield the other day. My choice of clear was KBS Coatings Diamond Finish.

000-pins2.jpg

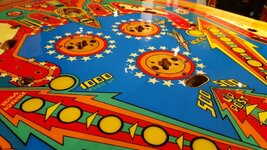
Went with that due to its quick cure time and ease of which you can work with the product. Pricy, but a fantastic product I’d recommend to anyone. At the suggestion of a user on an Aussie pinball forum, I thinned the Diamond Finish using KBS #1 Thinner at a ratio of three parts clear to one part thinner. This is pretty much the max the product can be thinned, as stated on the packaging. The clear was applied with a foam roller. I let the clear cure about two hours between coats, again, as suggested by the manufacturer. As anticipated the Diamond Finished helped even out difference in level between the areas of bare wood wear and the existing paint, smoothing out the transition and making it nearly invisible. (Aside: maybe this is the “INVISIBLE WEAR” the overseas container lists are always talking about?)

I let the clear tell me how many coats were needed. With each coat, the finish got noticeably smoother. I think I applied six coats, with the second and third coats being very liberal, and the rest being more conservative. Of the quart can, I used between one-third and one-half of clear (that’s a thinned amount), so expect a quart to do approximately two playfields…mileage may vary though. I had to add some extra clear in a few of the inserts to correct some cupping. A few spots of fish eye were apparent at the outset of the project (near the pops), but quickly corrected themselves after I hit the area with some of the clear using a foam brush…I guess the more “abrasive” application of using the foam brush persuaded the clear to adhere better? The playfield will still need a wet-sand with fine grit and a buff with medium and fine cutter. This should take out some of the miniature “bubbles” in some spots on the surface, mostly near the edges of the playfield. I may or may not have to lay down another coat, time will tell. I want to knock down the clear to a dull shine to try and recreate the look of the playfields of the era. To me, I don’t think the heavy gloss looks right on these older games. I was able to achieve such a look on a few other playfields I’ve cleared using Diamond Finish, and I hope this playfield turns out the same way.

The first thumbnail below will show the touch up of the dithered area by the flippers as discussed above. The photo is really harsh and makes the touched up area look pretty sh*tty. While it is not perfect, it is not as bad as the photo lets on. I’m just ecstatic (thus far) that I was able to work with what I had, and that I didn’t have to dive into the US collector market to locate a donor playfield!

Sanding and buffing can commence after 24 hours of curing according to the manufacturer…so I’m in the “clear” to start that process…so to speak. I’ll start it this week sometime if time permits.

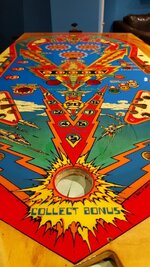
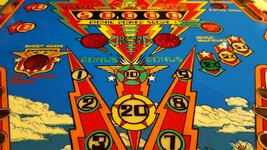
Photos of the pre-sanding/buffing clearcoat:

000-pins97.jpg

000-pins98.jpg

000-pins99.jpg
 
  • Like
Reactions: WARLOCK and eh97ac

eh97ac

Active Member
Nov 19, 2012
636
149
43
Mississauga
Rob,

Are you applying in the house or garage? If the garage, what temp are you keeping it at. Very interesting product.

Any idea if you could do minor touch ups with an air brush?
 
  • Like
Reactions: WARLOCK

spiroagnew

Well-Known Member
Staff member
Dec 1, 2012
1,334
311
83
Scotch Block, ON
www.creditdotpinball.com
Rob,

Are you applying in the house or garage? If the garage, what temp are you keeping it at. Very interesting product.

Any idea if you could do minor touch ups with an air brush?
Doing it in the basement. If brushed or rolled on the product is safe for indoor use. I just cracked a window and made sure the fans were on in the rest of the house. It didn't smell the greatest and got a bit chilly, but went on great and didn't mess with the cure times.

Not sure if touch-ups using this product with an airbrush would work...I have not even considered it, though. But really, this stuff self-levels fantastically and is so easy to work with using a sponge brush, I don't see why an airbrush would be needed for spot clears or smaller area applications. KBS has an excellent user forum, perhaps ask there about airbrush use.
 
  • Like
Reactions: WARLOCK

CJBob

Active Member
Nov 24, 2014
354
91
28
Mississauga
Rob, based on what you've read how durable do you expect the results to be? Should be fine for home use for a long, long time? And I agree with you about not having the playfield look too shiny on the older machines. Very nice.
 
  • Like
Reactions: WARLOCK

FastEd

Active Member
Sep 5, 2014
312
39
28
Toronto
Thanks for sharing Rob! I'm about to start clearcoating using the same DiamondFinish. Can you share where you bought it from or PM me the info?
 

spiroagnew

Well-Known Member
Staff member
Dec 1, 2012
1,334
311
83
Scotch Block, ON
www.creditdotpinball.com
  • Like
Reactions: WARLOCK

spiroagnew

Well-Known Member
Staff member
Dec 1, 2012
1,334
311
83
Scotch Block, ON
www.creditdotpinball.com
Rob, based on what you've read how durable do you expect the results to be? Should be fine for home use for a long, long time? And I agree with you about not having the playfield look too shiny on the older machines. Very nice.

From what I've read, very durable. I did two other games with Diamond Finish, Solar City and Spanish Eyes, and both are holding up well. No signs of wear yet...but these are on "low traffic" EM games, mind you.
 
  • Like
Reactions: WARLOCK

spiroagnew

Well-Known Member
Staff member
Dec 1, 2012
1,334
311
83
Scotch Block, ON
www.creditdotpinball.com
With the game buffed, I guess it's time to start assembling the playfield. All the metal parts will be but through the Ultrasonic cleaner, followed by 48-ish hours in the tumbler with corn cob media (and Flitz and Novus 2).

I started with my four problem child posts--the ones whose through-holes I filled with JB Weld in the post above--just to be sure they wouldn't pose a problem to the clear when drilling them out. Drilling went well and didn't ruin the clear. I ended up bolstering the post on the topside of the PF with a small thin washer...just to better spread out the impact, protecting the JB Weld repair. I put a larger washer and lock washer below to try to do the same under the PF.

fdefa06f3938ae4556ecdadb0650ff30.jpg


797954997948cf5b018225abd54d2067.jpg
 
  • Like
Reactions: DRANO and WARLOCK