• We have upgaded to the latest version of XenForum and the process finished without any errors!!!! Enjoy the new forum!

Dr.No and the STERN 'sisters'

DRANO

Super Member
Nov 15, 2012
2,827
519
113
Mississauga
20160618_222900.jpg


Sounds like the title of a B-movie, I know.... but I can assure you, it's really more of a love story.

It's been roughly a year since I finally broke down and came out of the closet... I love classic Stern pins!
It was a hard pill to swallow for a DMD and EM loving lad like myself who'd always laughed at the thought of classic 'Sturds" ;)
But, it wasn't long after I'd taken my first steps into exploring early solid state pins that I was ensnared by their shameful lure and digital bleeps, blops and bloops.

I love the Bally and Williams games from this era, but 1980's Sterns are decidedly different. I've heard them referred to as "cheap, pretty and fast…" Now, I'm not sure how cheap they are anymore, but they sure as hell are punishing and as beautiful as they are mean. Not to mention they have some cool rules and objectives for the era.

I had the good fortune of acquiring a Meteor for my first foray into this dark corner of pindom. A fantastic game and I still love it, but it wasn't long before space-rocks and ICBMs gave way to bodacious beauties.

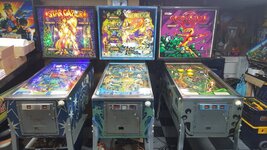
I had set my sights on some rare birds. Star Gazer, Quicksilver and Seawitch. It seems no coincidence that stern artists and designers were angling for the prepubescent male market with these strong female heroins/characters. I jokingly refer to them as "hippie chick, fishy chick and alien chick"… or simply "the ladies". Seeing them all together, they compliment each other beautifully. Each of these games combines great speed, creative shots, captivating sound effects and gorgeous artwork into pure pinball fun.

Given the rarity of some of these, I was extremely lucky to score these titles all within a year. I did have to trade a pretty decent DMD to acquire the Star Gazer, but the other two were found this Spring during the Allentown trip. I even cast my net across the Atlantic and ended up with a 2nd Quicksilver; from Serbia of all places! That 2nd example was sold off pretty quickly and helped to fund the others.
They are all here now and finally lined up in the workshop where they each await some long overdue attention.

So, with good weather on tap for the next few months, I'm setting myself the challenge of getting all 3 of these ladies refurbished, repainted and restored before the year is out. I know... it's not like I don't have other projects, but I am happiest when I have a dozen plates spinning in the air. My Fathom project is on hold until my playfield and parts arrive and the '66 Batman re-theme I'm doing with Monkeybug is also ongoing in the background. It's been a while since I documented an actual restore though, so I'll cover the progress here.

To preface, all machines are mostly working, so at least I can play one or two while working on another.
Star gazer is in the best shape out of the three so I'll probably start with the lowest hanging fruit and do SG first.

My goal is to have these complete before the new year… so I'm setting a very aggressive target date of December 31, 2016.... or 179 days (roughly 2 months per game).

I enjoy working under pressure.... so let's see how I do juggling these 3 pins and my other projects.

Stay tuned!
 
  • Like
Reactions: WARLOCK

DRANO

Super Member
Nov 15, 2012
2,827
519
113
Mississauga
177 days remaining

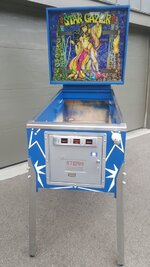
I got a bit of a start on Star Gazer yesterday night.
I've had this one the longest of the three so I've already gotten a fair head start on collecting parts.
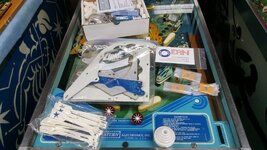
New rubber, coin door stickers, refurbished spinners, new targets and a full set of new repro plastics from PromoJoe on Pinside. He thought he was sold out but found this last set during a recent move. I was very lucky to find them... even though CPR is rumored to be doing them.


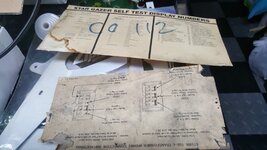
20160705_230451.jpg


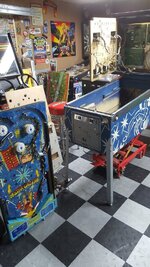
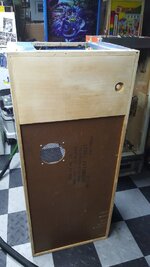
I took out the playfield and started to take apart the cabinet.
Overall the main cab is in nice shape and fairly clean inside. The head has some damage and some drywall screw repairs. Still, it'll be an easy fix.

I won't be able to get much more done until the weekend due to work, but should have the cab stripped enough to sand down in the next couple of days.

20160705_232819.jpg
 
  • Like
Reactions: WARLOCK

DRANO

Super Member
Nov 15, 2012
2,827
519
113
Mississauga
175 days remaining

Just a small update.
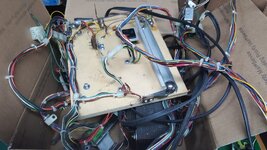
Got most of the guts removed. Still have to remove the side-rails but I'll give the inside a quick vacuum and a light sanding on the really dirty wood.
I also have to dig around to see if there's existing art out there for these cabinet labels.

20160708_215520.jpg

20160708_222732.jpg

20160708_222611.jpg
 
  • Like
Reactions: WARLOCK

DRANO

Super Member
Nov 15, 2012
2,827
519
113
Mississauga
171 days remaining

Progress is slow, but this is my busy time of the year, kids are home from school and all that other good stuff.
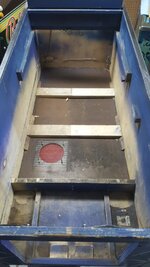
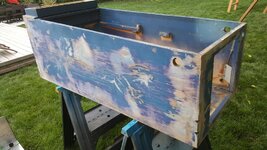
Well, the bottom of the cab looks GREAT! :)
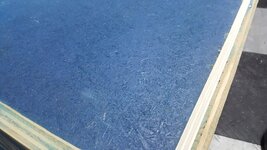
The other sides got a little sand and some patching to fill in any imperfections. I'm not going for a HEP level automotive finish here, but I do like things smooth.

20160709_174215.jpg


20160710_185240.jpg

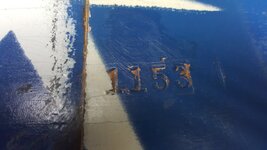
For anyone who cares, this is Star Gazer #1153


20160709_150643.jpg


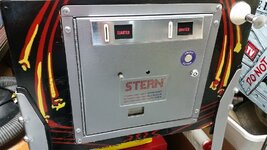
Last night I took apart the coin door. coincidentally, I quite love restoring classic stern doors. They always seem to come out so nice and applying that final decal around the start button and the logo is just fantastic. Here's a pic of one I did for my Meteor (don't know why it has an extra hole?). I'll probably do all of the games' doors together and knock them all out at the same time or right after each other.

20151003_175656.jpg

Today I ran over to Curry's art supplies to get some of the artist's spray paints that I like to use. There is IRONLAK at roughly $7/can, MOLOTOW at about $9/can and then the ultimate, LIQUITEX at a whopping $15-$16/can!!!
Of course, as luck would have it, the Liquitex had the best match :(
I only bought 2 cans of blue so hopefully that will cover me. I have some old blue lying around from my Fathom cab so I may use that as a base-coat first.

I'll hopefully have some nice cab pics to post by the weekend!
 
  • Like
Reactions: WARLOCK and Menace

fantasygoat

Member
Apr 19, 2015
153
14
18
52
Toronto, ON
The coin door on my Meteor was the best part! They look so great when you're done and the silver hammertone from Crappy Tire is a perfect match, so you're not out trying to track down some hard to find paint.

I love me some classic Sterns! Better artwork than most from the era!
 

DRANO

Super Member
Nov 15, 2012
2,827
519
113
Mississauga
151 days remaining

I'm back from a nice week in Maine with the family. A long drive from Toronto to the Old Orchard Beach/Kennebunkport area, but I still came back re-energized and ready to work!

First off; the lesson for the day... don't waste your money on fancy expensive paints :FP:
I spent the last few weeks wrestling with the best match for this project and I decided to spend a little extra and go with some Liquitex and Montana Gold paints for Star Gazer at roughly $14-$16 per can!!
They covered terribly and were harder to get a clean uniform finish from than the Molotow or Ironlak brands I've used in the past.
Finally after a week of prep I applied the decals today and it was nearly a disaster.

The Liquitex white I chose was running all over the place and took forever to dry. I ended up having to pull a hail Mary and spraying over the paint and decals with graffiti remover to strip away the crappy paint job. Luckily I had a few leftover cans of Nature White from MOLOTOW and quickly sprayed that over my mess. Luckily, the stencils were not ruined and I won't need to do too many touch ups. Also, the stencils (which I know are good) left a ton of glue residue on the Montana gold blue.

Also my desire to leave the cabinet looking a little more authentic with woodgrain and all has caused more headaches than necessary.

So, bottom line... I'm gonna stick to methods and products that I trust. No more experimenting on projects of this caliber.
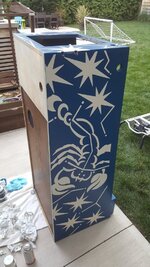
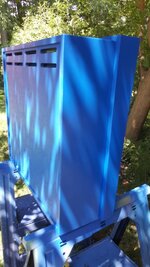
Here are a few pics of where I left off today. There's plenty of cleanup and touch-up to do that you can't see in these pics, but it'll turn out fine. Just more work.


20160801_192303.jpg


20160801_200853.jpg


The head repairs came out great. I put the final touch on it by stripping out the small damaged plywood lip and replacing it with a filler strip. I made up a few of these a while back and they come in handy for repairing the bottom and backs of cabinets. A little sanding leveled it out and some bondo fixed any little gaps remaining. Now that I know what to expect from the paints I'm using, I will hopefully have an easier time with the head in a few days when I apply the stencils.


20160729_234316.jpg


20160730_220320.jpg


20160801_134551.jpg
 
  • Like
Reactions: WARLOCK and Menace

DRANO

Super Member
Nov 15, 2012
2,827
519
113
Mississauga
142 days remaining

So I've eaten up more than a month so far and haven't made a ton of progress.
My plan was to get all 3 cabinets done while the weather is warm and then move on to the playfields as they can be done largely indoors.
At this pace I may not make my self-imposed challenge of completing all three machines before the new year, but it is Summer after all and there was some vacation time and lots of work-related travel mixed in these first few weeks. Hopefully things will settle down soon.

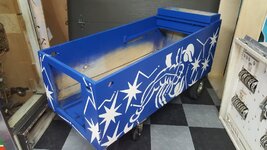
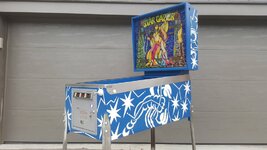
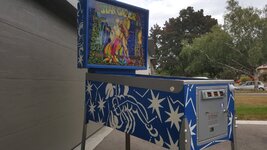
The Star Gazer cabinet had its challenges and I ended up having to perform a lot of unneccessary glue residue removal and some touch-ups. Still, it turned out very nice and the few imperfections actually help to give it a slightly more authentic look ;)

Here are a few photos I took today after putting the trim back on (I was short a few spiral nails though... can't find my stash).

20160809_184703.jpg


20160809_184759.jpg


20160809_184718.jpg
 
  • Like
Reactions: WARLOCK and eh97ac

DRANO

Super Member
Nov 15, 2012
2,827
519
113
Mississauga
Side rails look nice!

Thanks!
I tried something different this time around.

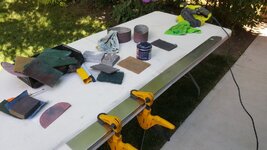
I had a handheld belt sander that accepts 3" wide paper. Normally you can only buy 150 grit or more coarse from the local big box stores, but Amazon.ca had varying grits down to 400 so I grabbed a few different grades and tested out using the belt sander to re-grain the rails.
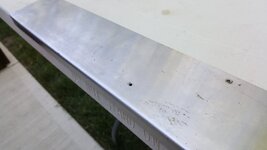
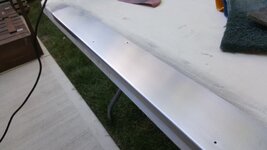
It seemed to work very well. Pro tip though... don't waste your time on super fine grits. This paper is meant for wood and the stainless steel just chews it up. I was fine using 150-180 grit for most of the work and then I dropped down to about 240 on the machine and then did the final pass by hand with one of those foam sanding blocks. If I was super anal and had a larger polishing wheel setup, I'm sure I could've gotten these gleaming, but I was happy with the grained look which wasn't too far off from the factory finish.

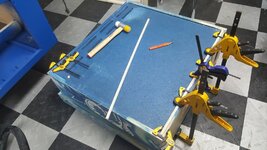
Below are some shots of my little setup and some early results; being careful to clamp down the pieces so I could work on half of it at a time.

Just one note. Don't expect miracles. If your rails are dented or have low areas (around nail holes) these will not sand evenly. You can try digging in the corner of the belt sander but I don't recommend that unless you are very comfortable with the tool. These little areas will need some hand work. I also took care to try and bang out as many low spots as possible by laying the rail down on the flat anvil end of my bench vice and hammering it from the back side.

The belt sander at coarse grit was awesome for removing most of the deeper scratches. The final finish is equivalent to what you would normally get by hand, but with a lot less work :)

20160807_111211.jpg


20160807_105100.jpg


20160807_110730.jpg
 
  • Like
Reactions: WARLOCK and Menace

stiffler4444

Active Member
Nov 20, 2012
387
46
28
50
Crystal Beach, Ontario
That cabinet looks great. Can't wait until you get to that Seawitch. Very impressed with your work. Actually, still wowed by that beautiful BSD of yours that I missed out on......
 

DRANO

Super Member
Nov 15, 2012
2,827
519
113
Mississauga
That cabinet looks great. Can't wait until you get to that Seawitch. Very impressed with your work. Actually, still wowed by that beautiful BSD of yours that I missed out on......

Thanks!
Might get to that Seawitch cabinet sooner rather than later and worry about the playfields afterwards. This nice weather is perfect for cabinet work.
 
Last edited:

DRANO

Super Member
Nov 15, 2012
2,827
519
113
Mississauga
129 days remaining

Okay, so I've had a bit of a setback.
Last night I dropped the playfield back into the cabinet. Just because it would be easier to strip it from there and I didn't want to bust out the rotisserie into my already overflowing workshop.
I took plenty of photos and details as I removed components.

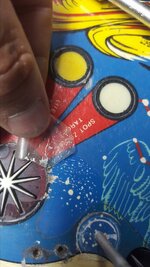
Once I had gotten tired and decided to stop for the night, I figured I would do a quick test on pulling up some of the clear vinyl that covers the entire playfield.
I don't know who did this, but it is obviously not factory and the soft material comes up very easily by hand. I had done a small patch when I first got the pin and it just peeled off beautifully. I had no worries about my ability to turn this into a stunning restoration.

Well, last night's testing shattered that dream. As I started to pull away the material from some of the higher wear areas, I could see that the artwork underneath had softened over years of being under the vinyl and little flecks of the paint were coming up no matter how gently it came off. After already having some challenges with this machine, last night was totally demoralizing.
My only resort now is to get a repro. So, a message was placed into Mr. Greatwich to remind him of my inquiry several months ago and (fingers crossed) he has a repro available for me.
It's money I wasn't looking to spend but, the bright side is, I will save myself a ton of work.

I guess we will move onto Seawitch and Quicksilver for the time being.


20160822_232604.jpg
 

DRANO

Super Member
Nov 15, 2012
2,827
519
113
Mississauga
New repro playfield has been purchased. Hopefully it arrives soon. It'll be nice to put one of these projects to bed.