• We have upgaded to the latest version of XenForum and the process finished without any errors!!!! Enjoy the new forum!

spiroagnew's Solar City Cabnet Refresh

spiroagnew

Well-Known Member
Staff member
Dec 1, 2012
1,334
311
83
Scotch Block, ON
www.creditdotpinball.com
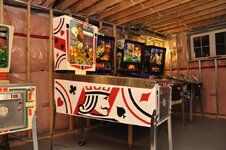
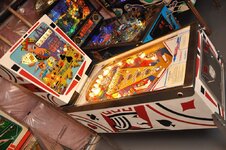
It has been a while since I've added something semi-productive to this site, so I decided to chronicle the face lift I gave my Gottlieb Solar City cabinet. I hesitate to use the word “restore” because it is an overused term in this hobby. I tried to bring the cabinet back to factory original, however, I'm no Christopher Hutchins (or Christoofur Hoochens as he's known around these parts) and the work isn't perfect by any stretch of the imagination. Some may cringe that I repainted the cabinet to begin with. Well, too bad. Its my pinball machine and I think it looks better for it.

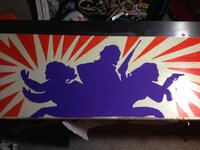
I had only attempted a cabinet stenciling once before, and it wasn't a full blown production like the Solar City re-stenciling would be. Last fall, I gave the cabinet of my Gottlieb Charlie's Angels a face lift, by repainting the purples which time had turned to a muddy gray. I cut stencils out of a think glossy presentation paper, masked off the areas I didn't want getting blasted and went to town with a can of rattle-can Rustoleum, spraying right over top of the faded purples. The remnants of that stencil still hang on the wall of my garage, and are all that remain of the game—it was sold the following spring. That process turned out alright, but the cabinet still had nicks and scratches in other areas that I tried to touch up, but as anyone who has tried to touch up a cabinet in the past knows, matching the colour and texture is a tough, near impossible, task. Also, the Rustoleum purple I used was also a little too glossy for my liking. It made the silhouette of the Angles pop, but was far too glossy to look factory original.
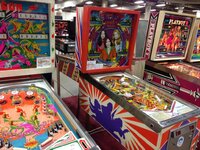
IMG_4037.JPG IMG_5149.JPG
Left: The Angels repainted. Right: The game as it appeared on display in Allentown.

About a month ago, I picked up my first two EM machines from PBRev stalwart Warlock: a Gottlieb single-player wedgehead Big Hit, and a Gottlieb two-player Solar City. Both needed minor adjustments, but both were pretty much plug and play. While Big Hit maintained its original splendor with a fantastic playfield and cabinet, Solar City left a lot to be desired. The playfield was filthy, had multiple wear spots and had two of the always pleasant, over-sized, non-factory Robertson screws that had broken through to the top of the playfield from beneath. The cabinet had a lot of scrapes and bruises, too. I'm told only now (after the project was complete) that the cabinet would be considered “not bad” by EM standards as it arrived in my care...but to me, there was just a bit too much wear for my liking.
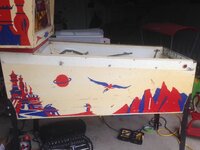
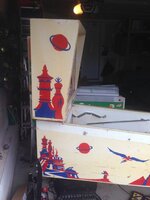
IMG_6305.JPG IMG_6306.JPG IMG_6307.JPG
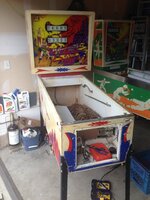
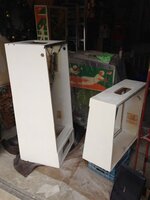
"Before" shots of the cabinet

A word or two about Solar City, I suppose, before I begin. It is known as the red-headed step-child of the El Dorado-Gold Strike-Canada Dry-Target Alpha series. All of the games have the same layout with different art packages. The layout remains uber-popular to this day: everyone loves drop targets, and this one has an absolute ton. It also has the longest undisturbed shot in pinball, a record that still stands: the shot from the lower left flipper to the furthest right drop target in the upper bank. The lack of a traditional upper arch allows for the extra inches to make the record...go ahead, measure it. El Dorado, the one-player wedgehead, led the way in the series, followed by its add-a-ball and export brethren, carrying a wild west theme. Canada Dry was a licensed theme for export to help promote the ginger ale soft drink. Target Alpha arrived with some great futuristic artwork (second only to Gottlieb's Jet Spin, in my opinion) in a four-player version of the El Dorado layout. Solar City was a bit of an after thought as a two-player version. It has a unique backglass and cabinet art, but the graphics seem to be a bit more subdued (and less inspired) than Target Alpha. Where Target Alpha epitomized 1970s sci-fi cool, Solar City seemed approach the theme from a less exciting fantasy style. The final nail in the coffin is driven in because Gottlieb didn't bother to manufacture a unique set of plastics for the game...they just changed the colour scheme of the Target Alpha plastics for use on Solar City--so you've got characters on the plastics that bear no reference to the Solar City characters on the backglass! The main drawback about Target Alpha/Solar City gameplay, is that the drop targets will not reset if you can knock them all down in one ball like the one-player series of games will. Also, there is no moving lit target paired with the drop targets to chase on the multi-player game, whereas it is an integral feature to score loads of points in the El Dorado series.

So why Solar City? Frankly, it was there. And it was something I could work with. And I love the layout, but there was no way I would pay the price El Dorado commands. Also, Gottlieb two-player games were always the rarer of the box-head multi-player games: they made 7,285 of Target Alpha but only 2,875 Solar Citys. Further, if I wanted to really play the restoration game, a new Solar City backglass is readily available from Classic Playfield Reproductions, which is more than can be said for other games of the same vintage (Solar City's purchase-mate, Big Hit for example has no reproduction glass on the market). I'd be painting myself into a corner with bringing this game back to life: I'd never get back the money I'd be sinking into it, but that's not why I'm doing it. Wait, why am I doing it again...? Or right, for the love of pinball.

Con't...
 

spiroagnew

Well-Known Member
Staff member
Dec 1, 2012
1,334
311
83
Scotch Block, ON
www.creditdotpinball.com
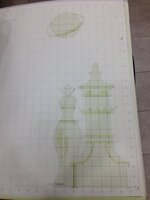
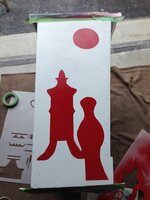
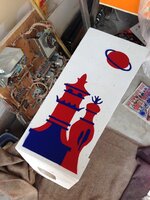
I dealt with the playfield first, tearing it down, tumbling all the metal, ultra-sonic cleaning whatever would fit in the tub and re-rubbering. I also clear-coated the playfield myself with passable results (but that's another thread altogether). Pinball Rescue Australia will be repro-ing the plastics this winter, according to their schedule, so I'll have to wait on those (the existing set isn't all that bad, actually). With the playfield out of the way the cabinet was next in line. I decided early on that I would be cutting my own stencils. I could have hunted for them online, or had the Pinball Pimp cut a set for me, but I thought it would be best not to pour too much more money into the game, and I did do a pretty accurate job cutting for Charlie's Angels. I bought a roll of tracing paper from the craft store and did a decent trace of the cabinet graphics. There were two layers to trace: a bottom layer of red and a top layer of blue, all set on a white background. The left side graphics were a mirror image of the right, so tracing took no time at all: a trace of the reds and a trace of the blues and I was done. You could actually see, after all these years, where the original colour traps were—that is, where the red was sprayed down in such a way so that the blue could be sprayed over top, rather than just having the two colours meet edge-to-edge. This was extremely helpful, as it would be one less thing to worry about when aligning the stencils.

I traced the graphics onto tracing paper first because, honestly, I had no idea what I wanted to use for the actual stencil. The glossy paper had worked fine for Charlie’s Angels, but I wanted something a little more reliable that wouldn't bend or pull apart when wet with the first coat of paint (because, ideally, they have to be used twice--once for each side). This stencil, especially the blue layer would be pretty intricate and I wasn't sure cardstock would hold up. Frisket was also out: it wouldn't provide the signature “Gottlieb Over-spray” we are all so fond of. Gottlieb used large brass stencils to paint their cabinets. Due to equal parts imperfections in the wood, wear and tear on the brass, and “Who Cares” attitude of the factory workers, many (if not all) cabinets have instances of over-spray when the paint crept beneath the stencil and resulted in a soft edge, rather than a crisp one. Frisket would not reproduce this, and moreover, it would be damn expensive, because it could only be used once per side, you'd have to cut twice as much. I read an article online that suggested mylar cut with a hot etching pen. Again, the results looked just okay. The helpful folks at the art store suggested a velum-like material. It is much thicker than tracing paper, much thinner than mylar, but it was still opaque. It was flexible and appeared super durable. A 20x25 sheet cost about $3CDN (if your wife is a teacher, she gets another 10% off!), and seven or eight sheets will cut an entire stencil set. It is a decent price that is in line with the quality of material. Next up: the task of transferring my stencil tracings into the velum material. It was an extra step, but in retrospect, I think working with the lighter tracing paper on the cabinet was easier than working with the velum on the cabinet.

IMG_6270.JPG IMG_6274.JPG
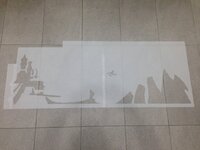
Some examples of the stencils cut from the Velum material

For cutting the velum, I used a run of the mill Fiskars knife from Wal-Mart. If there is one tip I'd give here it’s this: don't skimp on the blades. Buy two or three extra packages of blades and swap out frequently. I used a self-healing cutting board, and while it did a good job keeping my blade steady, it did a number on the sharpness of my blade. A dull blade is going to jerk and pull the velum resulting in an uneven and sloppy cut...and it will certainly show when you are laying down your paint. The extra few bucks you spend on blades will be worth it for the accurate cuts you'll get.

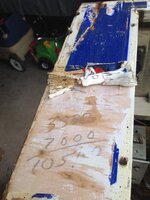
Next up was stripping the cabinet. To get the side rails off, I used a trick I learned from Pinside's Vid1900. Rather than scraping up the rails trying to pry the nails up, I just indented a pilot hole using an awl and drilled out the head of the nail. Once that was done (ten times per side), the rails popped off and the neck of the nail was persuaded out with pliers. Pinball Resource sells identical spiral nails for pennies, so it is not even worth trying to save these forty year old relics at the expense of the side rails. Once the coin door and other cabinet accoutrement was removed, I used paint stripper and a putty knife to scrape off all of the original paint. I needed to apply the stripper twice, once to take off the years of dirt, grime and smoke (the yellow layer which came off in thick gobs of goo) and once to actually get the paint off the cabinet. When taking the paint off the coin door I found some simple math beneath the paint and primer. Really...who needs to write down that equation for simple addition? I guess Gottlieb cabinet makers did. I filled the dings and scratches with Bondo in the low traffic areas and JB Woody in the high traffic areas (“high traffic” being cabinet corners, side rail nail holes and other points of contact). I then sanded smooth with a random orbit sander. I repeated this process about, oh, a dozen times or so, until I just got fed up and realized that it would never be perfect. And in my defense, I'm sure a lot of these games left the factory with less-than-baby-bottom smooth finishes.

IMG_6310.JPG IMG_6354.JPG
Left: Found math while stripping, Right: Primed and ready for white

Con't....
 
  • Like
Reactions: DRANO

spiroagnew

Well-Known Member
Staff member
Dec 1, 2012
1,334
311
83
Scotch Block, ON
www.creditdotpinball.com
I wanted to lay down a white primer to make sure any imperfections were as hidden as they could be. I choose a Zinsser rattle-can spray primer, and was pretty impressed with the results. I wasn't surprised: Zinsser makes great products. Not the cheapest, but you get what you pay for. I'll confess here that I chose not to paint the inside of the cabinet. I see these massive overhaul projects where the inside of the cabinets are fully painted and so clean you could eat off'em. Maybe I got bit by the lazy bug, but I didn't go full board. I made sure to paint the areas you could see when the playfield was in and the glass was on, but I didn't take it all the way down to the Lauan bottom board. Two cans of primer did the entire cabinet.

I next had to select my paints. Full credit to Drano here for suggesting the Belton Molotow Premium spray paint. Its finish comes close to the original Gottlieb finish, and its coverage is phenomenal. I elected to go with #160 Signal White for the base, but #79 Pure White would also be a viable choice, and one I would make in the future to see how the two colours stack up. I contemplated choosing an antique white (read: yellow-ish white), to give the cabinet that aged look, but seeing the white of the cabinet under the yellow goop of age re-affirmed that a brighter white was in order as it more closely reflected the colour that left the Gottlieb factory. Two cans of the Molotow spray did the job. I ended up with a few hot spots where paint went on thicker than I would have liked, so I block sanded the cabinet lightly with 600 grit sandpaper with special attention to those areas, and it seemed to do the trick to even out the finish.

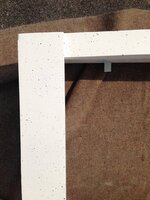
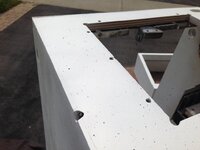
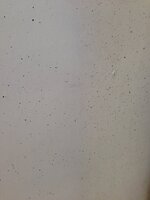
I was now faced with my first trial-and-error portion of the face lift: how to accurately re-create the spatter effect on these Gottlieb EM cabinets. Since the cabinets contained large areas of light colours (mainly white), Gottlieb would spatter the cabinet with little dots of black paint or webbing to hide imperfections in the finish and cut down on the appearance of grime. Solar City originally used the spatter technique. These were miniscule specks of paint, not globs, and didn't draw your eye away from the colour artwork—no speck would have been bigger than the head of a pin. I'm assuming it would have been sprayed with a paint gun at the factory, but lacking one of those, I was forced to other avenues. Clay Harrell used a wire brush on his TOPCast #1 video to achieve the effect on the coin door area of a cabinet, but I wasn't too pleased with the results that it produced. Others online suggested a cheap paint brush smacked against a block of wood. In the end, I concluded that a kitchen scrub brush with stiff bristles flicked by running your fingers over top of them worked the best.

IMG_6372.JPG IMG_6371.JPG
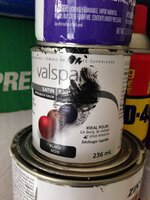
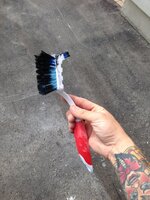
Left: My chosen paint, Right: My chosen paint spattering brush

There are several keys to getting this spatter to look right. First, choose the right paint. I got a pre-mixed Valspar satin black in a can, but flat would work, too. These finishes work well because they seem to be a little thinner than the other finishes available, and easier for “flicking”. If the black paint appears too thick, it is advisable to thin it a bit in order for the flecks of paint to sit flat against the cabinet, and not remain a 3-D globule that can be picked off with a fingernail. The second key is to get the right amount of paint onto the kitchen brush. I had a staging area, which was simply a large sheet of the aforementioned tracing paper, where I would run my finger over the bristles once to get all the large globs of paint off of the brush first. The third key is the most important: distance. Throughout the process I was three to five feet away from the cabinet while I was flicking the paint. At no point was I ever over top of the cabinet with the kitchen brush for fear of dripping paint onto the cabinet. I even got a step ladder out so that I could get some height to make the spatter land at more random and even intervals. Once I was happy with my coverage of “larger specks”, I got a little closer, about a foot-and-a-half away, after flicking my brush in the staging area a good three to four times, getting the bulk of the paint off, to fill in the space with smaller specks of paint. This paint produced a very fine spray and filled in areas that required more coverage. Finally, don't overdo it! If you say to yourself: “Maybe just a little bit more...”, chances are, you are done, and you shouldn't lay down that next application. Too much spatter will look ugly and draw away from the graphics. For the first time doing it, I'm very happy with the results. Just take a look at the inside of the cabinet where I was able to blend the spatter to factory original. I was probably the toast of the neighborhood that afternoon: standing atop a ladder with rubber gloves, a can of black paint and flicking a kitchen scrub brush onto a white box.

IMG_6365.JPG IMG_6366.JPG IMG_6368.JPG
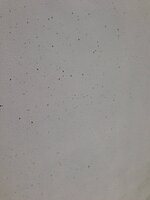
Some examples of spatter coverage.
IMG_6367.JPG
The left half of the picture is my spatter, the right is original from the inside of the cab.

Con't....
 

spiroagnew

Well-Known Member
Staff member
Dec 1, 2012
1,334
311
83
Scotch Block, ON
www.creditdotpinball.com
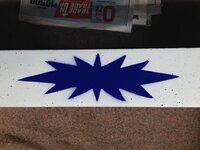
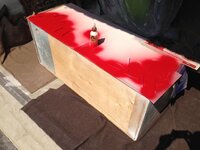
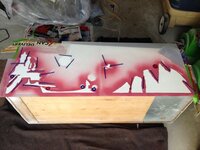
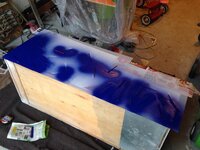
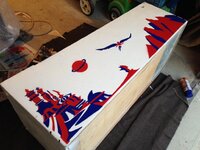
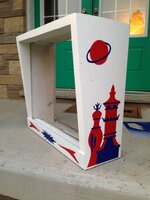
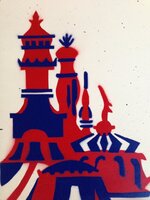
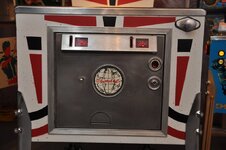
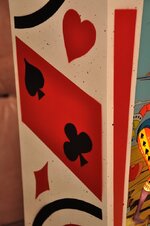
Finally, time for the rubber to meet the road: stencil application! I went with Belton Molotow Premium rattle-can paint again, in #24 Ultramarine Blue and #14 Signal Red. I sprayed the blue sunburst on the front of the head first to get a feel for the product, and wasn't too happy with the colour: it looked a little too purple for my liking. Once I got working with it though, its blue-ness came through and matched the original nicely. The velum material I used for the stencils worked like a charm. I wouldn't hesitate to use it again or recommend it to someone re-stenciling a cabinet with these types of rudimentary graphics. The Molotow paints were quick-drying, and were dry to the touch in less than ten minutes, making the process fly by. I weighted down the velum masks with large fencing nails and washers in the areas which had the tendency to pull up—mostly curved or un-attached cuts. Since it was weighted down, I didn't have to tape down the stencil, which is key when taking the stencil off when the painting is done. If taped down, there is a good chance the stencil will shift about when you are fiddling with unsticking the tape and ruin the clean lines you just laid down. The velum produced a nice amount of overspray in some areas and nice neat lines in others, just like the original Gottlieb stenciling. One can each of blue and red were more than enough to complete this leg of the paint job. Again, the Molotow coverage was fantastic. One coat sprayed about eight inches from the cabinet produced both consistency and solid colour. The blue had no problems covering the red colour traps from the first layer. At $6.50CAD per can, you can't go wrong with the Molotow brand for this type of project.

IMG_6369.JPGIMG_6370.JPG IMG_6374.JPG IMG_6373.JPG IMG_6376.JPG
IMG_6378.JPGIMG_6379.JPG IMG_6384.JPG IMG_6381.JPG IMG_6380.JPG

That's about it really. I'm extremely impressed with the way the cabinet turned out, on this, my first cabinet re-paint. I can't take full credit though, I had some extremely high quality materials to work with that made the job a breeze. I also have to admit that I did NOT refinish the top of the head of the game...I couldn't stand to erase the serial number off of the game. Perhaps someday I will go back and strip it off, but I'm such a numbers nerd and a staunch supporter of the Internet Pinball Serial Number Database that I just couldn't do it. And its the top of the head, nobody's gonna see it anyhow. I can't wait to get the game back together...then the headaches really begin: dealing with mechanical issues, me being a very inexperienced electro-mechanical troubleshooter! Wish me luck!

Epilogue: It appears I'll be doing some cabinet repainting for some GTA collector friends. Working on other people's games will do a number on my nerves, but hopefully their cabs will turn out as decent as mine did.

End.
 
  • Like
Reactions: DRANO

brewmanager

Active Member
Nov 14, 2012
631
115
43
Scarborough, ON
My OXO cab looks like it was found in a barn.

Mostly because it was found in a barn. Can't wait to see what rob does to it!

Amazing work on solar city rob!
 

mwong168

Administrator
Staff member
Nov 14, 2012
6,682
1,452
113
46
Toronto
You did a great job Rob! Can you come refresh my slightly faded Johnny Mnemonic cab too?? :cool:
 

DRANO

Super Member
Nov 15, 2012
2,827
519
113
Mississauga
Super nice Rob!
Thanks for posting so many details.
Nice option on the vellum. I'm all for an option that's easier to work with than card stock. That stuff kills my fingers.

Now that I have a CPR playfield for my Joker Poker I'm thinking the cab needs the same treatment ;)
 

spiroagnew

Well-Known Member
Staff member
Dec 1, 2012
1,334
311
83
Scotch Block, ON
www.creditdotpinball.com
2a75f950f09d1f3e8c95a8e23b9815db.jpg


Just got finished doing a Gottlieb Jacks Open cabinet for a member of the board. Turned out a-OK. If I ever find a Jacks Open for myself, I'll have the stencils ready to go!
 

mwong168

Administrator
Staff member
Nov 14, 2012
6,682
1,452
113
46
Toronto
That looks fantastic Rob and can't wait to see how your next project cab comes out for your next client.
 

WARLOCK

Administrator
Staff member
Nov 14, 2012
1,824
208
73
54
The Bluffs, Scarborough
lol. I had pretty much decided it is time to get my hands dirty on that EM. Just need to locate a prime part from Hanley.
Good thing I have Gottlieb Playmates right beside it as the go to reference machine. Only difference should be the add-a-ball unit.
 

goomba

Member
Aug 30, 2013
67
3
8
GTA
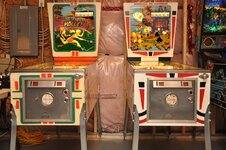
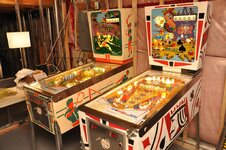
Rob did a fantastic job on my Jacks Open. The game was yellowed with age, had some letters carved in the head, and the front corners of the cabinet were separating and basically falling apart. After Rob's treatment the corners are crisp, there is no trace of the carvings, the colours are beautiful and the spatter is just right.

I'm attaching a few images showing the overall look, the cabinet corner, the location on the head where the carvings were, and a comparison between it and the Volley next to it that hasn't gone through Rob's hands, yet :) Jacks Open's colour was very similar to that Volley.


DSC_0665.JPG DSC_0670.JPG DSC_0674.JPG DSC_0672.JPG DSC_0668.JPG DSC_0675.JPG DSC_0677.JPG