• We have upgaded to the latest version of XenForum and the process finished without any errors!!!! Enjoy the new forum!

Spiroagnew's SPRAY & PRAY Cabinet Re-Stenciling

spiroagnew

Well-Known Member
Staff member
Dec 1, 2012
1,334
311
83
Scotch Block, ON
www.creditdotpinball.com
I started re-spraying cabinets late this summer, and started with my Gottlieb Solar City; the long-winded write-up of which can be found here.

Since, I have had the pleasure of working on a few cabinets for some of the members of this board. In about seven weeks, I completed the stripping, filling and re-stenciling of five cabinets, working on-and-off as time, children and my full-time job allowed. I was working out of my garage to a certain extent, but mainly in my driveway. Our classic car is stored in the garage, so dust and overspray isn’t something I’d want to introduce to the area--thus, as the cold weather approaches, I think the spraying season is over. I created this thread to share some of the photos of the cabinets I worked on further to the Solar City (photos for that project are well documented in the above linked thread).

If anyone needs some repainting done, I’d be happy to help, just shoot me a PM.
 
  • Like
Reactions: WARLOCK

spiroagnew

Well-Known Member
Staff member
Dec 1, 2012
1,334
311
83
Scotch Block, ON
www.creditdotpinball.com
Goomba's Gottlieb Jacks Open

Some of the worst damage--high scores etched into the wood:
00-jacks4.jpg

The completed head:
00-jacks5.jpg

The complete package:
00-jacks6.jpg

The game reassembled in Goomba's gameroom:
00-jacks111.jpg

Corner detail. The entire wood coin door panel had broken free from the rest of the cabinet when it arrived. This was obviously repaired!:
00-jacks1.jpg

Backbox detail:
00-jacks2.jpg
 
Last edited:

spiroagnew

Well-Known Member
Staff member
Dec 1, 2012
1,334
311
83
Scotch Block, ON
www.creditdotpinball.com
CJBob's Gottlieb Joker Poker

I took on this project after CJBob saw my Solar City thread and was feeling a bit overwhelmed with the whole repaint process. He had bought cab stencils from Twisted Pins which he provided, but I ended up cutting my own stencils, as mine would not provide the "Gottlieb overspray" effect I was after (and I'd not heard good things about the Twisted Pins products). This one was a slam dunk for me, as Drano had torn down his Joker Poker at the same time and wanted a repaint, too. One set of stencils, two cabinets painted back to back!

Some of the damage on CJBob's cabinet:
00-JP0333.jpg

The original finish of a JP head on the left versus my repaint on the right:
00-JOKER2.jpg

The completed head:
00-JOKER1.jpg

The body before attaching the hardware:
00-JOKER3.jpg

The completed body:
00-JP05.jpg
 
Last edited:

mwong168

Administrator
Staff member
Nov 14, 2012
6,681
1,450
113
46
Toronto
Great work Rob and if I ever get an older game (without a DMD :p) with a beat up cab I know who I am going to call.
 
  • Like
Reactions: spiroagnew

DRANO

Super Member
Nov 15, 2012
2,827
519
113
Mississauga
I know of a nice Melody that would love a facelift :p

But seriously... these cabs looks awesome.
I just brought home my Joker Poker a few days ago and now can't wait to do the CPR playfield swap.
My project backlog is pretty deep and, when Rob offered to start doing these, it was a huge load off my shoulders to be able to get one of those projects 50% completed.
I saw some of these other cabs in his garage and they look fantastic.... right down to the intentional-accidental overspray that almost every old cabinet has. Spanish Eyes was my favorite!
 
  • Like
Reactions: spiroagnew

spiroagnew

Well-Known Member
Staff member
Dec 1, 2012
1,334
311
83
Scotch Block, ON
www.creditdotpinball.com
Drano's Gottlieb Joker Poker

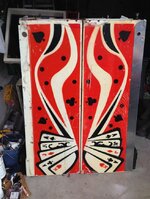
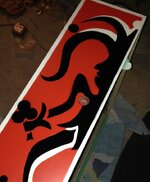
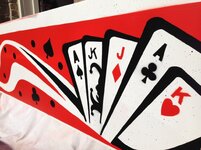
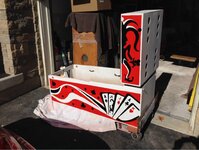
Boy am I ever sick of card themed games! Just kidding. This was a continuation of the Joker Poker marathon I started with CJBob's cabinet above. I was able to re-use the stencils I had cut for CJBob's project. The only change I made, at Drano's request, was to use the Molotow colour Vermillion instead of Traffic Red, as chosen by CJBob. The colours are very similar, with the Vermillion being just a hair lighter, and thus more accurately reflecting Gottlieb's original colour choice. In the end, it would take a super trained eye to spot the difference. You'd probably have to have the two sitting side-by-each to tell the difference. As an aside, this cabinet art is unique as it has letters, the "J", "K" and "JK" combo, that cannot be inverted. Most stencils of the era are simple mirror images; one side is painted, then the stencil is flipped to paint the other side. For Joker Poker, an extra stencil had to be made for those letters that would have been stenciled backwards if simply flipped over. I, too, had to create a secondary stencil just for the letters to make sure they were stenciled correctly.

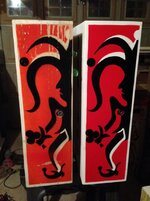
A tale of two Joker Pokers--Drano's on the left, and CJBob's on the right:
00-dranoJP0001x.jpg

Some detail on the re-painted head before the black layer was applied:
00-dranoJP0002x.jpg

One side of the completely painted head:
00-dranoJP0009xx.jpg

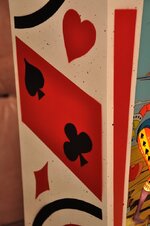
Detail of the completed cabinet:
00-dranoJP0002xx.jpg

The final outcome:
00-dranoJP0003x.jpg
 
Last edited:
  • Like
Reactions: WARLOCK

spiroagnew

Well-Known Member
Staff member
Dec 1, 2012
1,334
311
83
Scotch Block, ON
www.creditdotpinball.com
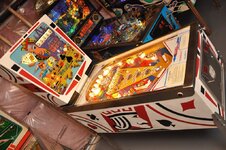
Spiroagnew's Williams Spanish Eyes

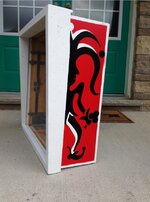
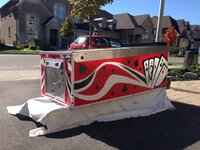
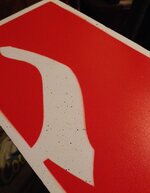
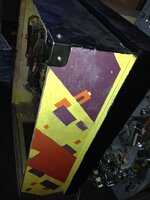
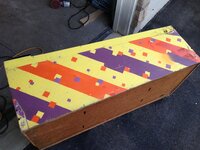
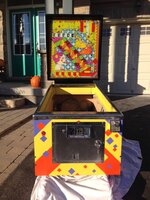
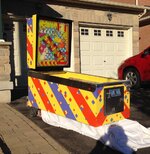
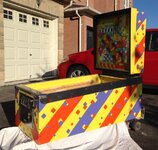
Finally! Painting another game for myself! Too bad it's a Spanish Eyes... The game, to many, is an eyesore, with garish paint colour choices and an odd looking Christian Marche backglass (hey, at least they aren't pointy people). I picked the game up from an older couple on Wolfe Island (near Kingston), who were downsizing. The game was on Kijiji for quite some time, and by the time I contacted them, they just wanted to get rid of the thing. One Sunday morning, I packed up my kid and a dolly in the SUV and made the three-and-a-half hour road trip to get the game. We had to take a ferry over to the Island, which pleased my kid to no end. The cabinet of the game was in pretty bad shape. It was missing a chunk out of the chipboard back panel of the main cabinet (quite a cost-cutting measure of the era) and had undergone an inspired, but poorly executed re-paint at some point. Thanks to the re-paint and the geometric design, this repaint was particularly confusing. Figuring out the paint traps and stencil orientation was a major pain in the rear...I'll take a card themed stencil any day! With some help from other Spanish Eyes owners on Pinside and IPDB.net, I was able to put together an accurate stencil to use. The Molotow spray paint came through with some accurate colours, and it was interesting doing spatter with silver paint instead of black due to the thin consistency of the metallic paints. All in all, I think it turned out pretty good. The game probably isn't a keeper, but its one of the first EMs I ever remember playing (this one and GTB Buccaneer). I'll clean up the playfield (which was in decent condition), play it for a bit and then move it along for what I have into it. It was more of a painting experiment than it was cleaning up a grail. I can take solace in the fact that one more good looking EM will be back in circulation...even if it is a Spanish Eyes.

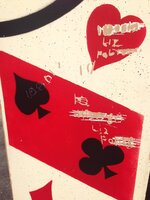
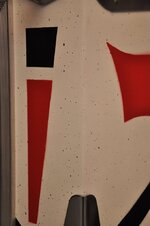
Some of the interesting re-paint liberties taken on the head:
IMG_6539.JPG

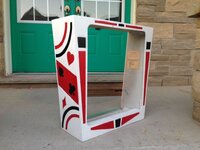
The original cabinet:
IMG_6606.JPG

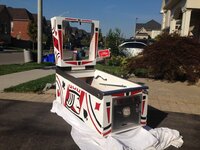
Repainted cabinet, front view:
IMG_6994.JPG

Repainted cabinet, side:
IMG_6995.jpg.JPG

Repainted cabinet, side:
IMG_6996.JPG

Detail of side artwork:
IMG_6997.JPG
 

Che

Member
Mar 19, 2015
68
37
18
51
Waterloo
Beautiful work Rob! Stripping the cabinet must take a lot of work/time! Could you achieve a similar result by priming over the existing paint instead? How would you rate this as a diy project?
 

REVOLUTION

Administrator
Staff member
Nov 13, 2012
2,314
77
48
46
GTA
www.pinballrevolution.com
Pretty awesome work, rob! Are you setting up a spray area in your garage for the winter or is that it till next year?

Also are you getting your stencils from the Pinball Pimp?
 
Last edited:

spiroagnew

Well-Known Member
Staff member
Dec 1, 2012
1,334
311
83
Scotch Block, ON
www.creditdotpinball.com
Pretty awesome work, rob! Are you setting up a spray area in your garage for the winter or is that it till next year?

Also are you getting your stencils from the Pinball Pimp?

Shutting down for the winter, unfortunately. Although with the weather we've been having I could probably squeeze in one more.

I cut all my own stencils. Time consuming but very Zen...
 

DRANO

Super Member
Nov 15, 2012
2,827
519
113
Mississauga
Beautiful work Rob! Stripping the cabinet must take a lot of work/time! Could you achieve a similar result by priming over the existing paint instead? How would you rate this as a diy project?

Simply priming over the cab will not address flaking paint, cabinet scratches, missing wood etc... Basically, you'll just see all that stuff right through the paint. A good sanding, filling and sanding again is always best practice for any cabinet restore. Then, once primed and sealed, you should give it one last light sanding because the primer has a tendency to raise the woodgrain again and your final finish won't be smooth.

It's not THAT big of a deal and, as long as you take your time, this is a job that most people could do if they put their minds to it.
Cutting the stencils can be a bit of work, but Rob seems to have found a good material and process to get it done more efficiently. When I did my Centigrade 37 with heavy board, my hands had blisters after cutting them.
 

spiroagnew

Well-Known Member
Staff member
Dec 1, 2012
1,334
311
83
Scotch Block, ON
www.creditdotpinball.com
Cutting the stencils can be a bit of work, but Rob seems to have found a good material and process to get it done more efficiently. When I did my Centigrade 37 with heavy board, my hands had blisters after cutting them.

I used glossy poster board for my first foray into stencil cutting which did an okay job but the board had the tendency to warp after paint was applied (and since you have to use the stencil at least twice, once for each side, it was a pain). Also, the heavy board was unforgiving if you happened to mis-cut or your blade strayed off the tracing. The material I use is soft and flexible, but extremely durable. All this talk about stencilling coupled with the good weather, makes me want to repaint another cab!
 

spiroagnew

Well-Known Member
Staff member
Dec 1, 2012
1,334
311
83
Scotch Block, ON
www.creditdotpinball.com
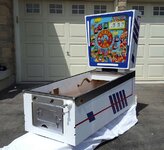
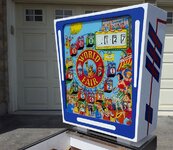
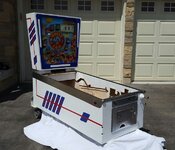
Spiroagnew's GTB World Fair

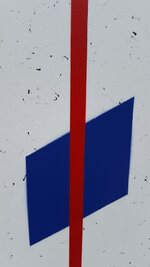
I took a break from the Six Million Dollar Man refurb (because I hate working with sticker stencils) and jumped into repainting the cab on my GTB World Fair. Pretty straightforward stenciling on this one—ninety and seventy-five degree angles all around and no coin door art! It would be my first attempt at cabinet webbing, all the other re-stenciling I’ve done to this point has been spatter. Instead of using Molotow rattle can paint for the white base, I laid down the white in a cabinet grade waterborne alkyd by Dulux with my LVLP spray gun. It is a process I’ll be doing from now on as the Molotow seems to mark up way too easily...whereas this alkyd is manufactured to withstand bumps and rubs a little better (being kitchen cabinet grade paint). I stuck with Molotow rattle can paint for the coloured stenciling, because my cut-and-weighted-down stencils probably couldn’t withstand the air pressure shot from the spray gun…and would yield far too much overspray.

As for the webbing process, it was met with a ton of research before deciding how to proceed. Old master Clay Harrell covers webbing in his EM repair guide, and uses a $2 wire brush (he’s proud of his $2 wire brush, let me tell you) to fling lacquer on the cabinet. The pictures in the guide are low resolution, and, frankly, did not depict the desired result. Canned Krylon webbing spray (direct from the can) was out of the question, as I’d seen way too many good cabinet re-paints ruined with strings of the thick canned sludge laid upon them. Two discussions on the subject of webbing are worth a look:
  • The first is on rec.games.pinball where Mr. Harrell chimes in to defend his $2 wire brush technique against those that suggest using a spray gun and high quality lacquers. In the end I was convinced by EM-veteran “Marvin G” and his mini-tutorial (in the above thread) of using lacquer shot from a spray gun at a very high pressure.
  • Studying paint choice was next…as finding true high-quality lacquers is a bit of a chore. The Pinside thread here pointed me towards a very high quality lacquer used to paint (or dip) archery arrow shafts. Also suggested, was spraying the Krylon webbing-in-a-can into a secondary jar, thinning it with lacquer thinners (as it is a lacquer), and spraying that concoction through your spray gun. That Krylon canned webbing is a regularly stocked item at Michaels, however is only available in black (the Krylon website lists grey and white as well but looks to be unavailable at Michaels).
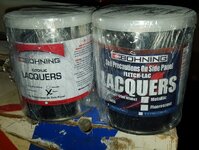
In the end, I got myself a cheap spray gun from Harbour Freight, a ten-dollar syphon feed touch-up jobber with a 1.4mm tip, and sourced white and black lacquers mentioned in the Pinside thread above from 3 Rivers Archery. Shooting pure black onto the white cab doesn’t really give the same effect as the original webbing; it was more of a grey, so I mixed a custom shade from the two paints taking the edge off of the stark black against the white. Darkness of the webbing seems to depend on the era of game…or what they had lying around at the Gottlieb factory at the time! I cranked the pressure way up on my compressor and laid the webbing down from the gun from about a foot away. No thinning was needed. Since the lacquer is so thick, it sputters and webs as it exits the gun…giving the desired effect, and one that I think is pretty close to original. I did the whole cabinet using only a teaspoon of the paint, so given the two pints I got from 3 Rivers Archery, I should be good for webbing lacquer for about twenty more years! Stencil cutting and painting was a relative breeze considering the simplicity of the design, a welcomed way to finish up this cabinet project.

I’m indebted to user “4star” from Aurora for sharing his restoration techniques on this era of games. His restorations are top notch, I’d argue some of the best in North America, and if I can get my games to look half as good as his, I’ll be satisfied. He is a World Fair owner as well, and sent me quite a few measurements of the cabinet art to help recreate a stencil—some of the art of my game was whitewashed over with latex, and lost.

Now that the spring has sprung, I can start painting cabinets at a better clip. Lined up in the queue for friends I have three Volleys (!), a Melody and maybe a GTB Soccer. I need to wrap up my own Six Million Dollar Man cab, and, time permitting, start on GTB 2001, GTB North Star, Bally Hotdoggin' and any other games with trashed cabinets I foolishly buy.

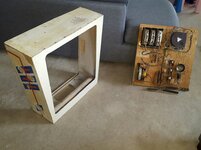
Side head, original finish.
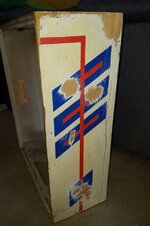
000-pins83.jpg

Side body, original finish.
000-pins85.jpg

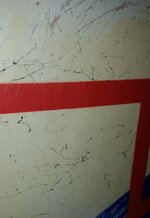
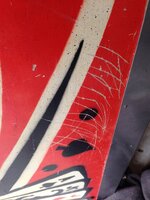
Webbing detail, original finish.
000-pins82.jpg

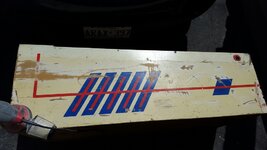
Head with missing art.
000-pins81.jpg

3 Rivers Archery Lacquers.
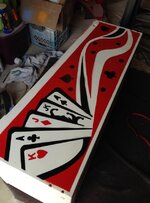
000-pins84.jpg
 
Last edited: