• We have upgaded to the latest version of XenForum and the process finished without any errors!!!! Enjoy the new forum!

Spiroagnew's SPRAY & PRAY Cabinet Re-Stenciling

DRANO

Super Member
Nov 15, 2012
2,827
519
113
Mississauga
She's come a long way! Figuratively as well as literally.
Simply a beautiful game. Good on you for saving it!
 

spiroagnew

Well-Known Member
Staff member
Dec 1, 2012
1,334
311
83
Scotch Block, ON
www.creditdotpinball.com
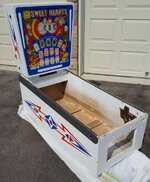
Drano's GTB Sweet Hearts

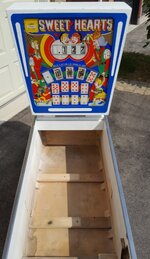
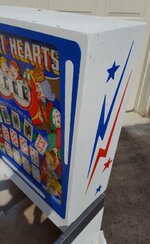
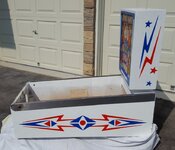
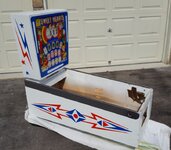
Another of Drano's games gets a facelift. Sweet Hearts' geometric design is elegant in its simplicity, but it's obvious Gottlieb was assigning cabinet designs with disregard for the game's overall theme. Otherwise, there should have been some hearts on here somewhere, right? It got lightning bolts and stars instead. This one used a very light grey webbing effect, rather than the much darker grey that's normally used on this era and later Gottlieb games.

The nice weather is working in my favour. I thought I'd need to rush to squeeze a couple of my own projects in before the cold weather hit, but at this rate, I'll be spraying cabs in my shorts 'til Christmas!

000-pins7.jpg

000-pins6.jpg

000-pins5.jpg

000-pins4.jpg

000-pins2.jpg

000-pins3.jpg
 
  • Like
Reactions: WARLOCK

DRANO

Super Member
Nov 15, 2012
2,827
519
113
Mississauga
Woohoo! My Spiro-cab collection will soon be the envy of most any man ;)

Should post a before pic. This one was especially tired.

Thanks again!
 

spiroagnew

Well-Known Member
Staff member
Dec 1, 2012
1,334
311
83
Scotch Block, ON
www.creditdotpinball.com
spiroagnew's STERN Big Game

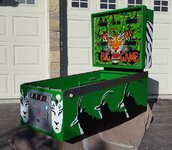
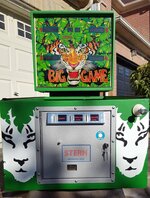
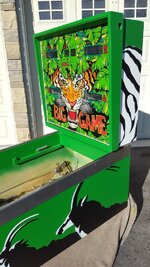
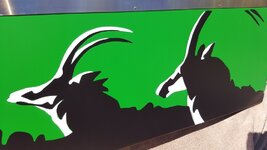
The good weather continues, so I decided to give my Big Game a fresh coat of paint. I picked this game up from Allentown this year at a steal of a price, but the game needed some love (as they all do). I recently touched up the playfield, and Drano cleared it, so I figured I'd go whole hog and get the cabinet looking good as well. I didn't use a commercial stencil kit this time, I cut my own. Stern's stencil work back in the early solid state era was pretty...well...shitty (compared to Bally)...so the stencils are pretty forgiving. I like the different colours Stern chose for their base; green here on Big Game, purple for Ali, a deep navy for Nine Ball, etc., and they really stand out among the reds and blacks used by Bally. Anyhow, I'm hoping to get ONE MORE cabinet done before the snow flies, a Bally Kiss...however I'm patiently waiting for Pinball Pimp to make the stencils commercially available (the site says "Coming Soon" and has for quite some time). I'm currently working on the re-assembling the Big Game playfield, and I'll post some pictures once the game is complete.

000-pins2.jpg

000-pins3.jpg

000-pins5.jpg

000-pins4.jpg
 
  • Like
Reactions: WARLOCK and DRANO

spiroagnew

Well-Known Member
Staff member
Dec 1, 2012
1,334
311
83
Scotch Block, ON
www.creditdotpinball.com
Even though I have not been very active myself lately, I'll do my part and post a little original content in this thread (and break up the steady stream of FS and WTB ads the site is now known for).

spiroagnew's Bally KISS

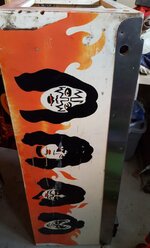
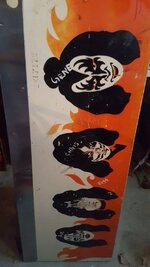
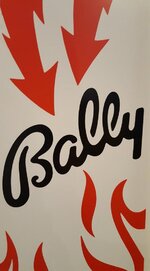
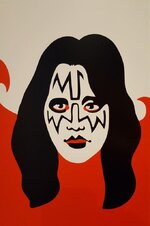
I've been wanting a Kiss for many years, as long as I've been collecting. I can remember playing one in my Uncle's garage as a kid (he also had an EM upstairs in the guest room) so even though the gameplay isn't aces by any stretch of the imagination (light spinners, rip spinners, don't drain), I'm a fan of Kiss' music output, I love the artwork and I have a bit of a soft spot for it.

The game had always been a bit cost prohibitive, given its status as "the Ultimate Kiss Kollectable" (Uncle Gene Simmons' words, not mine). This particular game popped up on Kijiji last fall--a few are probably familiar with it. The playfield was beat and so was the cabinet, but the game played well enough. I immediately jumped it in the restore queue. I did some playfield touchups (okay, a lot of playfield touchups) and then sent it to Drano for some finishing touches (the rub-on text he's covered in his "Stern Sisters" thread) and a nice clearcoat. It turned out absolutely beautiful.

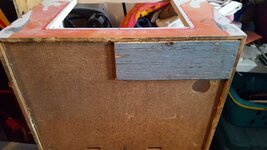
As for the cabinet, I was running out of fall weather to paint by. Since the original cabinet required some major work to the bottom, and the game was certainly a keeper, I sourced a stripped, filled and primed Bally cabinet (Lost World or Super Sonic, I think?) to stand in for the Kiss cabinet. The inside rails that the playfield sits upon were a bit different from the donor cab to Kiss, and it just needed a section of the inside wood rail removed in order to accommodate the left side Kiss drop targets. Having a cab already primed made the project a breeze. I'll probably end up using the original Kiss cabinet somewhere down the road.

20180212_171910.jpg

20180212_171923.jpg

20180212_171938.jpg

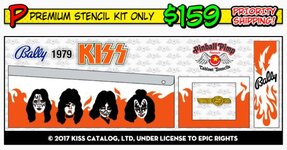
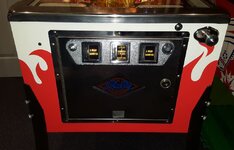
As luck would have it, I got one of the first few sets of Kiss stencils that Pinball Pimp made available...he was just finishing getting them licensed by Kiss as I was getting ready to paint. Like all of his stuff, they are absolutely beautiful and are a dream to work with. In Kiss' case, there is no coin door stencil to use--the orange side stencil wraps right around to the coin door, so no more fussing to get the art to line up...it's a real neat touch to make the cab look its best and simplify the process.

pimp.jpg

http://pinballpimpstencils.com/?page_id=3917

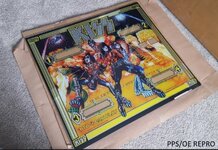
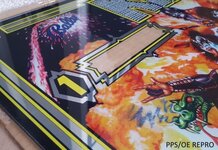
Again, I decided to do this at the most opportune time: as PPS released a repro glass for Kiss right in the middle of this restoration. The game came with the European/German glass with the rounded "S" and was flaking in some areas, so I decided to spring for a new glass. PPS/Outside Edge did a nice job on the glass, and reproduced the mirroring effect well (which is key for this game--BG Resto just uses a grey colour to sub in for the mirror effects on his glasses). I installed a set of Pinitech UNO displays, in white, I think they look killer, and promote the chrome/steel feel on the backglass.

000-pins2.jpg

000-pins3.jpg
 
  • Like
Reactions: WARLOCK

spiroagnew

Well-Known Member
Staff member
Dec 1, 2012
1,334
311
83
Scotch Block, ON
www.creditdotpinball.com
spiroagnew's Bally KISS con't

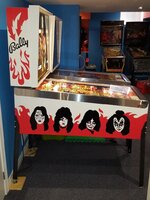
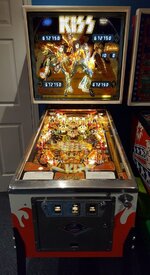
I didn't get glamour shots outside, as winter rolled in quire quickly...here's a few shots from the gameroom. I sprung for a new set of siderails for this game. I've been pretty lucky saving rails throught the years, but I figured it would save some work, and be the cherry on top. This should be it until the spring for cabinet painting!

20180212_134909.jpg

20180212_134938.jpg

20180212_135006.jpg

20180212_135108.jpg

20180212_135020.jpg

20180212_135041.jpg
 
  • Like
Reactions: WARLOCK and DRANO

spiroagnew

Well-Known Member
Staff member
Dec 1, 2012
1,334
311
83
Scotch Block, ON
www.creditdotpinball.com
spiroagnew's WMS Pharaoh

I’m glad this one was for my own personal collection, and not for someone else, because it gave me fits and took me way longer than it should have. I apologize for the long post up front.

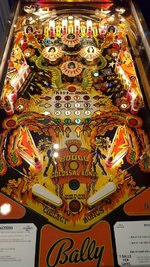
I bought this Pharaoh about a year ago off of MAACA. I’ve acquired a new BG Resto backglass and will be experimenting with adding an Outside Edge Hardtop to the game, as the mylar lifted quite a bit of the artwork off of the playfield during teardown.

The game is one of Williams’ tetralogy of dual level games along with Solar Fire, Black Knight and Jungle Lord. The very first game I ever owned in the hobby was a Solar Fire, and I’d like to own a nice copy of each of these games at some point, even though I much prefer Bally and Stern games from this era. I’m partial to Pharaoh though, the theme, the artwork, the speech, the gameplay…I think it’s the best of Williams “fantastic four” (and that’s highly debatable point, I know).

I offered to capture the cabinet artwork for the Pinball Pimp, so that he could add Pharaoh to his lineup of stencils, and in turn I was able to acquire a set to use in this restoration. There were actually two different versions of the coin door cabinet art: one seemed rushed and uninspired on early copies of the game, and the other was more fleshed out on later copies. The yellow colour used seems to differ on the two versions as well. The yellow on the earlier games matches that of a lighter yellow used on Black Knight, the later games used a more orange-y tone. My game had the earlier artwork with the brighter yellow, but the Pinball Pimp recreated the better looking artwork for his stencils.
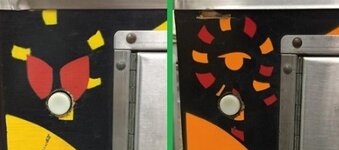
000-pinskys5440.jpg

It is also interesting to note that when I aquired the game, I saw a faint outline edges of a different stencil that looked to be painted over on the head of the cab. I identified this as the artwork for Black Knight. Sure enough, when I was stripping the Pharaoh paint off of the head, it revealed the Black Knight artwork underneith that had been painted over. This was certianly a factory coverup. They must have had a few BK heads lying around at the end of the BK run and at the beginning of the Pharaoh run. The main cab didn't have any cover-ups--it was a Pharaoh original. It's quite fitting to find this kind of archeology on a Pharaoh cabinet, isn't it?
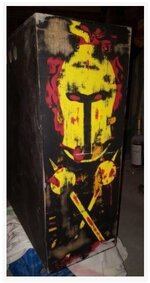
000-pinskys5440-1.jpg

I usually subscribe to the “if it ain’t broke, don’t fix it” mentality, but I’m ashamed to say I strayed for this project. Instead of using the tested and true Molotow rattlecan paint, I thought I’d give the game a high gloss look, and I went with the Krylon brand of rattlecan paints. The Pinball Pimp recommends using Krylon or Rustoleum rattlecans, so I thought, why not? Further, the brand had a deep red and a yellowy-orange in gloss that matched well, to lay onto of their standard gloss black.

The cabinet was stripped, sanded and primed using my regular methods. The black base was applied with little issue, but I did find that it wasn’t drying well. I gave it a week to cure, putting it outside on warm breezy days. When it came time to lay down the first yellow layer, I had multiple instances of the paint “crinkling”. It just so happened that there was a Pinside thread where a collector was having the same problem with Rustoleum paint. There are a few reasons why this may have happened: one of the layers wasn’t completely dry, the solvents reacted badly, weather conditions prevented proper adhesion, etc. The bottom line was, the yellow layer was ruined in a few spots, and I had no choice to strip the cabinet down and start all over again. To make matters worse, I had used up the yellow layer of Pinball Pimp stencils which are one-time use.
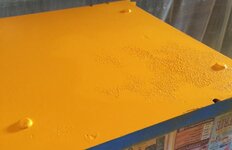
000-pinskys50.jpg
(From the Pinside thread mentioned, here's an instance of what was happening, except it was on my stencil layer, this one is on the base layer.)

I took a tracing of the yellow layer and decided to cut my own stencils instead of hassling the Pinball Pimp for another partial set (and paying for them). I also decided to go back to the Molotow brand of paint. I usually source the paint locally, but I was now told that the Molotow spray has been recalled due to it not meeting Environment Canada standards. Just another setback. Luckily, Bombing Science in Quebec had the paint readily available to ship to me, at a great price, with a further 10% discount, free shipping, and a massive colour palate from the Molotow line to choose from. Bombing Science either didn’t bother to acknowledge the recall, or they are shipping paint that now conforms to standards.

With the stencils cut and the new paint in-hand, I banged out the project with no other hiccups. Well, there was one hiccup…the Pinball Pimp stencil had one area where it wasn’t weeded properly. Check out the difference in the Pharaoh’s rear arm—one is filled and one isn’t. I’ll probably leave this slight difference that nobody will notice to remind me of all the trouble I went through to paint this damn cab.

Pictures to follow in the next post...
 
  • Like
Reactions: WARLOCK

superjackpot

Active Member
Nov 19, 2012
342
45
28
Mississauga, ON
I'm admiring the finished product. The artwork looks wonderful and is worthy of this level of restoration effort.
With all the hiccups you encountered I guess it helped that you were doing this for yourself.
Great work!
 

roar

Well-Known Member
Oct 22, 2015
645
345
63
49
Waterdown
@spiroagnew, I'm curious to know how you prep for sanding/stripping the cabs to avoid any lead paint concerns. My SBM project could use repaint but the lead paint concerns have me questioning whether it is something I'm equipped to handle... no respirator, HEPA sanders etc, what lengths do you go to?
 

spiroagnew

Well-Known Member
Staff member
Dec 1, 2012
1,334
311
83
Scotch Block, ON
www.creditdotpinball.com
A lead test was conducted on a couple of cabs and the results shared online. The games fell within the 1978-81 era. The games were found to not have used lead paint. One was a Bally if I remember correctly. That said, it's near guaranteed that lead paint was employed earlier in the 70s and before.

I still approach any game with care. I strip the games first with Circa 1850 (or equivalent brand) gel-based stripper. This gets rid of the majority of the paint, leaded or otherwise. When I'm sanding down the remaining cab, I've got an N99 mask, gloves and goggles. It's done out of doors, obviously with a regular sander. I'll disrobe out of doors and throw my clothing straight in the laundry as to not track as little as possible into the house.

YMMV. This ain't gospel. It's your own health, make yourself feel comfortable.
 

roar

Well-Known Member
Oct 22, 2015
645
345
63
49
Waterdown
A lead test was conducted on a couple of cabs and the results shared online. The games fell within the 1978-81 era. The games were found to not have used lead paint. One was a Bally if I remember correctly. That said, it's near guaranteed that lead paint was employed earlier in the 70s and before.

I still approach any game with care. I strip the games first with Circa 1850 (or equivalent brand) gel-based stripper. This gets rid of the majority of the paint, leaded or otherwise. When I'm sanding down the remaining cab, I've got an N99 mask, gloves and goggles. It's done out of doors, obviously with a regular sander. I'll disrobe out of doors and throw my clothing straight in the laundry as to not track as little as possible into the house.

YMMV. This ain't gospel. It's your own health, make yourself feel comfortable.

Thanks for the prompt reply! Sounds like I should invest in a lead test before going too far, at least then I'd have the answer as to whether the paint has lead in it. From the cabinet repair thread on pinside I was left to believe all stencilled cabs pre-90's were likely painted with lead paint.
 

roar

Well-Known Member
Oct 22, 2015
645
345
63
49
Waterdown
Thought I'd post a quick follow-up on this. I picked up a lead test kit at Home Hardware for $20 after tax. Tested my SBM from 81' I believe. Tested the paint from several area's and all 3 colours. I could not get a positive reading for lead. Doubted my testing kit, ran a cotton swab across the back of one of the display boards and it lit up for lead immediately. I will still proceed with caution when/if I strip the cabinet but thanks for the words of wisdom.
 
  • Like
Reactions: DRANO