• We have upgaded to the latest version of XenForum and the process finished without any errors!!!! Enjoy the new forum!

Vewlix Clone MAME/Console Project

mwong168

Administrator
Staff member
Nov 14, 2012
6,681
1,450
113
46
Toronto
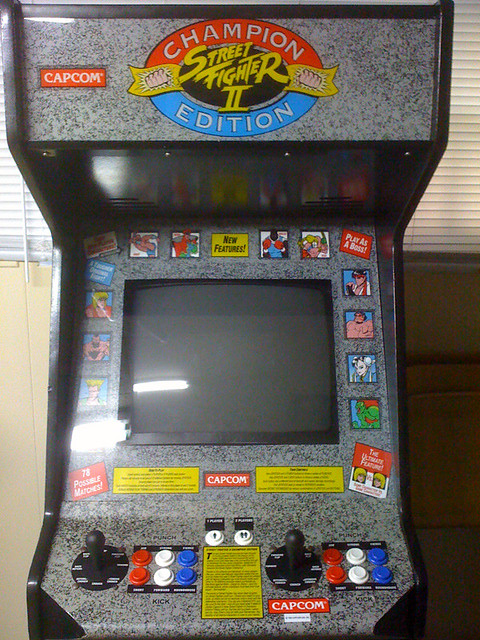
I've been playing with emulation since my early days in university back in 1997-2001 and building MAME and PinMAME cab projects since 2008 for myself and friends. I got myself a dedicated Street Fighter II Champion Edition cabinet in 2009 which I cleaned and fixed up before I MAME'd it.
5716461034_8328a75432_z.jpg


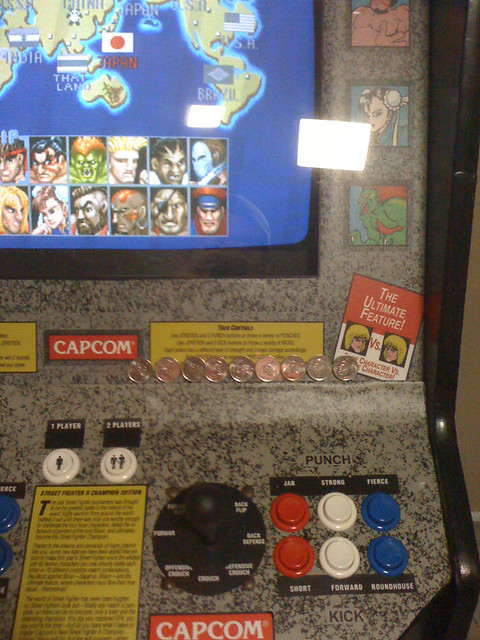
This was my grail and this actual style of cab was the one I spent the most time on kicking ass at the local arcades. I had some old friends over who I use to play with so I took it off free play and made it so we all had to coin up to face off against each other like we use to back in the day at the Allen Court Pool Hall across from Bayview Secondary School :cool:
5716461792_539b559bab_z.jpg


As my daughter got older she started to play more with my pins and vids. She really enjoyed playing the beat em' ups like Ninja Turtles or Simpsons. It sucked that we could only play 2 players whenever her cousins and friends would come over. I always envisioned getting a Nintendo red tent and turning it into a 4 player dual screen MAME setup.

Sure enough in 2015 that vision became a reality because one had popped up on kijiji and was being sold by an old friend. Funny enough this friend was the same person I got my SF2 cab from too and he actually wanted it back. So we worked out a trade and it worked out for everyone in the end.

I never documented or posted pics of my red tent because I was scared all the Nintendo fanboys or puristswould hang me for not restoring this back to its original boring form. Thankfully it was already butchered and looked like it lived a very rough life. Here is what I started with.
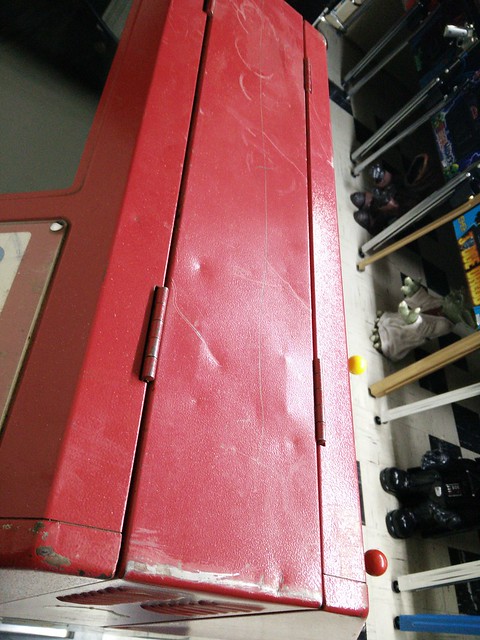
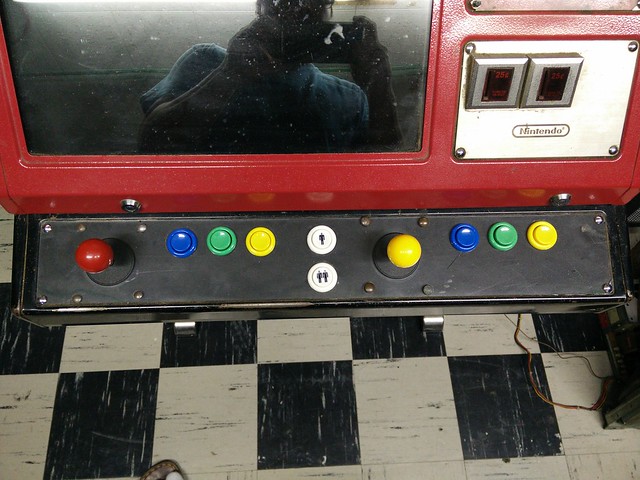
16694941815_47576fe299_z.jpg


16669002166_655103e10b_z.jpg


16693903052_f90aa7a25b_z.jpg


16074983193_1cb778f510_z.jpg


16507548160_9abaf1242e_z.jpg


I didn't care for the internals which I believe were wired to play JAMMA boards. I sold off the CRTs and whatever else I stripped out of the cab that I didn't need. I replaced all the controls with iL 8 way euro joy sticks with custom hollow shafts so I could light up RGB ball tops. I also used iL translucent buttons and put in RGB led boards in each one. These controls were not cheap and by the time it was all said and done I had spent close to $350usd! I figured this was going to be my forever keeper MAME setup so I didn't spare any expenses.

I planned to use LED blinky so only the controls would be dynamically lit for whatever game you had selected. I had Player 1 and Player 3 wired to one side and Player 2 and Player 4 on the other side. So if you picked a two player game only the controls for Player 1 and Player 2 would be lit. I even had it setup so the controls would light up in different colour schemes to match the game too, so for Street Fighter II the buttons would be lit up red, white and blue.
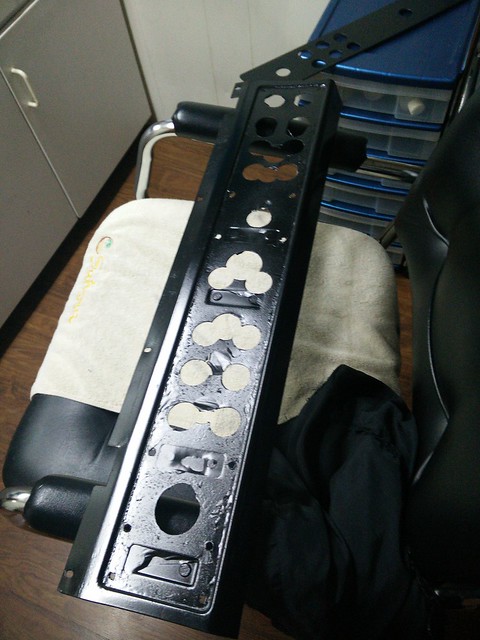
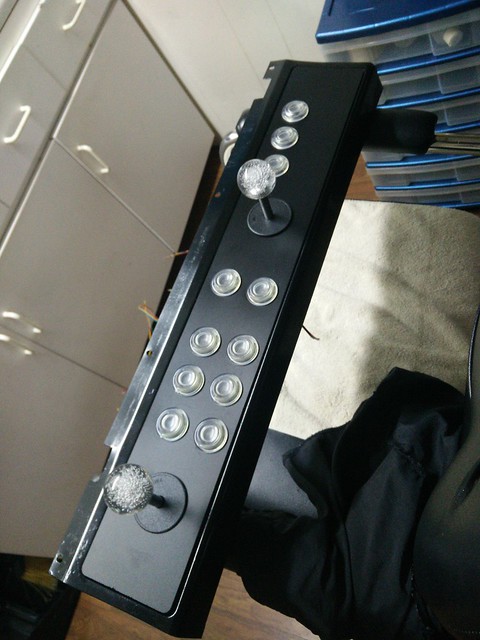
17230027590_decb68a2b5_z.jpg


16795072734_8fa8aae8aa_z.jpg


17229829368_5ddc2aa8d1_z.jpg


The wiring was quite a pain in the ass and I went through 2.5 spools of wire (~250') by the time it was all said and done. I probably went a bit overboard with the zip ties but I was trying to keep the wiring tight and neat.
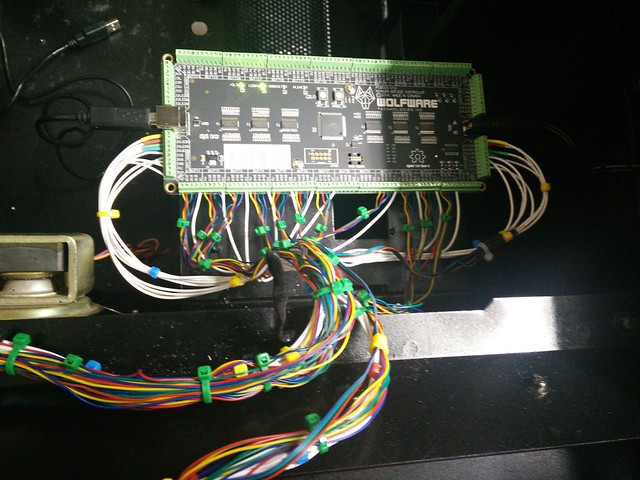
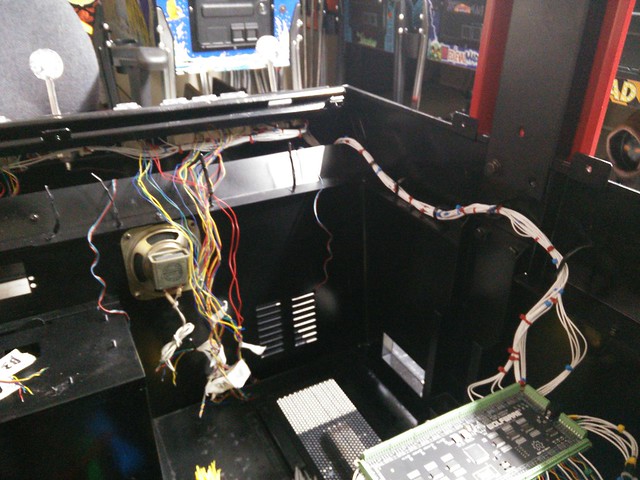
17639050749_7941675286_z.jpg


17820046036_0172b6c3e4_z.jpg


17735051468_c2d6e12be1_z.jpg


17707978379_3e114b0ec7_z.jpg


Installed the PC after I got the control panels all wired up and lit up. Installed a Lepai mini amp to drive the existing stock speakers.
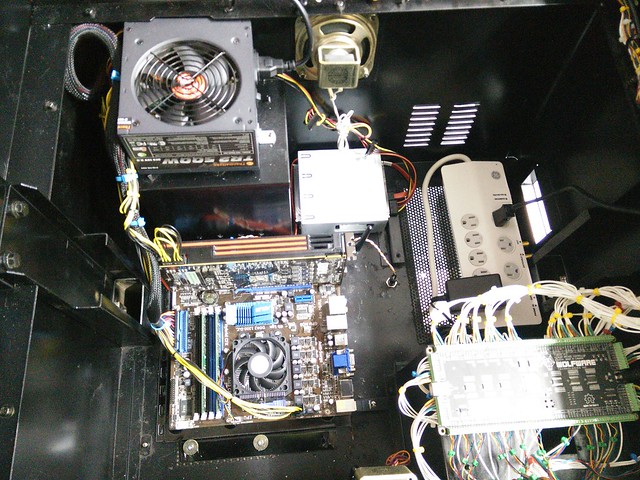
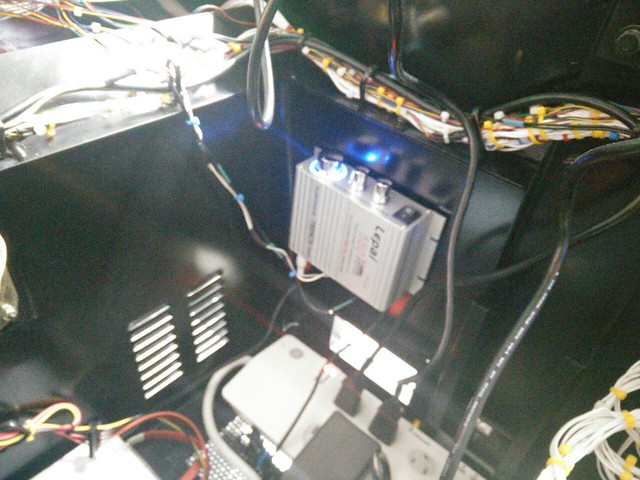
18707560388_856ac82b0a_z.jpg


18927899491_acd48dcbc9_z.jpg


I picked up four Dell 19" LCD monitors off kijiji from a guy who was into stocks and upgraded to a bigger wide screen setup. He originally wanted $80 for all four and I initially offered him $40 for two. Then he said give him $50 and take them all away :lol: These monitors were a perfect fit and I ran the PC with dual screens in a mirrored setup.
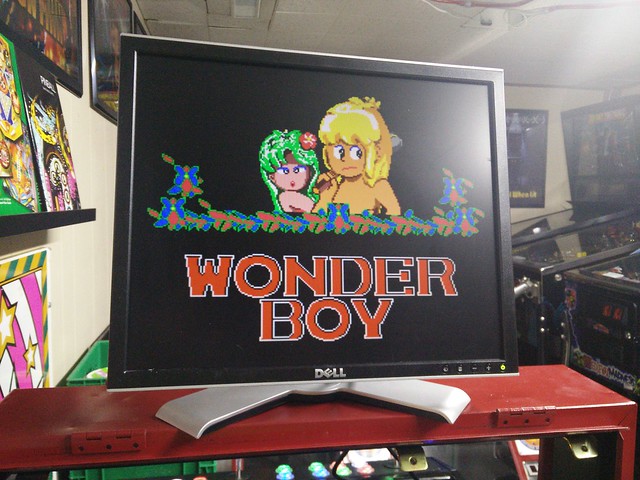
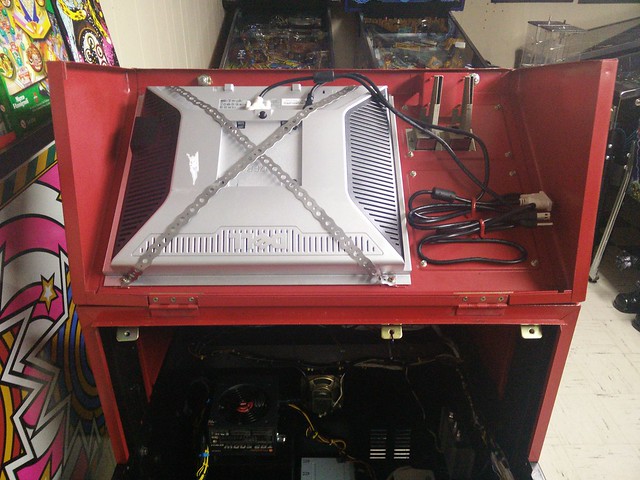
19060052685_f2e5036882_z.jpg


18768464300_e84303dd39_z.jpg


Not having the CRTs helps out a lot with heat management and accessibility to the components inside.
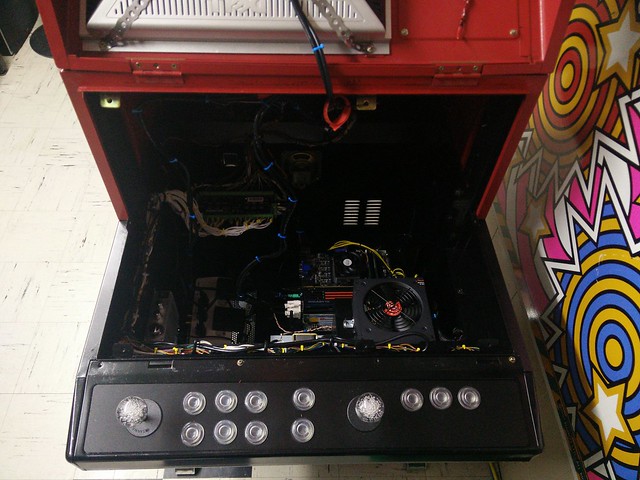
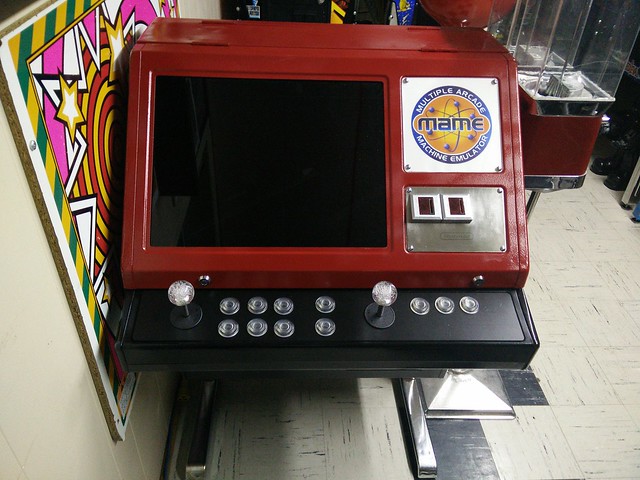
18969015082_e2f14ce70a_z.jpg


17229833888_67087333d5_z.jpg


Here is a quick video showing you how it turned out in the end.

 
  • Like
Reactions: Rhino

mwong168

Administrator
Staff member
Nov 14, 2012
6,681
1,450
113
46
Toronto
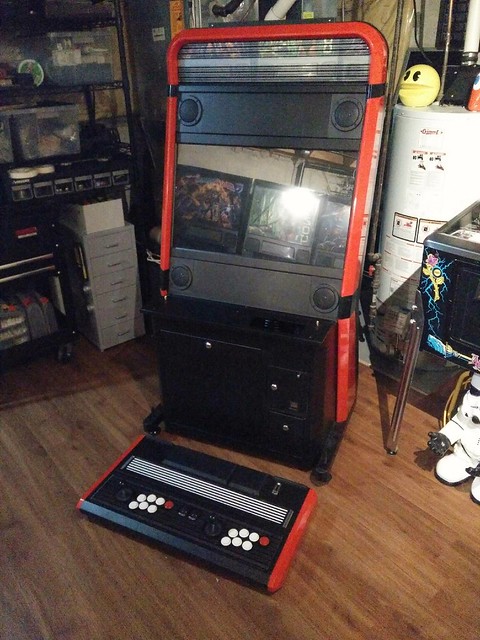
So for the longest time I've been an admirer of the Taito Vewlix candy cabinet. The lines on this cab are so sleek and modern looking. I wish I had the wood working skills to make my own replica like Donovan Myers and many other who used his plans did back in 2009.

vewlix-package.jpg


http://www.donovanmyers.com/old/2009/04/vewlix-tournament-edition-worklog-04/

I stumbled across this ad on kijiji earlier this year and turns out they also run http://vewlixshop.com too!

https://www.kijiji.ca/v-pc-games/ci...me/1293911114?enableSearchNavigationFlag=true

The price and mostly the distance to see/pickup was a deal breaker for me. I went over to my buddy Steve's from Top Tier Arcade a few months ago and had a closer look at his vewlix clone and was convinced I wanted one now. I was also having a hard time finding a good spot for my red tent in my new place that didn't make things feel so crowded when I had more then 8-10 people over playing.

37446242462_57a6bcb020_z.jpg


36807335433_84473b8579_z.jpg


So I gave it some thought and lately it's only been Jade and I enjoying playing the older video games on the red tent so I could go back to a 2 player setup. Besides here was my chance to finally get a vewlix that I have been wanting since 2009. So I sold my red tent to who I thought was a good friend for pretty much what I had into it minus my time for $1200. But it looks like he is currently trying to fish for a buyer off kijiji and make a quick $1k :mad:

Anyways, I needed the space in my gameroom and the money to put towards my vewlix clone. So on August 9 my red tent was picked up

36768011354_0f9c7881e3_z.jpg


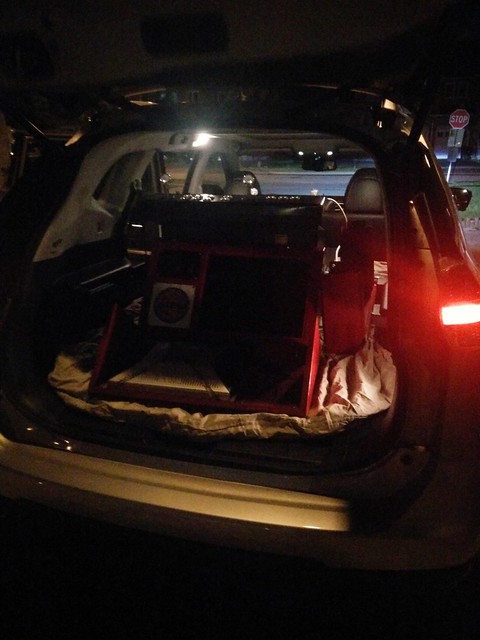
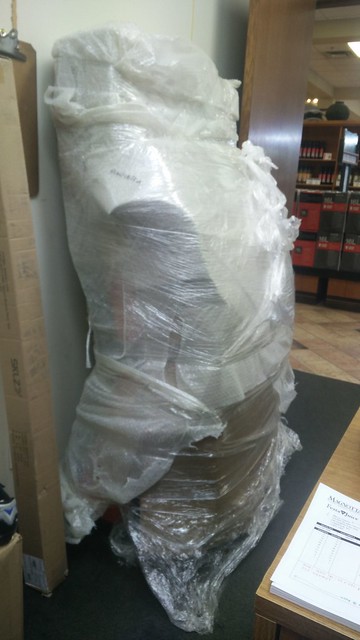
and a week later the vewlix this showed up at my office :D

36442049316_f0defb542e_z.jpg


I had it shipped here to save a few $ because there is a loading dock here otherwise the shipping company would have to charge extra to deliver to my house with a truck with lift gate. My asian brother from another mother kvoxx (aka Kev) works up the street from me. He pick this up the next day from my office as it was drawing all sorts of attention from my coworkers and customers. We brought it it home that night and sadly this was about as far as I got once moved in.

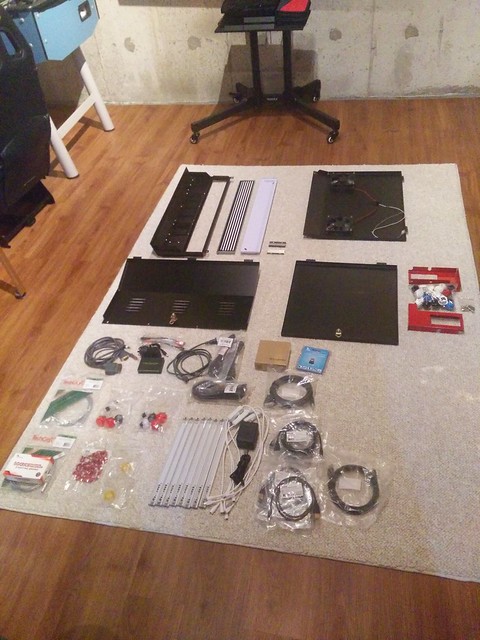
35704440783_f19c6da276_z.jpg


I was missing a key to open up the control panel. These cabinets ship with 2 keys, one that can open everything like the control panel, service panels and another key that can only open the coin box for the operators. The set of keys that were zip tied inside my cab were both coin box keys. I called Steve to the rescue the next day but told him to keep his 18v drill and titanium bits at home and bring me the keys from his vewlix cab. I was able to open up all access panels and physically mount the control panel to the cab. I left the control panel unlocked so I could begin working on things while the replacement key was mailed to me.

36780387463_a70f7cbd0e_z.jpg


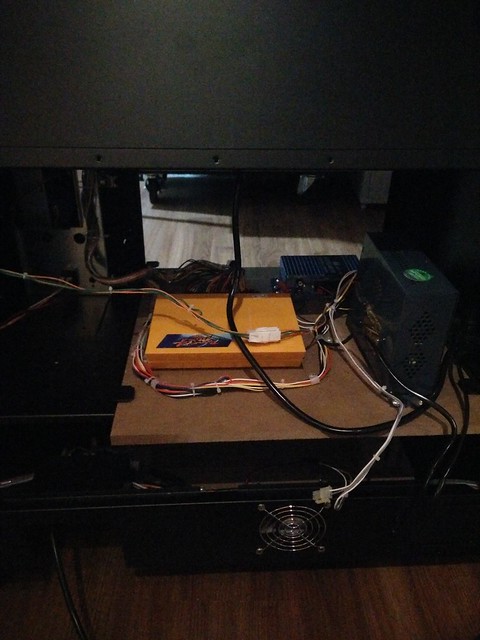
I did power up the Pandora Box to make sure the screen worked before I pulled out all the wiring and other components that came installed in it.

37192912460_e058b18e3c_z.jpg


37402682516_84c667de38_z.jpg


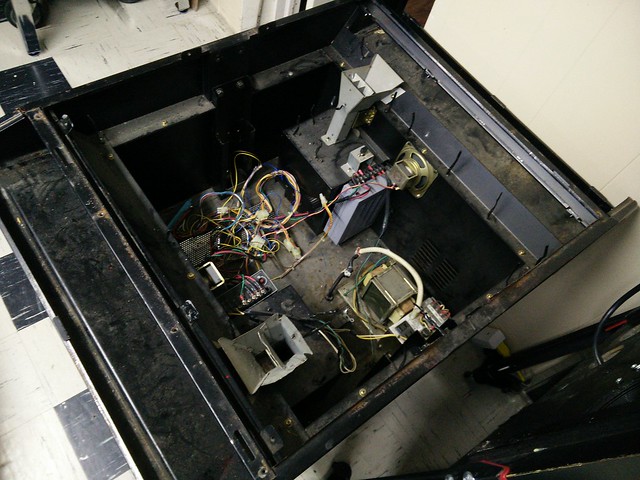
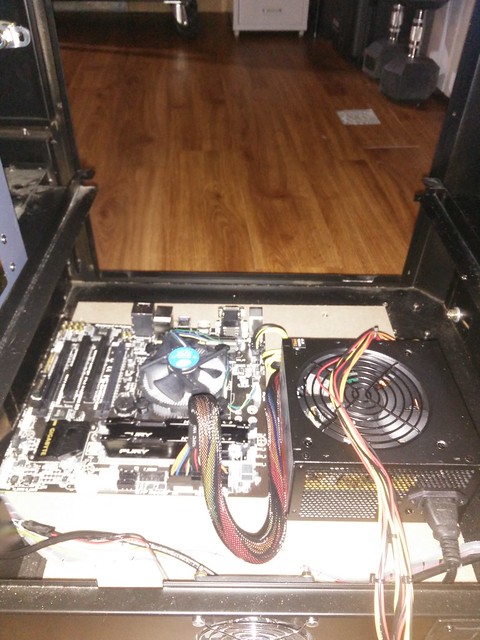
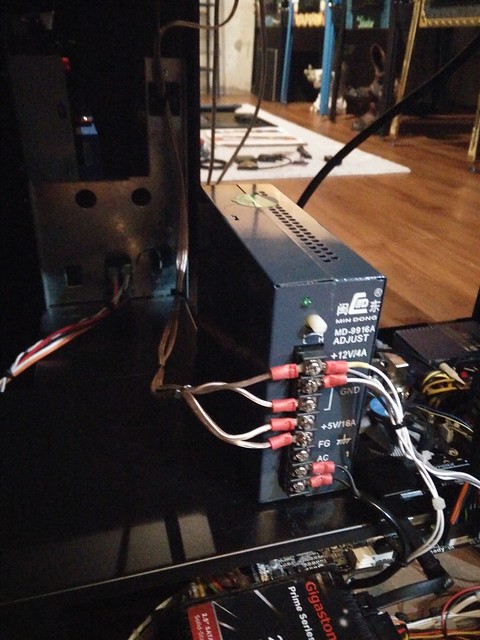
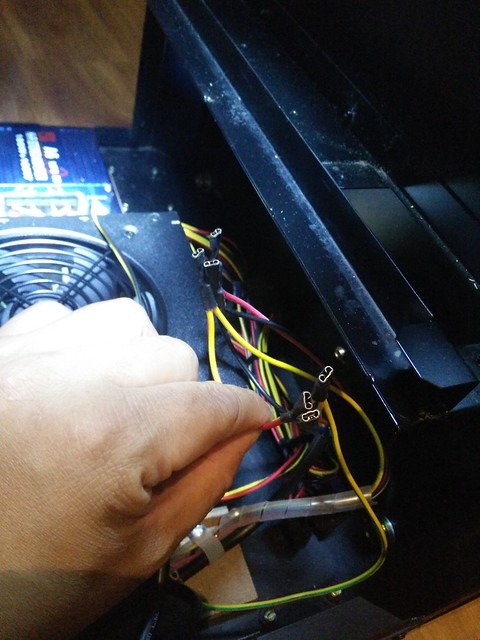
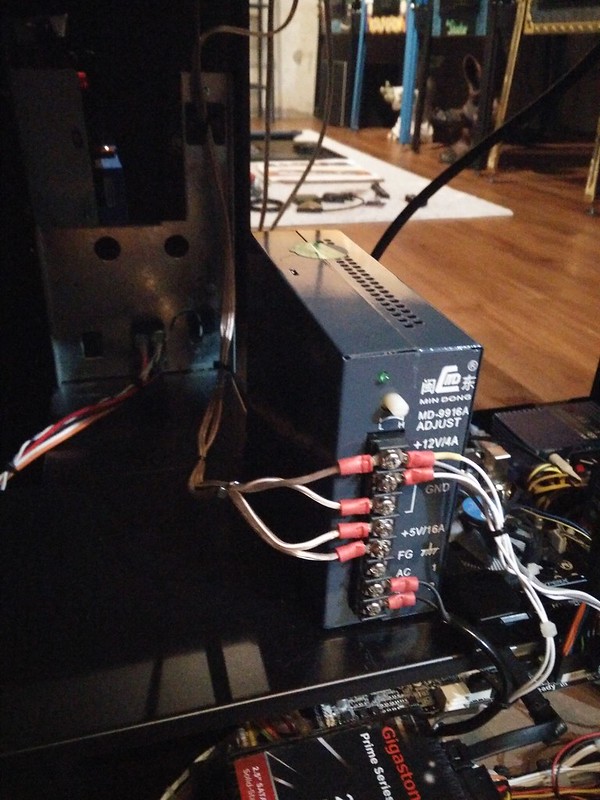
Now that the slate was clean I started figuring out how and where to mount the computer on the very bottom. I relocated the existing power supply which supplied power to the sound amp, coin mech and fans to the top shelf. I will also be pulling 5v/12v from here to power the lighting for the control panel later on.

37419385162_e45a4a10dd_z.jpg


37419419922_f1f0de7fbf_z.jpg


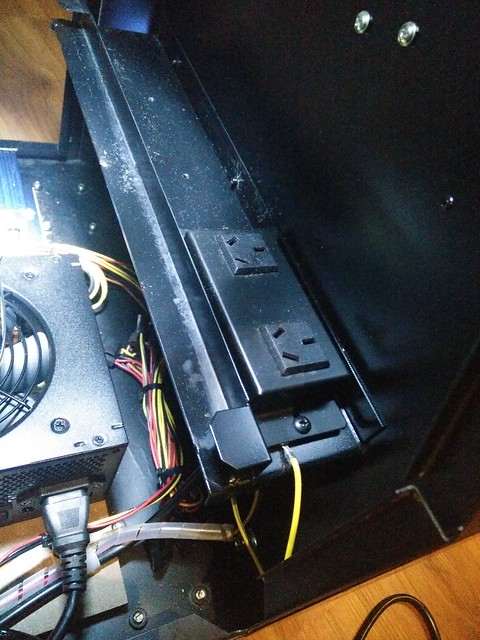
The LCD was plugged into these outlets which were not North American but cab was set for 110v.

37402682356_43f077114d_z.jpg


23598282078_216309b861_z.jpg


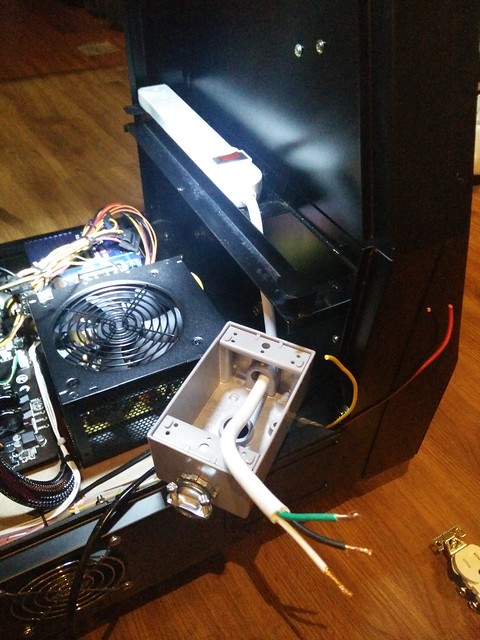
Originally I was going to hard wire in a standard power bar but I had an extra 2 outlet receptacle box. I only hard wired the existing power supply, plugged in a standard power bar to supply power for components on the top level and other outlet was used for the computer.

36741052824_5ea6fa0a87_z.jpg


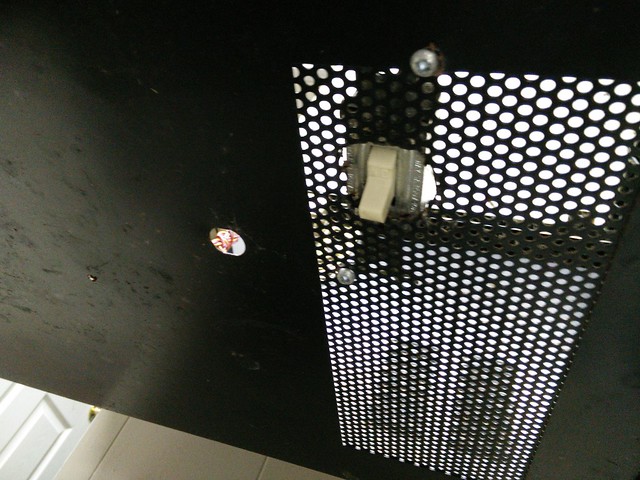
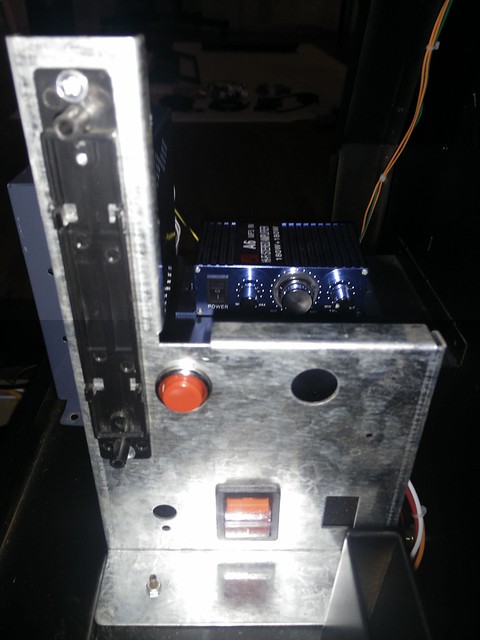
There was two existing holes where the coin mech was so I put in a button next to the master power switch to turn the computer on/off.

36780408613_72fe18d488_z.jpg


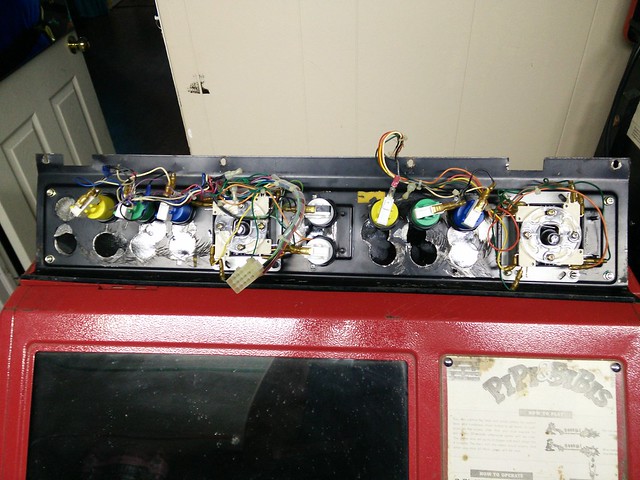
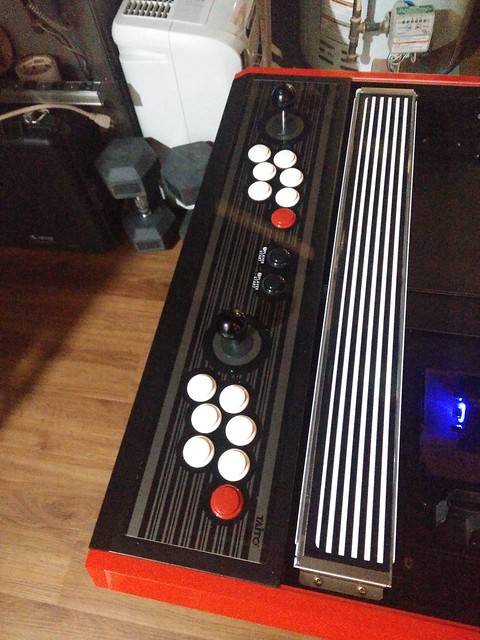
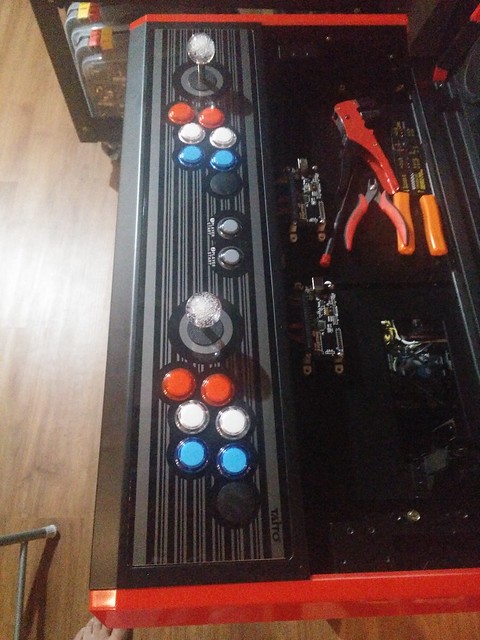
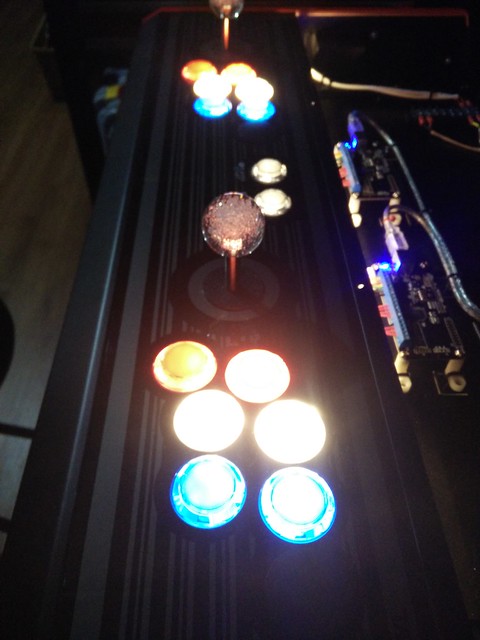
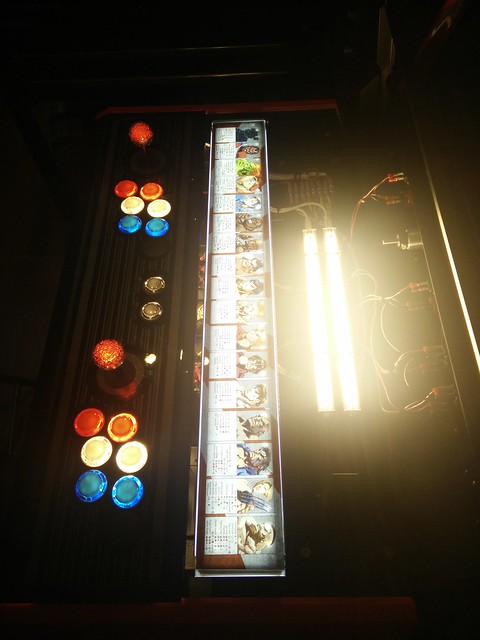
Now onto the control panel... I removed all the knock off Sanwa buttons and replaced with Sanwa OBSF 30mm coloured translucent ones. Staying true to my grail I went with the SF2:CE red, white and blue colour scheme. I also replaced the ball tops with translucent ones and got a button plug to fill in that extra 7th button for each player.

36780395603_e23d5c79be_z.jpg


36780409123_f45014f8d2_z.jpg
 
  • Like
Reactions: Rhino

mwong168

Administrator
Staff member
Nov 14, 2012
6,681
1,450
113
46
Toronto
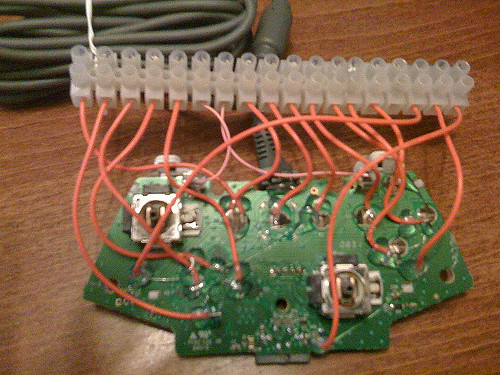
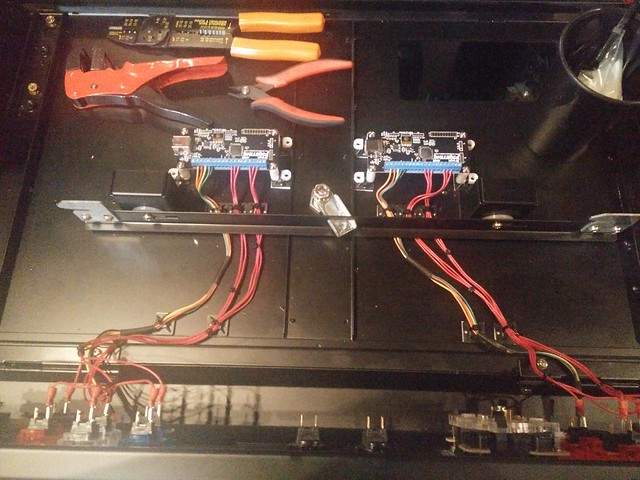
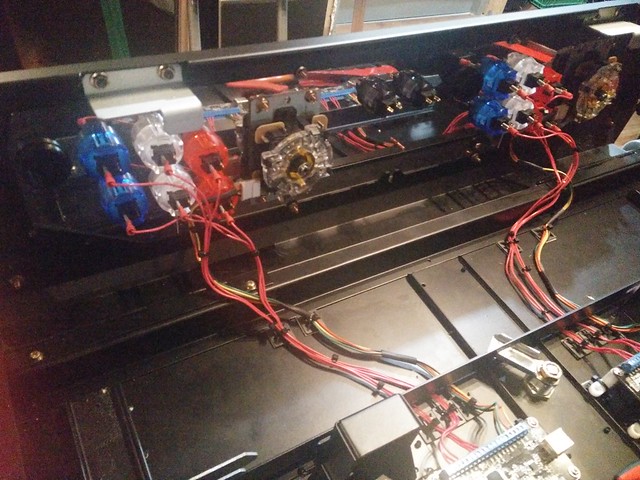
Now onto my favourite part which is wiring up the control panel. Originally I was only going to use this vewlix for MAME but I figure since it had 32" LCD why not make it so I can run modern fight games too like Street Fighter IV or Mortal Kombat X. I already own a XBOX360 and recently picked up a PS3 and PS4 for my sit down racing simulator setup. The problem is in order to interface controls with each system you would need to padhack a controller like this for each individual system and to the arcade controls.

37480580591_e8847b5d27.jpg


The other easier alternative is getting dedicated after market boards like the Toodles MC Cthulhu. These are commonly used in fight sticks to connect up easily with the arcade controls with no soldering required. Some of these boards aren't cheap and only dedicated for certain systems like XBOX or Playstation only. I use to build fight sticks for friends back in the day when SFIV came out and you couldn't find a Madcatz fight stick in stock or pay these ridiculous scalper rates.

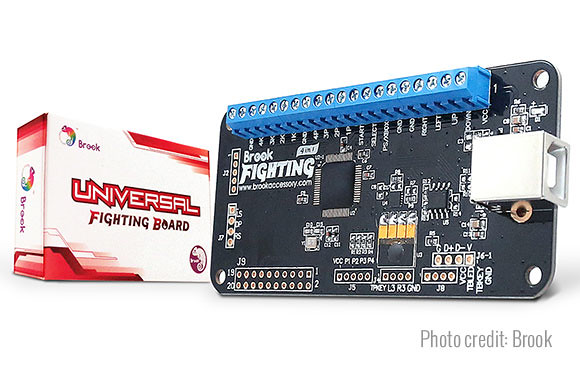
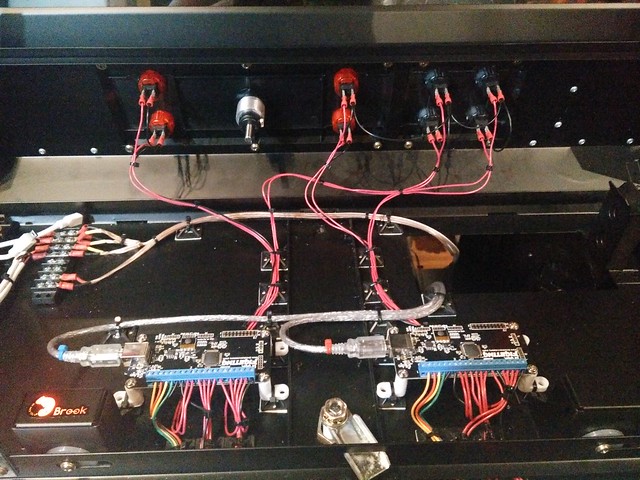
It turns out there is a new universal fighting board available made by Brook that works across all the current and popular platforms. This was not cheap and ran me close to $170usd for two boards but it gives me total flexibility to connect up my control panel to PC or consoles.

23628530898_51969e1fa0_z.jpg


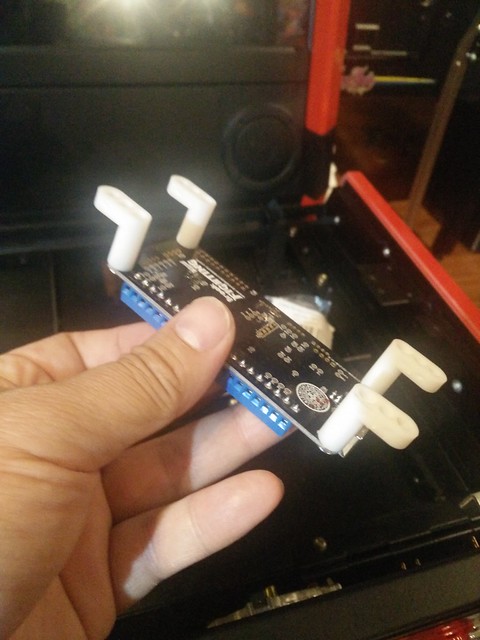
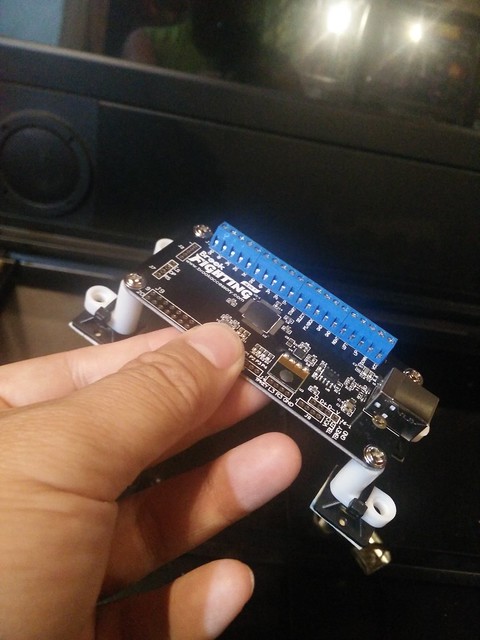
I didn't want to make any sort of permanent modification or hack that wasn't reversible to my vewlix. To mount these Brook boards in my cab I used a combination of these plastic PCB stand offs, zip ties and these stick on zip tie mounts.

37419420102_1456f7ec7b_z.jpg


37192915830_4bdaee96b3_z.jpg


Time to start marking connections, I reused the existing JLF joystick harness that came with the cab's wiring harness and also replaced the stock square gate with an octagonal gate.

36780411263_d9e62f6090_z.jpg


37419413042_06b36cdca8_z.jpg


I was going to replace both joysticks but I was told by brad808 that these knock offs are almost identical the real Sanwa JLF sticks. I played a few games with them before on the Pandora Box and they felt pretty good. I'm relatively new to Japanese controls like Sanwa/Seimitsu and on the fence about them still as I find them very noisy and clicky. I prefer the good old american style controls I grew up which were made my iL (not HAPP).

37402654076_caaee0b3c1_z.jpg


36780390023_36cf4e4f07_z.jpg


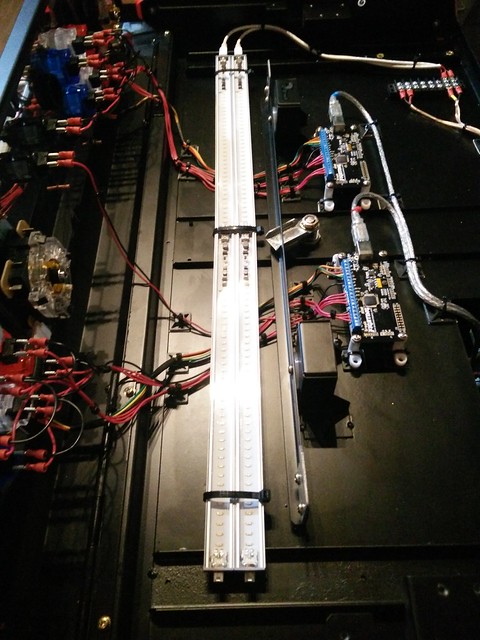
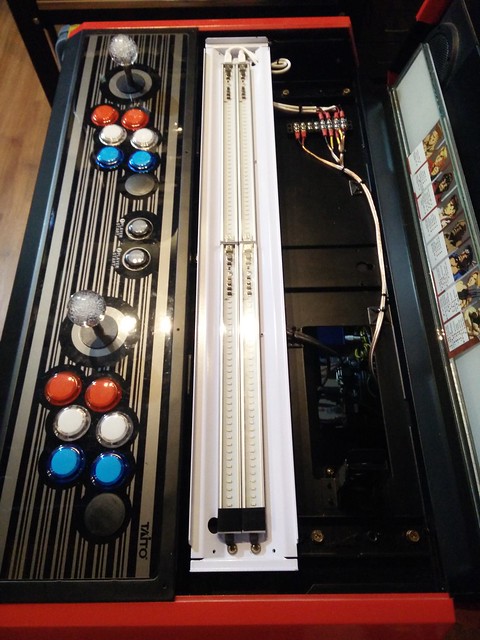
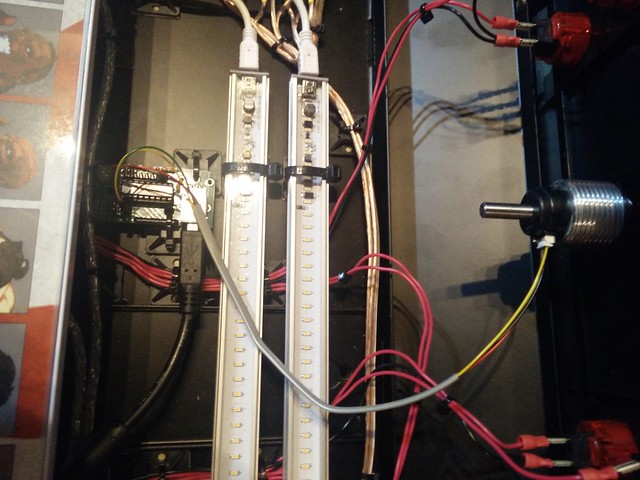
I ran two pairs of wires up to the control panel from the power supply for 5v and 12v to a barrier strip so I can tap into for power. I was thinking of doing dynamic RGB lighting for the controls like on my red tent but in the end I decided to just go with a fixed translucent colour instead. There was just so much wiring involved to each button and with the translucent coloured buttons all I needed was a really bright light source like these USB warm white led bars I had lying around.

37402674996_f267f8413f_z.jpg


36780387023_f331550be8_z.jpg


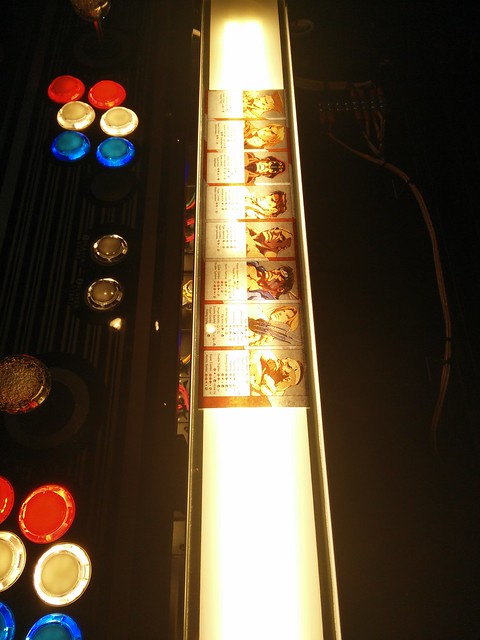
I was going to use the same LED bars to light up the instruction card area for the moves list.

36741048224_9b7a10084a_z.jpg


36741044744_1b6a2b7253_z.jpg


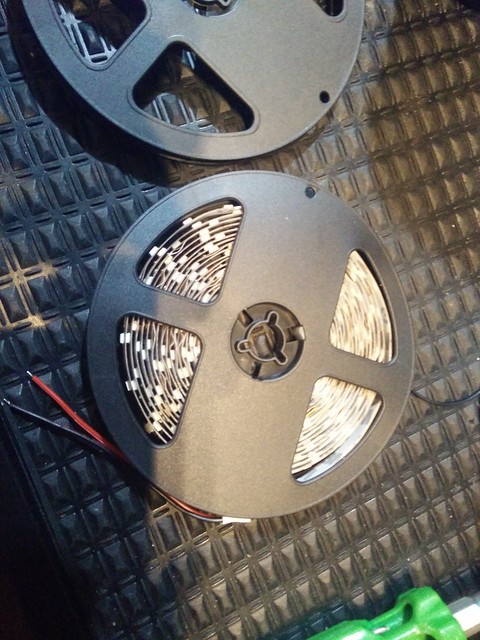
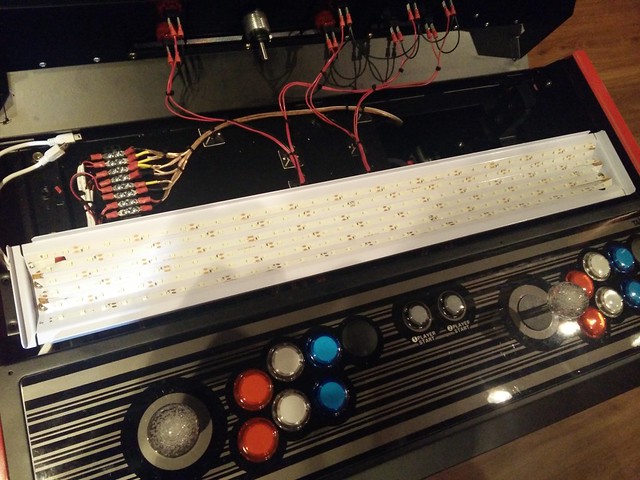
I didn't like how uneven the back lighting looked as you can see above. I had a few extra rolls of warm/cool white LED strips I used for mods on my pinball machines. You can see the back lighting is not only more evenly distributed but brighter too!

36741043214_00fcd56657_z.jpg


36780412593_49165e7a06_z.jpg


37192932030_4e0debdfcc_z.jpg


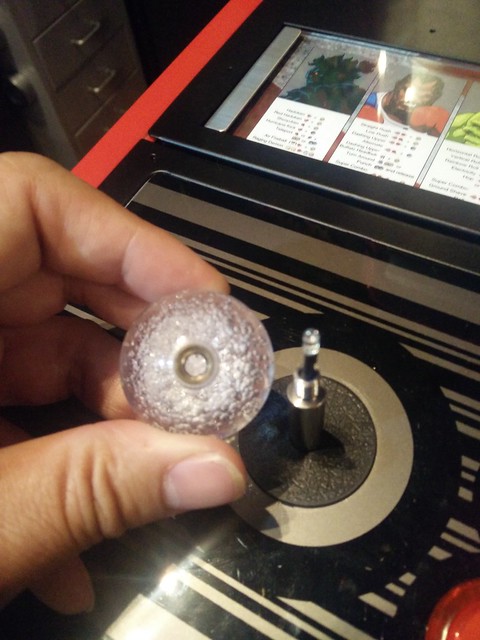
To light up the ball tops I got these small 3mm leds and a custom made hollow shaft from Paradise Arcade for the JLF stick. They forgot to drill out the ball top so I had to use a 3/16" drill bit so the led could shine through.

36795470254_31a6d41c2e_z.jpg
 

mwong168

Administrator
Staff member
Nov 14, 2012
6,681
1,450
113
46
Toronto
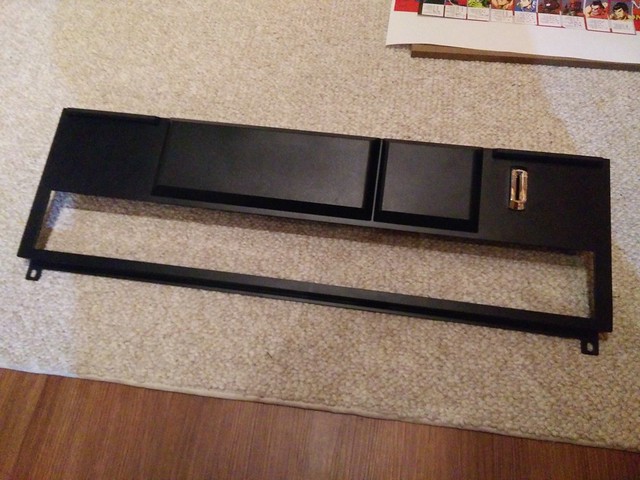
Now onto the last part of the controls which are the blank panels you see here.

36780393103_425b107f33_z.jpg


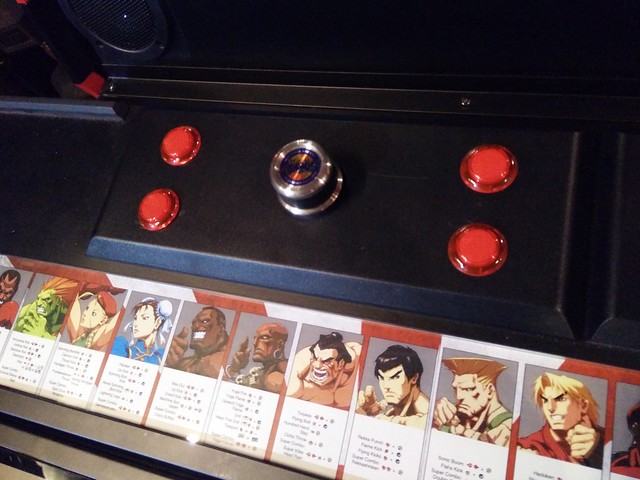
I was sort of torn on putting additional buttons and/or controls here because I am not a fan of these cluttered or frankenpanels you see on other MAME cabs. You can get away without needing additional buttons for admin functions by using shifted keys or just having a wireless keyboard/mouse around. At the very least I will need 4 additional buttons for the home buttons for each console system as well as the select button. I had an extra Turbo Twist Spinner that I bought from GroovyGameGear a very long time ago. The installation of this is as simple as installing a button.

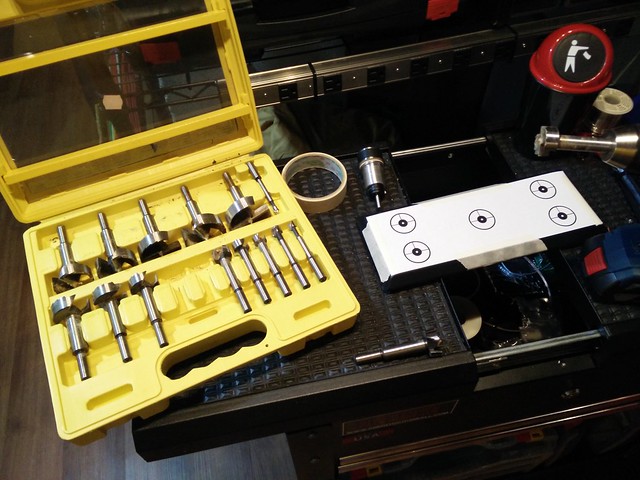
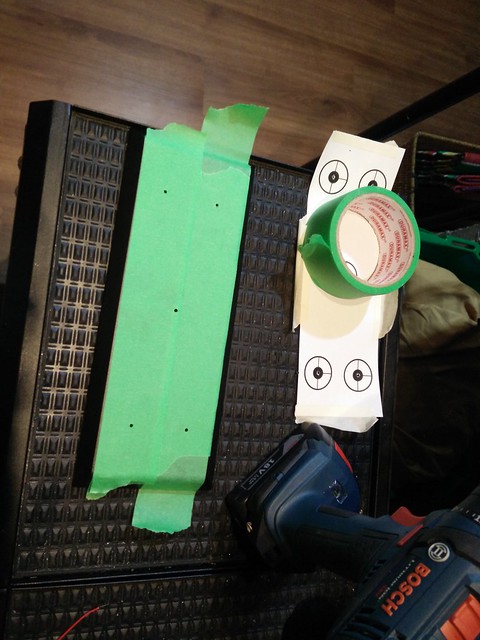
So I created a template to drill some pilot holes also to ensure things were centred and spaced evenly on the panel. This piece was made of ABS plastic so I went very slow with the forsner bits and put down a few layers of painters tape to protect the top surface from scratches while drilling through.

37402679136_220b0f17a8_z.jpg


37192910680_c201a7f591_z.jpg


36741040714_f9f25a8cf5_z.jpg


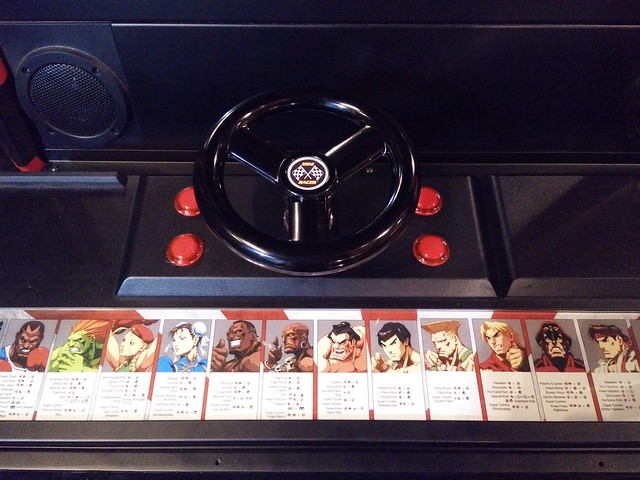
Since I had two extra unused inputs from each player I put in some extra buttons on each side of the spinning so that way it could accommodate left or right handed play. It also makes it easier to hit the buttons for the games that require button input as well like the laser power up in Arkanoid or gas pedal in Super Sprint. Speaking of which GroovyGameGear sells mini steering wheel attachments for their spinner so I can use this to sorta recreate the arcade experience. I always wanted a Super Sprint but given how little play it would get and space being a premium that always stopped me. Plus I know it can be a pain to keep up and running because Drano has a really nice one and every time he moves it or even looks at it the wrong way it breaks :)

36780401183_d630907d5e_z.jpg


Now to wire up the rest of the buttons to the Brook Universal Fight board, install the special OptiWiz controller board for the spinner and light it up!

37402673466_b9717bac3f_z.jpg


37402677396_dd22da859b_z.jpg
 

mwong168

Administrator
Staff member
Nov 14, 2012
6,681
1,450
113
46
Toronto
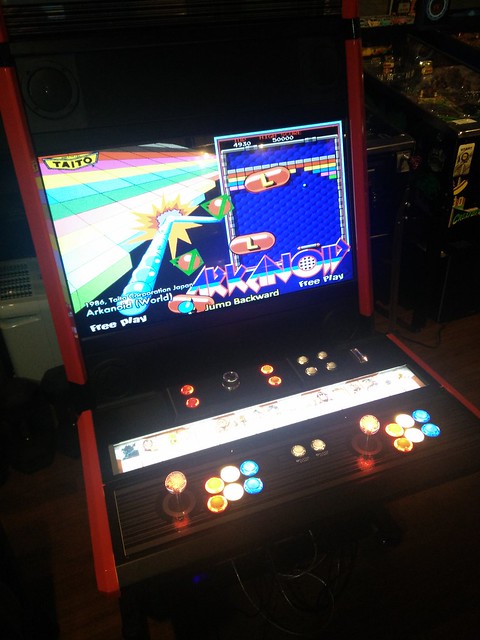
All the controls worked on the first boot up of the PC and just had to tweak a few settings in MAME to enable mouse controls for certain games like Arkanoid.

36780411053_21e4dd2005_z.jpg


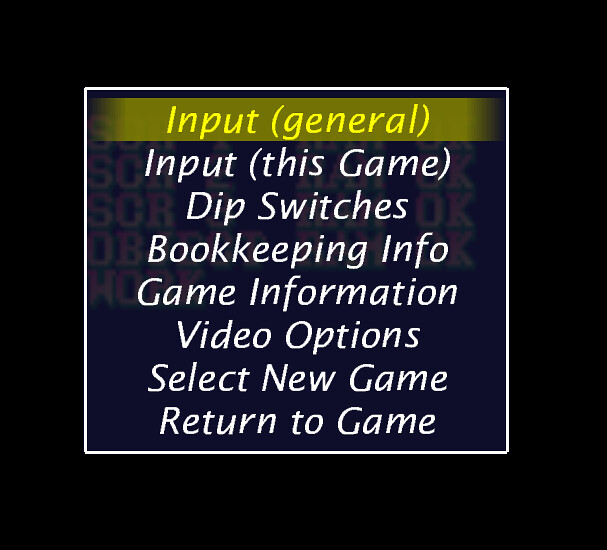
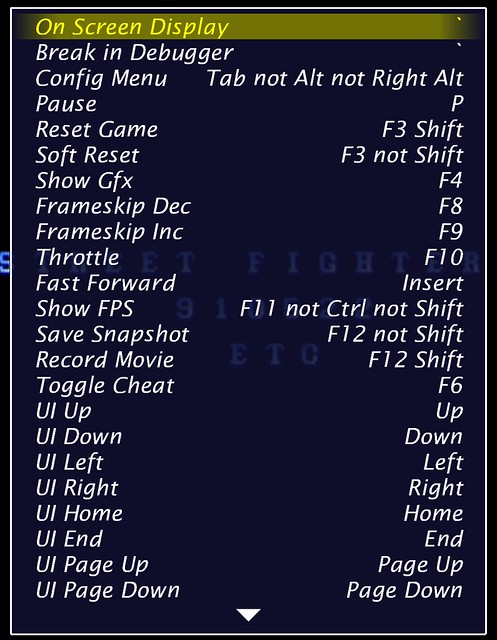
Now since these Brook Universal Fight boards are recognized as a joypad and not a keyboard encoder like an IPAC which I used all most of my past MAME builds. So I had to use a piece of software called Antimicro because my older version of Hyperspin doesn't seem to want to recognize the joypad inputs. Another thing I also found weird and didn't look to deeply into was that MAME was still recognizing the joypad inputs even though Antimicro was running in the tray. No big deal so I just remapped all the controls and functions universally. All you have to do is load any rom and then hit the TAB key to bring up this menu.

23660948308_d44bfaff62_z.jpg


From here you will want to select Input (general) to this menu

23660948248_861c326aa9_z.jpg


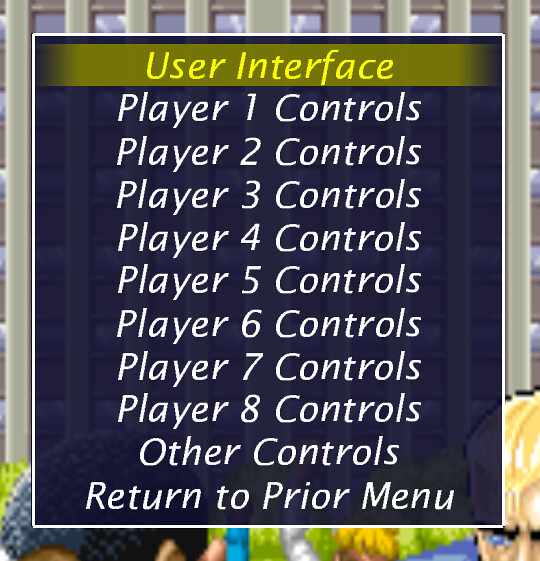
Then select User Interface

36803006174_0a5cbbb349_z.jpg


I only mapped the following functions:

Config Menu - P1 Joypad Up and lower left button next to spinner
Pause - P1 Joypad Right and lower left button next to spinner
Reset - P1 Joypad Left and lower left button next to spinner

Be careful when you are remapping the UI Cancel or Select functions because if you accidentally hit the delete key and assign None to it you will not be able to navigate back to the previous menu and have to force quit MAME. If you do this by accident all you have to do is go to your MAME folder and there should be a subfolder called cfg, delete the default.cfg and start all over again.

UI Cancel - P1 Joypad Down and lower left button next to spinner
UI Select - P1 Joypad Button #1

You don't really need this but you will need this to bypass the initial nag screen just once when you load up a rom for the very first time.

UI Up - P1 Joypad Up
UI Down - P1 Joypad Down
UI Left - P1 Joypad Left
UI Right - P1 Joypad Right

Some other functions you might want to consider are the Save and Load states but that would be cheating :)

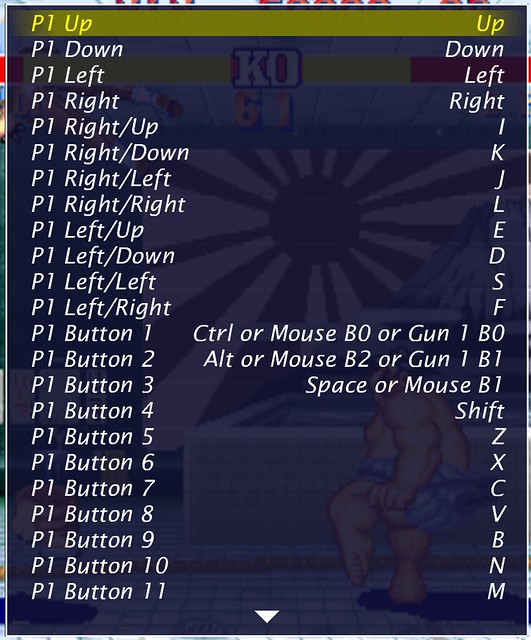
Now go back to the previous menu and start mapping out each Player's controls. Whatever you set here will be the defaults used upon first launch of a rom.

23660948118_099a857c93_z.jpg


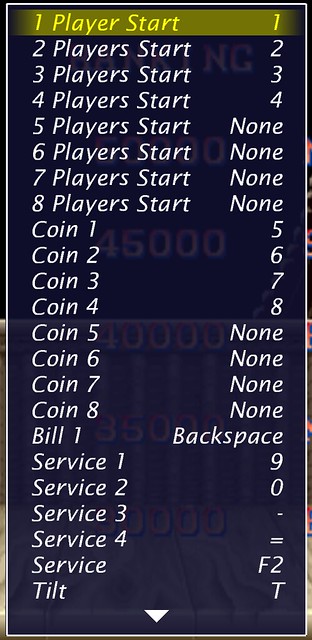
Even though you map Start and Coin for each individual player's control it won't take as default. The reason for this is because you need to set it somewhere else. Go back to the previous menu and select Other Controls to set them there.

36803005924_8d1a35cbbb_z.jpg


That's basically it for MAME setup and I would go into step by step detail on how I setup my Hyperspin front end but it has been a work in progress and something I have been tweaking since I got into MAME. My version of Hyperspin is v0.8.0.1 and very old. I think they are on v1.4 now but I believe if it ain't broke why fix it. I know my setup very well because I configured everything from pretty much scratch because I wanted to understand the ins and out of the software. It's a very tedious process because the files used in these pretty themes such as backgrounds, artwork, wheel logos and xml files have to match the database as well as your rom filenames too. If something isn't exactly matching your game won't load or your theme might cause the front end to hang requiring a force quit in Windows.

I could have easily just paid the $200-250 for a pre-configured Hyperspin setup you see on kijiji. It would probably be just as much work to tweak this setup because I would have to figure out how to disable the 30+ versions of Mahjong or the other 10,000+ games I will never play. That and I know some stuff isn't tested and doesn't work. I know all my games work 100% because I actually tested each one to make sure the theme and game loads from Hyperspin.

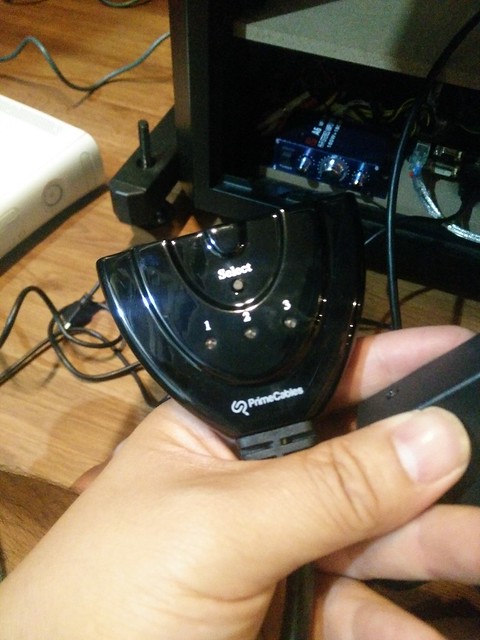
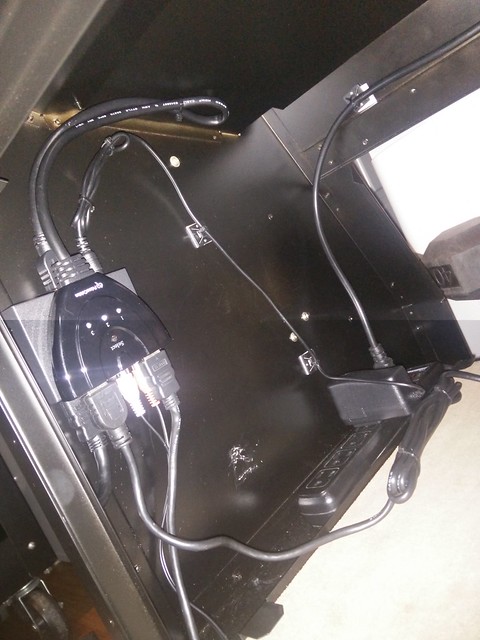
Anyways, now onto the last part of this build which is connect up modern consoles such as the Xbox360, XboxOne, PS3 and PS4. This vewlix came with a 32" LCD screen but only had VGA and DVI inputs. Since there was only a single DVI input I bought this 3 port HDMI switcher from Prime Cables along with a DVI to HDMI cable.

36795475424_b464ac2a56_z.jpg


At first I thought this 32" LCD that came in the cab was only capable of going up to 720p. But I noticed when I connected up the PC it just defaulted to 1920x1080 which is 1080p. So this was great because 720p doesn't look as crisp on the consoles.

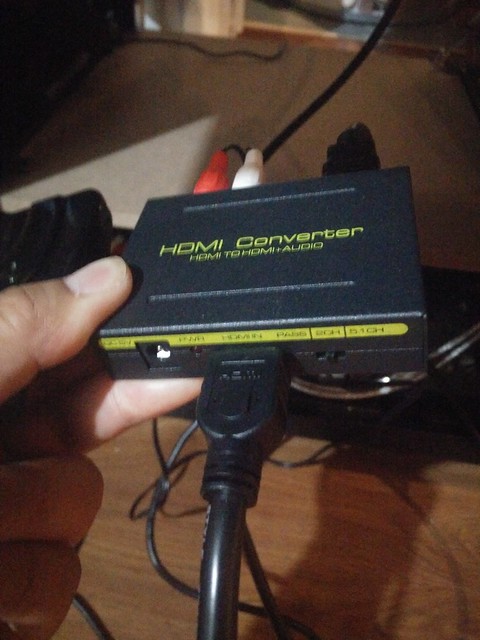
This was only half the battle because the LCD didn't have speakers and my only source for audio was through the mini amp. I did a bit of research and turns out you can get an HDMI audio converter/extractor for around $20 like this:

36795471514_9906f01d0e_z.jpg


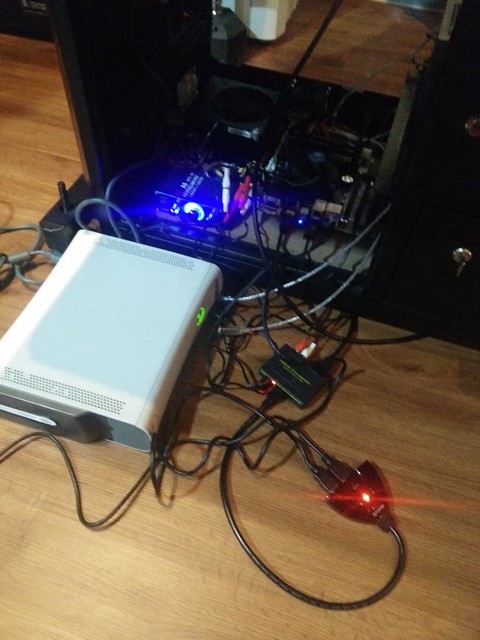
So I plug my PC and Consoles into the 3 port HDMI switcher and then into the HDMI in on this extractor box. Then on the other end I had the DVI to DVI cable going to the LCD screen along with a pair of RCA audio cables that went into the back of the mini amp. Unfortunately I am limited to 2 channel stereo which is fine.

36836474483_711f9317eb_z.jpg


37505590881_b4edd5cf04_z.jpg


36795474774_6b3cf8bc0b_z.jpg


I tidied up all the wiring and was happy to be able to put back on all the access panels in the back of the cabinet on.

36795469944_82d14b1a08_z.jpg


36795471304_db9fd38f46_z.jpg


36795472394_da89a6f54c_z.jpg


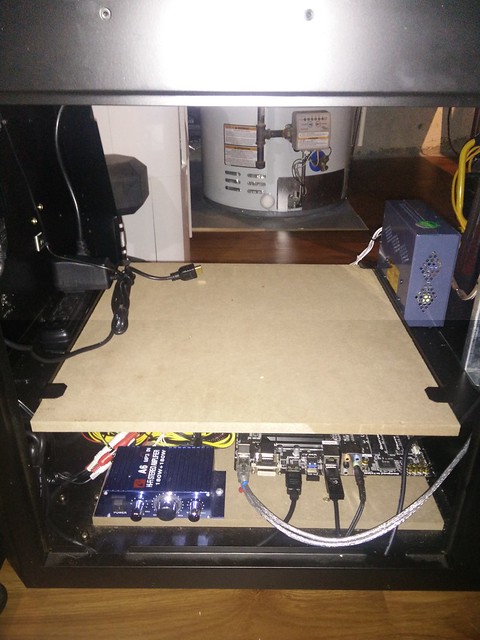
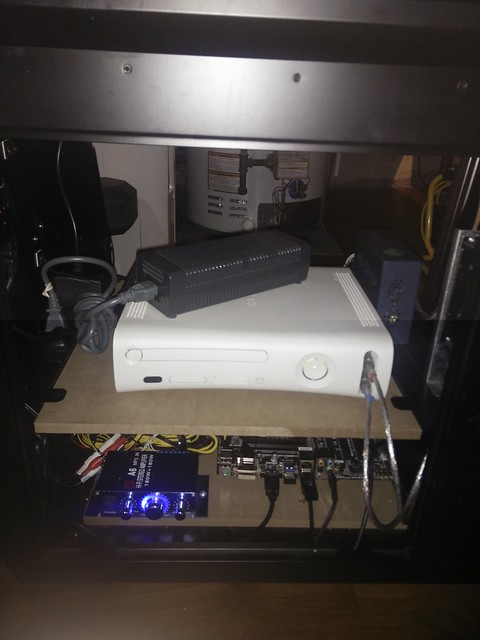
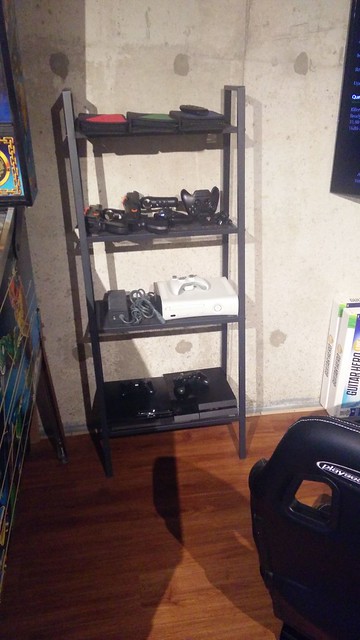
I put the top shelf back and debated putting in another shelf for another consoles but then figured I probably won't be jumping back and forth too much between systems. I would still need to open the front panel to swap the USB cables around for the control panel. Besides the consoles will also be used on the other side of my gameroom here.

37256012750_4dec9cd201_z.jpg


36845102643_30949eb88e_z.jpg


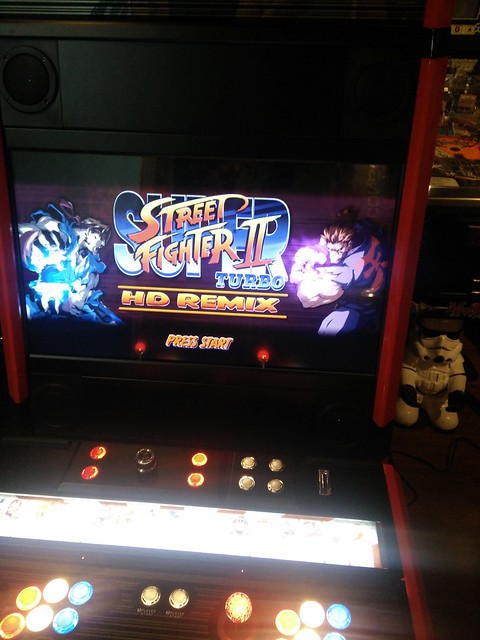
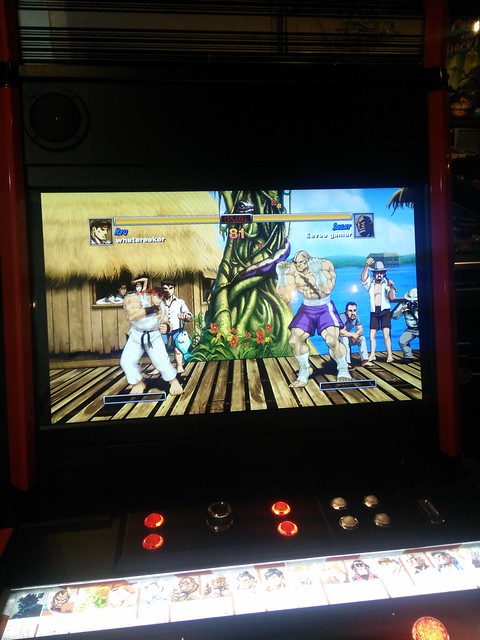
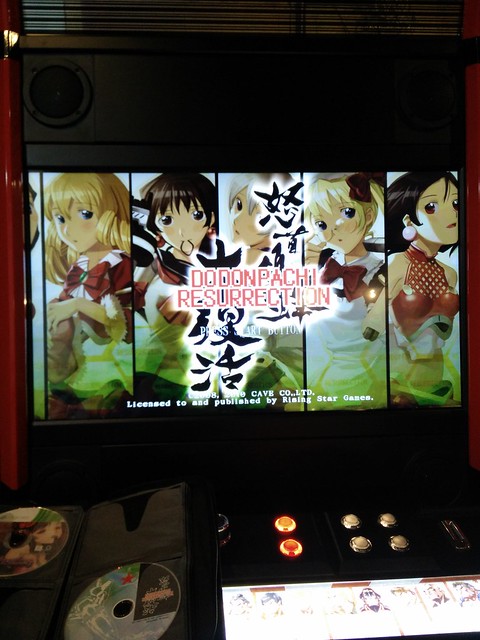
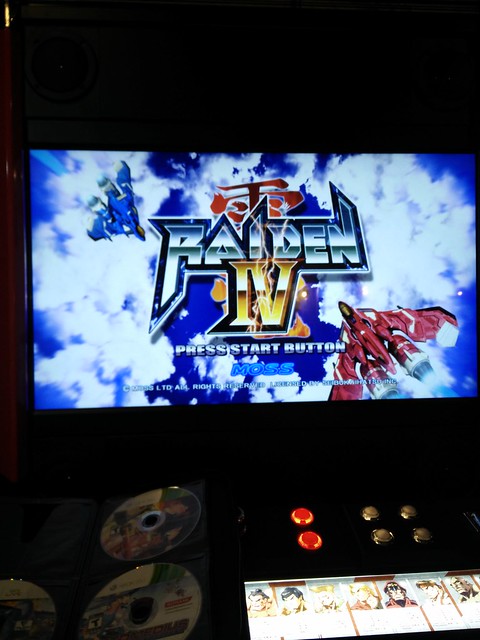
I am looking forward to is getting into the Shootem' Up (aka SHUMPS) genre of games. It's a good thing the Xbox360 has a very well established collection of them thanks to their exclusivity deal with Cave.

36836690173_2a6eafde65_z.jpg


37474677452_b8f637d73e_z.jpg


23653463718_a4544327d8_z.jpg


I've been slowly collecting as many region free Cave and other games over the past few weeks off ebay and amazon. I might have to look into buying a Japanese Xbox360 down the road if I want to get all them.

I'm very happy with how this all turned out and went a different route then Steve from Top Tier Arcade who "restored" his to be a dedicated Street Fighter IV cabinet. I think emulation is great and only getting better. Sure it might not be 100% as some purists will complain that there is lag or doesn't look/feel right but for me it is a great way to relive my childhood even if it is just for a few minutes.

If anyone has any questions or needs help with their build feel free to ask me any questions.
 

TopTierArcade

Active Member
Apr 28, 2016
204
118
43
44
Toronto
www.youtube.com
Amazing, Mike! Very informative and clean build. Congrats!! Can't wait to see it up close and see if I can tell the difference between MAME and a true arcade PCB. Prepare yourself...there is fighting game matches to be played
 

mwong168

Administrator
Staff member
Nov 14, 2012
6,681
1,450
113
46
Toronto
Thanks guys and hopefully this MAME will be my keeper even though I keep saying that about my last one :p
 

brad808

Member
Feb 28, 2013
656
24
18
Brantford
Amazing, Mike! Very informative and clean build. Congrats!! Can't wait to see it up close and see if I can tell the difference between MAME and a true arcade PCB. Prepare yourself...there is fighting game matches to be played
There will be a few things "wrong" with a setup like this when compared directly to a PCB. I say "wrong" because they aren't really wrong and many people don't care simply want to play thousand games, but they will not allow for convincing PCB replacement. I'm not saying any of this to knock mwong's system, simply to share information. With the way the system pictured is currently setup there will be a few short comings against PCB. One of my annoyances is people saying emulation sucks when they are playing and comparing system which is guaranteed to have certain problems or things like pandoras, 60-1, old mame, etc which are filled with issues. Here are couple off my head about the current system:

Audio lag
Around mame .0180-.0183 area mame introduced port audio into mame which in turn drastically lowered audio lag. Before that there were a few tester versions of asio mame floating around, anything before that will have substantial audible lag. I believe default mame setting is something crazy like 2! By using hyperspin you cannot take advantage of the lowest available apis. Lowest you can get using hyperspin that I can get working is MME, which is still lower than default. If running outside hyperspin you can take exclusing control of audio apis and run WASAPI or WDM-KS both of which have much lower audio lag than MME. By using those you can get down to 10s of ms lag.

vid output
By using an LCD you run into other problems. Some of them have been taken care of with very specific LCDs but for the most part still a big problem. There is more lag added with an LCD vs CRT. Most LCD are not variable in sync (starting to be with freesync and gsync mons). You will likely be running fixed refresh rate, fixed resolution,etc. All that is guaranteed to introduce screen tearing, foldover, stretching, etc. Unfortunately there are 1000s of arcade games that used slightly different video outputs. If your system can't adjust to that then very few if any of the games will run "properly" beside a pcb. 60 is not 59.637 and it makes a big difference. The system has to account for this. Using fixed refresh and resolution is not going to cut it. This can be helped by using groovymame and compatible vid card to adjust output for each game individually to exact refresh rate, resolution, sync frequency etc. You can then get essentially pixel perfect vid output.

more lag
by using something like groovymame you have some additional settings which help lower your "lag" more. Frame_delay is a setting in groovymame ini file which you can adjust to delay your emulation of a frame. It is percentage based 1=10%, 2=20% etc. Some quick example, you are creating 1 frame each 16ms approx, you use ipac and poll windows at 2ms. If your input is polled at 16ms until next frame your input won't be as accurate as if it is polled 6ms before your next frame. By delaying the emulation frame you will receive a more accurate input. In order to hold off emulation and be able to create a frame in a much smaller time frame you need substantial power. Before your processor had 16ms now it has 50% less time using frame_delay 5. Even high end i7 and overclocked systems will start to choke on many games using frame_delay 8. It is something that needs to be set on a per game basis due to differences in emulation speed requirements. It used to remove an added delay inhrent with using d3d systems but now with special patched versions which can use d3dex it is no longer an issue.

There are few sketchy tests indicating joy input is also slower but I don't know enough of the details to conclude myself. From what I read it may be the case. Believe it had to do with direct input being slower and joys needing to use direct input?

Truth is emulation when setup and tweaked properly can be near indistinguishable from PCB. PCB will remain supreme from technical nitty gritty but I feel emulation in most cases has the power to be indistinguishable to 99 percent of people. With baseline mame and a standard lcd I think there will still be shortcomings. If you have high end OC i7, groovymame, tri sync arcade Mon, j-pac, super resolutions, frame delay 8, Port Audio with WDM-KS...I think you will get a very very convincing setup. So much that I recently sold most of my boards over the last few months. I can't justify a $500 board with its own quirks when I have a system that is now good enough for me.

Anyone can correct me it is all off my head and not worded well but general point will likely come through.
 
  • Like
Reactions: mwong168

mwong168

Administrator
Staff member
Nov 14, 2012
6,681
1,450
113
46
Toronto
Thanks for the insight Brad and will consider tweaking my setup down the road to address some of these issues with mentioned above.

My vewlix got a good workout today along with my pins from around 1pm till 11pm now that guests and family are slowly leaving. I didn't notice any lag as I beat Donpachi with my niece's boyfriend. Maybe it is one of these things that need to be pointed out to me and once seen it can't be unseen :p
 

mR_CaESaR

Member
Nov 1, 2017
32
6
8
42
Sydney
hi there, joined up the page specifically for this thread! :)

Like you, I've always wanted a Vewlix since 2009 - the release of SFIV brought me back to my childhood - I know it's a very different game, but

I'm posting my findings in https://forum.arcadeotaku.com/viewtopic.php?f=3&t=36736 but happy to post here if you don't mind me adding to the thread.

I've just purchased my 1P control panel in preparation of buying a second Vewlix (or I refer to them as Chewlix). Sooner or later, I will also purchase 2x brook UFB's, I might just use my original PS360 for the time being as they are still SFV compatible. I primarily want these for SFIV and SFV ie. PS4.

For anything "retro", I have my bartop builds.

Did you think about making the molex/atx style harness? I suppose the UFB is pretty much everything you'd need and won't necessarily require "changing" pcbs all the time.

Thanks for this thread as there's information on this page that I haven't been able to find anywhere else. The fact that you've done a UFB conversion too makes it a perfect thread for me :)
 

brad808

Member
Feb 28, 2013
656
24
18
Brantford
Thanks for the insight Brad and will consider tweaking my setup down the road to address some of these issues with mentioned above.

My vewlix got a good workout today along with my pins from around 1pm till 11pm now that guests and family are slowly leaving. I didn't notice any lag as I beat Donpachi with my niece's boyfriend. Maybe it is one of these things that need to be pointed out to me and once seen it can't be unseen :p
@mwong168 again these points I showed are not meant to be a knock on your system specifically, so don't feel that way please. Simply pointing out where you (along with many other's systems) will likely find differences (and possible remedy) comparing directly beside PCB as Steve was wondering. That's all :).
 

mwong168

Administrator
Staff member
Nov 14, 2012
6,681
1,450
113
46
Toronto
hi there, joined up the page specifically for this thread! :)

Welcome to PBREV and honored you joined just specifically for this thread. I'm also glad to see our builds have quite a few things in common and love that you are going for a very ambitious VS style setup by "linking" up two chewlix cabs. Feel free to add to this thread so in case anyone else who might be interested in a vewlix setup like ours can hopefully find what they are looking for all in here.
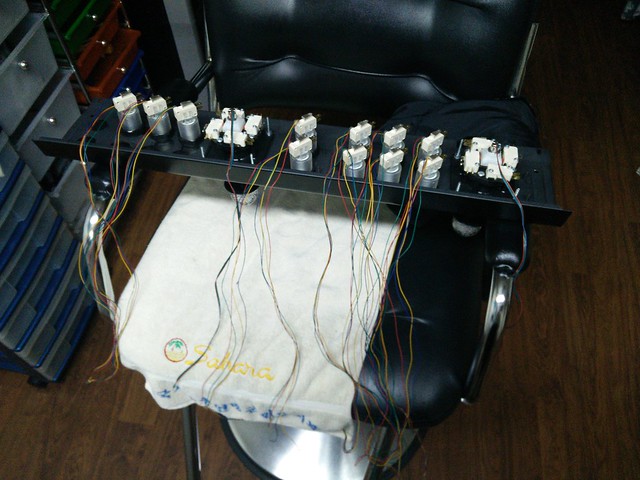
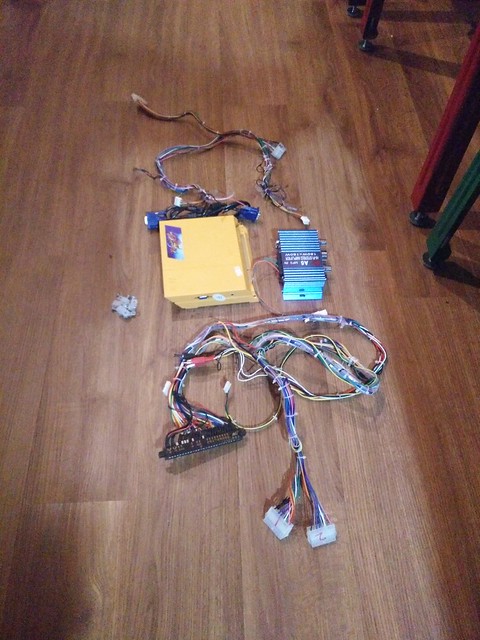
I pulled everything out of my cab including the JAMMA harness which has the motherboard connector for the control panel. I wired everything from scratch as you can see above. If you want to use the existing harness in your cab you can get empty motherboard connectors here:

Male
https://www.ensourced.net/24-pin-male-motherboard-connector/

Female
https://www.ensourced.net/white-24-pin-female-motherboard-connector/

You will need a proper crimper for the terminal pins like this

71AktGpItOL._SL1200_.jpg


https://tinyurl.com/yaj4moow

Before I discovered the Brook Universal Fighting board I was going to use multiple pad hacks or interface boards like the PS360 that could be interchanged when I switched from different consoles and PC running what I am accustomed to which is an IPAC from ultimarc. The Brook Universal Fighting board works just fine for PC and I had to reconfigure my MAME keys to match the joypad inputs. The only thing I had to do was run a program called Antimicro on start up to get the Brook board to work in Hyperspin since it can't accept joypad inputs.

@mwong168 again these points I showed are not meant to be a knock on your system specifically, so don't feel that way please. Simply pointing out where you (along with many other's systems) will likely find differences (and possible remedy) comparing directly beside PCB as Steve was wondering. That's all :).

It's all good and no offence taken if you noticed I followed my comment with an emoji. Appreciate your informative post above and sure others will too when they happen to stumble across this thread.
 
  • Like
Reactions: brad808

mR_CaESaR

Member
Nov 1, 2017
32
6
8
42
Sydney
you are going for a very ambitious VS style setup by "linking" up two chewlix cabs

Yep. It's going to cost a bit, but the cost is going to be cheaper than buying one Chewlix. The one that I've currently got was only 1k and they are 3k AUD here brand new - I am currently on the hunt for another cheapish one to allow the linking capability.

If you want to use the existing harness in your cab you can get empty motherboard connectors here:

Yeah I've ordered 16 pin molex male/female connector and pins. Fortunately, I already have a crimping tool so I won't need to purchase that.

Out of curiousity, how is your amp powered? I currently don't have an external amp, but want to get an external amp (use the same Lepy 2024A that I have on my bartop) to allow me to use 3.5mm input. I noticed on my harness, there's a socket that looks exactly like the amplifier 12v 2a socket and would prefer to use that instead of having another slot taken from the power board.

I'm also trying to figure out how to connect the speakers to the external amp. I'm thinking it's just a matter of cutting the wires from the harness, and then putting them to the +/- section of L and R on the amp.
 

mwong168

Administrator
Staff member
Nov 14, 2012
6,681
1,450
113
46
Toronto
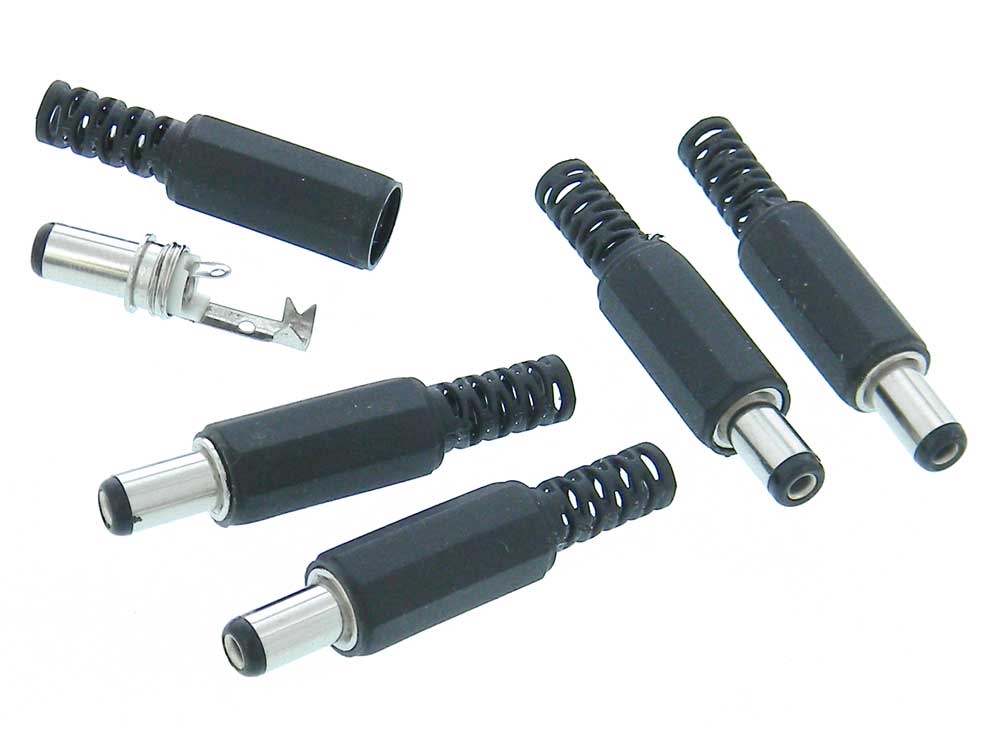
Your cab didn't come with a Lepy or Lepai amp? How are you getting sound out to the speakers right now? In regards to how I power my amp I picked up one of these coaxial adapter ends and hard wired it to the power supply so it comes on automatically when I hit the main switch for my cab.

19084-large.jpg


37419419922_f1f0de7fbf_c.jpg


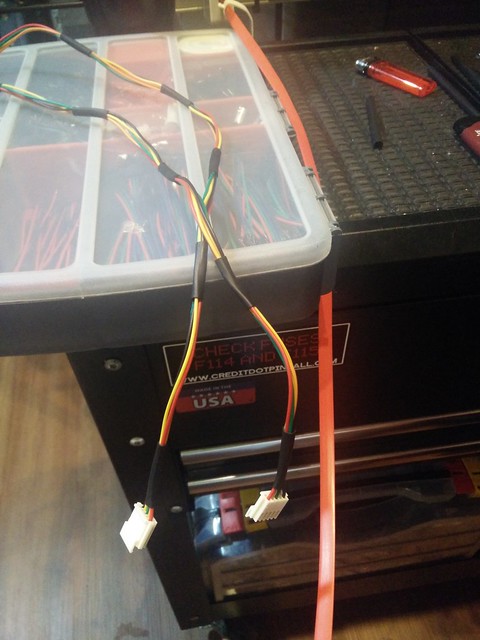
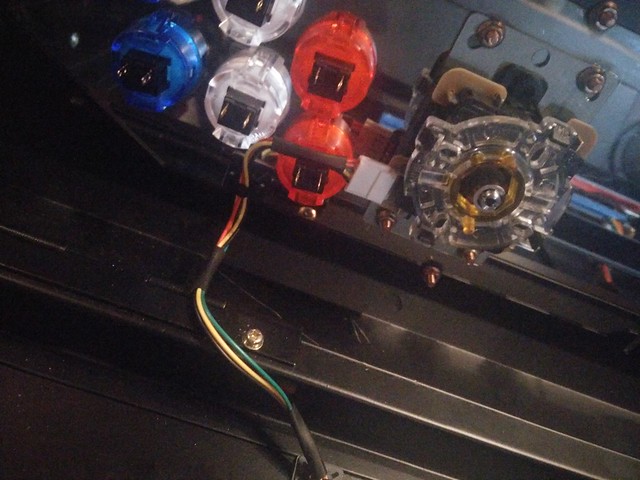
In regards to the speaker connector you have pictured below, the 4 speakers are wired in series and the other end of this connector should just connect to the +/- on your amp. I forget if green was + or - and can check later when I get home from work but if it doesn't sound right just reverse them going to the amp.

CrCMTsel.jpg
 

brad808

Member
Feb 28, 2013
656
24
18
Brantford
With regard to speaker -+ in this particular case if they are both wired the same it really won't make a difference. Where you get problem is when they are wired out of phase between speakers and get frequency cancellation between the two. Old video game sounds moving the coil thousands of times a second won't be able to easily identify whether it is "pulling" or "pushing" first. Just make sure they are the same whichever way you put them in :).