I thought I would post another one of my repairs/upgrades for everyone. We all know that leaking batteries on pinball boards are a fairly common occurrence and they can easily make an expensive MPU board in to a useless Frisbee. There are may ways to combat this problem from checking and changing your batteries on a regular basis in the factory holder, to doing a remote mount battery holder and extra diode all the way to installing one of the NVRAM modules that have been introduced to the market. Speaking for myself, currently my machines have a mix of stock and off-board battery holders, and I'm pretty good about checking them. But I'm always looking for a better, cost effective solution. And that solution is a memory capacitor.
This has been a common mod on classic Bally/Stern machines and also Bally 6803 machines for years. I've also used it on my WMS Joust machine, it runs circles around the coin cell battery mod.
I can hear you saying it now though, "But wait, how will the memory cap get charged? My game didn't come with rechargeable batteries originally!"
This upgrade does require you to modify your MPU board slightly, by removing the blocking diode and replacing it with a jumper so that the cap will charge. Follow along as I modify a DE Rev3 MPU board with a memory cap.
Before I get started though, a couple caveats I have to mention. You will lose your settings and high scores doing this mod, so if you have an awesome GC score on your machine, you may want to hold off on doing this until someone beats it so you can 'accidentally' lose their high score.
And as always, you perform any modifications and board work at your own risk, I take no responsibility for your soldering skills. If you're not comfortable, get a tech to do this for you, and feel free to ask any questions you may have!
Lets dive in!
To do this mod you will need the following:
Soldering Iron and solder
Solder sucker or your preferred tool for removing solder
Small side cutters
0 Ohm resistor or small piece of wire
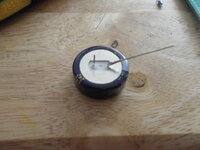
Memory cap, 1F 5.5V or larger. I used a 1.5F 5.5V 'coin cell' style cap for this one. If your machine sits a lot you may want to consider a larger cap, but I don't feel it's necessary. A 1F cap should be good for at least a month not being turned on.
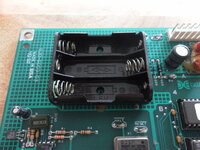
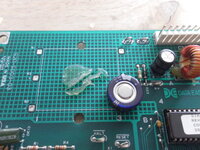
Ugh, battery corrosion, seriously one of the banes of my existence as a pinball tech. Thankfully in this case, caught early and it hasn't spread beyond the battery holder.
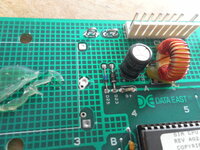
Battery holder removed. The blocking diode should be close to where the holder used to be, trace the + battery trace to the diode so you know which component to replace, or consult your schematics. On this board it's D25.
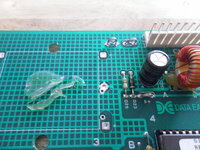
Diode replaced with 0 Ohm resistor. I used to just use clippings from other components for jumpers, but when replacing another component like a diode, the 0 Ohm resistor looks a lot nicer.
However I did use one of the clipped leads from the 0 Ohm resistor to lengthen the negative leg of the memory cap so that it would reach the hole where the battery holder used to be.
All done! Re-install the board and enjoy your leak-free, battery-less existence! Power on the game for at least a half hour to fully charge the cap and then try to make sure it's on for at least 20-30 min a month to maintain the charge.

